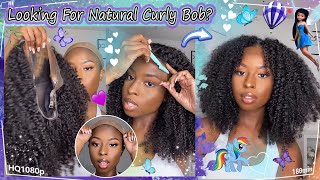
Bob Tutorial | Step By Step Quick Weave | How I Do My Quick Weave Bob
- Posted on 02 December, 2022
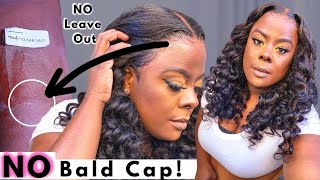
- Fake Scalp Wig
- By Anonymous
Hey y'all, so as promised, we are back again today. I'M gon na be demonstrating how to do a quick weave install on yourself, and I'm also going to show you guys how I cut my quick weave Bobs. Now, the last video I did on a quick weave on myself, I kind of talked through the entire video um. I did give you guys visuals, but I didn't actually um show the video in real time or really break down to you guys how I go about doing my quick weave. So that's what I'm going to try to do for you guys today, but before I do that I'm gon na go ahead and shampoo. My hair, I'm going to run through one time with the shampoo one time with the conditioner and then we're going to go ahead and get started. Foreign, so you're gon na need a bottle of hair glue, a blow dryer and some bonding gel before I put it on I'm going to go ahead and blow out my hair and make sure it's completely dry. So the first thing that I'm going to do is take this paddle brush wig, brush um. You know, whichever you like to call it and I'm going to brush through my hair. I prefer to use this over a wide tooth comb because it really gets all of the Kinks out without it being painful. Next, I'm going to take a blow dryer with a comb attachment and I'm going to blow dry my hair thoroughly and make sure that my hair and my scalp are both completely dry now. The reason why I choose to completely dry my hair before starting the quick weave process rather than to mold my hair, while it's wet, is because, if you do it wet, it will take a very long time to dry versus if you dry, your hair, braid it And then mold it it'll only take about 30 minutes or so for the molding gel to dry on your hair, and then you can start the process of laying your tracks significantly cutting down your thyme. Hence the reason why we like quick, weaves they're meant to be quick, so let's work, smarter and not harder. Thank you now for the biggest task of them all, I'm gon na go ahead and part my hair off. We are doing a middle part and I struggle every time trying to get this middle part right, y'all and clearly this is not the middle of my head, so I don't know why I'm working so hard on the side of my head rule of thumb for middle Parts which I know, but I still struggle, is to use your nose, the bridge of your nose to help guide you, but for whatever reason I still struggle. So this is going to be a leave out. You just want to twist these up and kind of get them out the way I just use a clip to kind of separate them. For me, I like for my quick weaves to look super natural, and sometimes I like to pull them back behind my ear and just leave a little bit of hair out. So you'll see me pulling out my edges, but this is completely optional. You can absolutely just put all of that in the braid and mold it back mold everything down again. This is just something I like to do. Thank you. Thank you. Now the braids do not have to be perfect. They just need to be flat. Um, I'm braiding. My braid underhanded, you can definitely braid it overhanded. It really doesn't matter. If you don't know how to braid, you can twist it up. You can do like just four or five regular twists and then just kind of pin them down and put your cap over top of that. It really doesn't matter as long as your hair is secured and laid down flat. You can do it. However, you want to do it whatever works best for you, which is why this is an amazing style to do if you're, a person who loves the look of having a sew-in. But you don't know how to do a sew-in or you can't afford to pay to get a sew in it's a super, quick and easy hairstyle to do. It'Ll. Save you a lot of time and money. Thank you. Now. Once I get halfway down the braid, I grab the end of the last braid that I braided and connect them together, so that I don't have a bunch of braid pieces hanging at the bottom and then, when I get to the end, I only have one end Left, if that makes sense, and you can either sew that down, if you want to - or you can do like, I do, which is I just tuck it up under the cap and once I put the mold in gel on it, it molds it in place. So just makes it more seamless and flat, and just everything is kind of controlled and in place versus having a bunch of Tails hanging all over the place. Um yeah just makes it easier, so you might have noticed that I had a little bit of dry scalp going on. So I'm going to take this oil and oil, my scalp, because my hair is going to be bonded under a layer of bonding glue gel. I'M sorry bonding gel and a wig cap, and I'm not going to be able to get to it. You can Pat it and you can kind of try to scratch through your tracks, but it makes it so much less stressful when you oil, your scalp first, so that it's not dry and itching up under this. Try not to get too much oil on your actual hair because remember. We need the binding gel to go on top of your hair and we don't want anything to interfere with the mixture of the bonding gel making it harder for that to set how it needs to so just oil, your scalp, and try not to get too much Oil on your actual hair. Now this is sticky and messy, so you can use a mixing bowl and like a coloring brush, which is what I I do sometimes most of the times. I just use my hair my hands, but if you don't want to have this stuff all over your hands, you can just get you a brush and a mixing bowl and apply it. That way - and I did put a clip on my leave out just to kind of remind me of where I need to stop the um - the burning gel at so that I wouldn't get it on my leave out. So I still buy hair store hair. Most of the time I get Empire, but today I use premium and live. I don't typically buy the premium hair too much. It'S usually either Empire or live uh live is one of my favorites and Empire is also one of my favorites. So don't believe the hype you can still get some good hair at the hair store, especially when you're doing something like a quick weave. So the very first track I laid under the bottom of the cap and from there I'm just laying them straight across from ear to ear and you'll notice, that big gap that I put there. It wasn't intentional, but also it was fine, because what I wanted to do with this quick weave is. I wanted to only use one pack, because I really wanted it to look flat and super natural. I didn't want it to be really full so um when you're, starting in the back. You can kind of leave a little space between those tracks just as long as when you get to the top. You make sure that it's full and everything is filled in so that you don't have um any crazy spaces or track showing, and things like that, especially because I chose to use a lighter cap. This time. Usually I use a black cap, but this time I used a light one. So I definitely have to make sure that everything is covered so that we don't see that brown showing through um but yeah. Just back to what I was saying about laying the tracks, when you start in the back, you want to go from ear to ear and then, once you get past your ear, you're going to want to go from Temple to Temple like you'll, see right here. You'Re! Basically, just creating a u-shape around your head. Now you can go from ear to ear in the back just straight across and then, when you get to the top, you can always go like straight from front to back straight from front to back and then, when you get to um, like the top of your Head, you can do from side to side. So in like a square motion you could do that. But for me it it's really no purpose to do all that and doing all that cutting you can just create that u-shape and it's going to give you um the same effect and then, when you get to the top, you can start to cut those pieces and Just go straight front to back front to back so it'll be more crisp, but just keep watching and you'll see what I have going on. You'Ll see what I mean because I'm doing a short bob. This is not necessary, but if you were doing like a long, quick weave, if you wanted the hair more on your face, what you would do is the same method, but you would curve those tracks more. I kind of just had the tracks going straight to the front, but rather than do that, you would curve it up more, so each track that you bring around you would curve so that the hair would be um kind of like in a horseshoe type of not Even a horseshoe, because that's so I could use um, maybe like in a c shape, so that it kind of closes in in the front that way once you're done, the hair will fall wore down into your face. I hope that makes sense, but that's just a tip if you are somebody who's. Looking at this video and you're doing a quick weave, but you but you're not necessarily doing a short one and uh yeah. So that's how you do that another tip to keep the glue from getting all over your head and just kind of keeping it stationary. You want to blow dry the glue on the tracks a little bit just to make it tacky before you go in and lay it down on your hair that way, it's not smearing all over the place when you go to lay it and um. Just for longevity, you can also spray it spray the track once it's on your head with a little bit of Spritz or sometimes I'll, do the guts to be holding spray, and I just makes it last a little bit longer. Okay, thank you. Thank you and now we're getting close to the leave out. You can see that part right there. I'M gon na go ahead and curve around the leave out and then I'm gon na go in and cut that excess cap off and from there. You want to lay the tracks as close to the part and leave out as you can so that it looks seamless like it is your natural hair and yes, you'll see that the glue is on my hair a little bit around the edges. But it's fine because remember we have that molding gel there, so it's completely hard and when I get ready to take it out, it's going to wash right out and it's going to be perfectly fine. So don't worry about that! The takeout you usually use oil or or conditioner, or something that's going to cause that glue and that um buying in jail to be slippery and slip on out. So it's it's not damaging at all. As long as you do it right, so nothing to be concerned about and honestly by the time you get ready to take it out or have it come out, it's gon na already be you know getting pretty old and the tracks are going to loosen up on Their own, so you're not going to have to worry about like pulling it from your scalp or from your hair. It'S going to be loosening up on its own anyway, so you add a little bit of oil or, like I said, a little bit of conditioner and it's going to slip right on out for what my track slipped out go. Look at my dresser! Now I don't get super specific with the initial cut, I just kind of grab all of the hair up and bunch it up together and I cut kinda in the realm of where I want my hair to stop. I usually cut a little bit lower than where I want it to be, so I can kind of play around with a little bit. If I need to and then sometimes I just cut it right where I want it to be, and then just clean it up to make it easier for you, if you are a beginner which you probably are, if you're watching this video just part it straight down The middle in the back and put it into two little ponytails low ponytails: don't pull it up, make sure you pull the hair straight down so that it's flat and tie it in a rubber band, and then you can cut right above or beneath the rubber band. Typically, you want to do above just for a cleaner cut, because you can kind of hold the bottom of the ponytail and pull it flat and Cut Above the rubber band for clean cut and then from there. I just go back in and comb it all together and you'll, see where the hair is longer and you just cut off the longer pieces, making it all even and yeah voila a clean cut and then from there. We just straighten it. Now the biggest mistake that people make is putting that hard bin at the bottom of your hair. You do not want to curve that flat iron and give yourself adorable Bob. So just Glide straight down your hair and just let it slip off do not bend it or curve it too. Much because you're going to end up looking like Dora the Explorer on some backpack backpack type of, and we're not doing that. If you wondering why I am using this brush, it's because I cannot find my comb and save my life and I have a million of them, but I cannot find it um. The wax stick is just going to help lay the hair down and make it look smooth, as you can see and voila magic, we're all done and of course, there's always that one hater trying to hold you down. But I did go back in and get that. One little piece that was out of place but other than that thank y'all for watching, and I will see y'all next time hope that helps

Comments
Genera Davis: I love this bob! The length is everything on you!