What Lace ? | How To Bleach&Install A Deep Wave Frontal Wig | Wig Meltdown| Alipearl Hair
- Posted on 20 September, 2020
- Fake Scalp Wig
- By Anonymous
**HAIR PROVIDED BY**
▬▬▬▬▬▬▬▬▬♛#AlipearlHair♛▬▬▬▬▬▬▬▬●
Hair details:180% density deep wave lace frontal wig 24 inch
Video Hair Direct Link ➤https://bit.ly/35FFePF
★ Alipearl official hair store ➤https://bit.ly/3mpkPnM
Deep Wave Wig 5x5 Lace Closure Wig ➤https://bit.ly/3km5liT
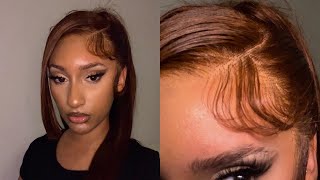
Brown Wig Straight Hair Body Wave ➤https://bit.ly/33sG5AH
Alipearl Lace Front Wig Silky Straight ➤https://bit.ly/2GUoytm
Follow @"alipearl_hair" on Instagram:http://bit.ly/2TXCQfw
►Use code:“alipearlyoutb”to save $10
Get to know our latest promotion ? http://bit.ly/2H0Gmmc
Follow @"Ali Pearl Hair" on FaceBook:https://goo.gl/GFnwNk
E-mail: [email protected] (Provide Wholesale)
WhatsApp: +8617719937661
#alipearldeepwave #lacefrontalwig #brownlace
Hey Dolls ❤️ Thank you for your continuous support and Love ❤️
What lace ? | HOW TO BLEACH&INSTALL A DEEP WAVE FRONTAL WIG | Wig meltdown| ALIPEARL HAIR
**PREVIOUS YOUTUBE VIDEOS**
Sixth Video - https://youtu.be/nSFBf5zPqmA
Seventh video - https://youtu.be/DAyW-M9VEN4
Eighth video - https://youtu.be/IK1pTz_I8VU
Nineth Video - https://youtu.be/nDQSNvm9JNI
**BOOK HAIR APPOINTMENTS**
~ Instagram: https://instagram.com/_dynastyluxeloun...
**BOOK ONLINE / SHOP ONLINE**
~ Website: www.dynastyluxelounge.com
{ Launching Sooonnn }
~ Instagram: https://instagram.com/shopdyluxe?igshi...
**SOCIALS**
~ Instagram: https://instagram.com/__rudynasty__?ig...
~ Snapchat : Missukruthy
~ Twitter: @__Rudynasty__
I do not own any copyright © to any song/instrumental played in this video
THANK YOU FOR WATCHING! PLEASE LIKE, COMMENT AND SHARE IF YOU ENJOY MY VIDEOS
--------------------------------------------------------------------------------
Looking to contact me? Send me an email. [email protected]
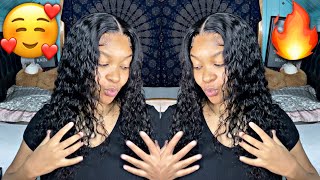
So, hey guys so welcome back to my channel, it's your girl, bree dynasty and i'm back again with another video. Today, i'm going to show you how i installed this 13x4 lace wig, and this wig was sent to me by ali pearl hair, and this had a density of, i believe, 150 or 180, and it was 24 inches. That'S how long the hair of it is um right now you can see, i am getting ready, preparing the bleach um. I use the bleach developer. I use the 90. I feel i think it's the 40 developer and just any bleach powder that i had and you know you stir it stir it stir it. So it has that thick consistency and then, after that, i'm going to spread it over the lace of the wig. So that can bleach my knots and you know glue on my head. So this is the box i received from ali pearl. As you can see, they sent me the wig and they sent me so many other like little gifts that i actually love they sent me lashes. They sent me a headscarf, they sent me a elastic band. They also sent me a brush like a edge brush. They sent me a wig cap. They sent me instructions of how to maintain their hair and also a satin bag, which was absolutely lovely. I'Ve never received this much. You know stuff before so i actually loved it. This is the wig i'm just opening the package. It came in the little clear or white whatever it is, do so so now that the bleaching process is finished and completed, this is the completed um bleaching process. The knots are bleached. As you can see, the baby hairs are beautiful. This wig did come pre-plucked, but i went ahead and plucked it a little bit more because i'm just crazy. That'S what i wanted to do. Um and now i'm taking my skin, protect just to spray around. My forehead to you know protect me from the harsh chemicals of the lace glue. I already took off some and i used rubbing alcohol to take off the residue on my forehead, the makeup and that line of demarcation. You can see that little um, yellow line is what i used to mark my middle part. That'S what i do um yeah! I took off the makeup that was on that area and now i'm getting ready as soon as this dries. I'M gon na then put the lace glue on my head, so here i'm gon na now i'm gon na take my eyebrow brush because i don't have any other marker, i'm just gon na mark where i want the lace to lay. As you can see. I have edges on that area. Don'T worry, i'ma keep them nothing's gon na happen to them. If you know how to take out your take off your lace properly, your edges will be intact. So, as you can see, i'm just marking the certain areas where i'm going to stick the hair and then cut the excess lace off so that the edges are still okay and intact. I'M now going to take my lace glue and i'm start to apply it. The first layer on my head - i normally do three layers. If i want this to lay for about two weeks, i normally don't touch my hair, i'm very good at maintaining my frontals and closures. So i'll probably do three layers of the glue and i'll show you. The end process of how to properly stick it up on the hair, make sure. When sticking the lace down that the lace is above or in front of the glue, you don't want it to be behind the glue, because that's just messy and you have to go in and clean up that area. It'S just long. So your best having the glue um behind the lace that way, if you miss out any um area, you can go back and just glue that area back right now, as you can see, i'm making sure that my sides are secure and then i'm gon na take My sprint and spray that area more, i'm now using my comb just to really secure the hair, make sure that the glue and the lace are both bonded together do now that that area is secured, i'm just going to take um the basically i'm going to put It apart on the sides of my um head once the glue is dry, i'm going to then take my elastic band and wrap around my head and then wait at least five to ten minutes for it to dry. Before i add any other um glue, such as the sprint or the got2b spray to spray, to give it that extra hold so hello, you so now that the elastic band is on i'm going to take the alipo satin scarf that they gave me just to give It my extra hold, and once i am finished, i'm going to wait at least five to ten minutes for that to completely dry and hold, then i'm gon na take off the band and then um scarf and cut the excess lace off and style. My edges, i went, and i did my baby hairs off camera and then i wrapped my head again just to set the baby hairs, while i added conditioner and mousse to my hair to give it that kind of wet slash dry. Look. So this is the finished. Look, i hope you guys enjoyed this video. This hair was super super easy to pluck easy to bleach cut like this looks like my scalp, but it's actually amazing. I love this hair so much, and i want to thank ali pal for sending me this beautiful beautiful week. This was a pre-made wig. By the way it was a 13x4 180 density, and this was the medium cap size as well. If you guys want to um check it out, i will link everything in the description bar below also um, don't forget to like comment share and subscribe and also follow me on my socials. Follow me on my instagram andy lux lounge. You


Comments
Heather Nengomasha: Beautiful ❤️❤️
ImoleAyo: Lovvveeee ittt
RuDynasty: GUYS DONT FORGET TO LIKE SHARE COMMENT AND SUBSCRIBE TO MY CHANNEL !!!