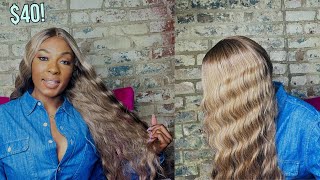
The Blonde Wig We All Need Ft Eva Wigs
- Posted on 05 August, 2020
- Fake Scalp Wig
- By Anonymous
Summer Sale
Sitewide 16% OFF over $119, Code: HOTSUMMER
-- No included clearance items.
-- Vaild before 31st Jul.
The Official Wig Link:https://www.evawigs.com/ready-to-ship-...
The Only Official Website: https://www.evawigs.com
Hair Info In This Video:
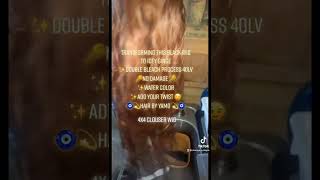
SKU: SK13479
Hair Color: #4 T #18 (The Same as Picture)
Hair Type: 100% Brazilian Virgin Hair
Hair Length: 22"
Hair Density: 150%
Hair Texture: Wavy
Lace Material: Korea lace
Lace Color: Medium Brown
Cap Construction: 4" Lace Front Cap with Bleached Knots
Hairline: Pre-plucked Hairline
Cap Size: Petite
Follow Evawigs on Social Media:
Facebook: https://www.facebook.com/evawigs
Instagram: https://www.instagram.com/evawigs
Youtube: https://www.youtube.com/user/evawigs
Pinterest: https://www.pinterest.com/evawigs
Lately nothing goes in my direction. Lately, nothing's coming my way, keep drowning every bit of my devotion sinking deeper every day and lately i am missing my reflection. Hi guys welcome back to my channel. I hope everyone is doing wow and you can see. Can you guys see this, please? No, i need to show you guys how good this install is. How cute this hair looks. The color looks boom. It looks so good with this lipstick as well. So it's been a while, since i did a week video. I know i thought i'd even be a bit rusty. I thought i wouldn't know what i was doing turns out. I came back bigger and better, so i'm going to be sharing with you guys everything about this particular unit, where i got it, how i installed it all of that. So let's go ahead and get started now, so this wig is from eva wigs um. I think what i really really love about this wig is just the color gosh. It'S just and it came like this. I did not color this wig myself. It came like this, so i'm gon na show you guys what else came in the box um. It was the hair, of course. Let me give you those hair details, so this is a hundred percent brazilian virgin hair. It'S a 22 inch wig, it's quite a long unit. I thought it should be longer than 22 inches. Hair density is 150. It has a wavy texture, although of course like i've added my own curls, but it's true like it's in in its natural state. It has this like these waves, um and then the less color medium brown, less material correlates. Okay, i don't know what that is. Um bleach knots, pre-plaqued hairline, so i'm gon na put a link to this hair in the description box down below, so that you guys can just go ahead and check it out. The other thing that came in the packet in the package rather is a comb which i've already used um some bobby pins amazing. You can never have too many bobby pins and then um wig caps, which i don't even wear: wig caps, but anyway, some two pieces of wig caps. That sounds wrong: two pieces of wig caps anyway, the other thing it came with is this elastic band, so it has those two clasps inside for me to be able to clasp it just in case i don't want to glue it down every single time. I can use this to make it glue less. So now, i'm going to show you a close-up of the kind of a close-up on the um units on my mannequin. Just that you guys can get a clear picture of how it looks. I did bleach the knot. It says the nuts come bleached, but i bleached it again for the first time ever and i think i over bleached it, but anyway it still looks cute. So now, let's get into the install because anyway i really killed it. I'M not gon na lie. I killed it, so let's do that. So let's go ahead and get into this. It'S been a minute since i did a voiceover guys, mostly because the video always leaves me behind, and it's because i talk too much, which is exactly what i happen to be doing now but anyway. So the first thing i'm doing is tinting the lace. The only mistake i made here is that the foundation i used is one that matches my skin tool completely. Please don't make that mistake, because usually your scalp is much lighter than your face. So if you use a foundation that matches your skin perfectly like the skin on your face, then your wig is not going to look as realistic as it possibly can now. The next thing i got into was cutting out the ear part just so that the wig could fit me perfectly. Every time you do. This just know: you're gon na lose a little bit of hair and that's totally. Okay, like you want your wig to really fit. You properly and not like press down awkwardly on your ear and make you feel uncomfortable okay, so the next thing i'm doing is using this wax stick. This kind of just helps you actually help with it. Kind of like makes the hair leaf flatter basically and works on flowers, and i just put this before going in with my hot comb just so that that hairline could lay all the way down and you guys can see like it did when i use this wax. Stick in conjunction with my hot comb, like miracles, are happening. Guys, miracles are happening in case. You can't see that wig is looking so realistic, guys wow, it looks like actual hair. The hairline came pre-plaqued, so it actually came already. Looking like this, i didn't do anything at all to the hairline. Now the next thing i'm getting into is laying down the wig. I chose to do this while the lace is still on um. Would i recommend not really honestly, because i ended up having a really really hard time, cutting the lace off when the glue was already on, but anyway, i'm using my got to be spray and i'm just gon na spray that and use my blow dry on. Usually i use medium heat just so that the lips can really like melt. You know, and then i use something to like press down the lace just so that that glue is like really all the way in there and then i'm gon na tie an elastic band around this just so that everything can just mesh well together. Usually i leave the elastic band, maybe for 10 or so minutes, 10-15 minutes ish and that's usually good enough time to take it down. Ooh girl. Can you guys see that ay shh ish looking good so now? This is when i cut off the list like i said. I had a really really hard time and i ended up not being able to cut off as much list as i should have, and it ended up kind of messing up my installation, because i had a like a key white line showing where the list was starting. So not good um. I was so scared of cutting off my edges guys. I feel like that's why i i didn't cut enough lace and you guys are kind of gon na see that throughout the video, like that's kind of where i messed up - and i think maybe next time i'm gon na use eraser or i'm just gon na cut The lace before i glue it down, i think that's gon na be much much easier because hey this one me, i was just panicking that i'm gon na cut my edges off after this. I just went in with a bit of glue because once you cut the lace, sometimes it can lift a little and you need to like reinforce it so that it completely is glued down. And once again i went over with my blow dryer on medium heat. Just to seal the deal you know to make sure that that hair there's no way it's going. If you guys can see nicely on one side, i cut the lace really. Well then the other side, i don't know what happened. I dropped the ball anyways. It is what it is we move and we land. So now i put the elastic band again just once again to seal everything together make sure everything is laid, and while everything is laying i went ahead to do my part. I opted to go for a side. Part and i'm going to use my wax stick and my hot comb just to make sure that that part lies down flat like the flatter. Your part lies down the more realistic your hair looks if your part is like puffy and is not lying flat, says it's gon na. Definitely look like a wig like we all know it's a wig, but at the same time you know we're still trying to like act like it's, not so make sure that that part is lying flat. Now. The next thing i'm going in with is my. What'S this thing called it's like a clump color, or something like that. I actually watched this life-changing video the other day. Okay, not life-changing that's dramatic, but i watched this amazing video where she was showing you how to use this tool, and i realized i had been using it the wrong way this whole time. So i'm going to link that video down below, like you, can even see my shock when i unleashed that curl like wow, so i'm just going to skip through this whole part but check the description box for me telling you guys, or rather linking the video that Is going to change your life when it comes to using this tool? So now i wanted to make my part a lot more realistic, so usually what i'll do is i'll tweeze around the part just because you know like when you part your own hair. It'S like there's not a lot of hair around the part and, like i said we want the part to be as flat as possible, so tweezing really helps. So that's basically what i'm doing here and though i didn't put it in the video. I also went ahead and put a lighter concealer just to really really define that part and make it as realistic as possible, and guys after that, i took out the elastic band and that was more or less it. I left this wig without edges because it really looked good. What i didn't like, though, is how there's that kawhite line that's showing where the lace is starting and that's definitely because i didn't cut off enough of the lace. I tried to add like foundation and powder which didn't really work for me, but that's okay. We are still learning we're still growing and the install still came out perfectly and now when i want to wear this wig again. What i'm gon na do is just cut off that excess lace, and i think i should be good to go, but um yeah that's more or less it, and that's it guys. Thank you so much for watching. I hope you enjoyed this video and i hope you learned something. I'M gon na have all the details to this unit in the description box down below so make sure to go ahead and check that out. Thank you. So much for watching and i'm gon na see you in my next one bye, my mama used to say that it's the way it goes


Comments
Tuke Morgan: This week is everything. The colour goes so nicely with your skin tone! That lip colour is Bae
waniz sharon: Beautiful
AliciaDH: That hair and lip combo is everything on you!
Miss Furaha: Wooow this wig is everything you laid it soo well, flawless the wig color and the lip color perfect combo
BARBIE CAESSYE: Amazing I love the colour of the wig it goes well with your makeup absolutely gorgeous on you
tassy king'ori: I'm loving the wig..it is matching with your skin
Beverly Mutirua: I just discovered your channel and been binge watching your content. I am about to start a channel and you've played a big role in this sis
Winnie Stawa: You look amazing in that wig. Kindly do a video on how to pre-pluck edges.Please make sure you explain it to us like two year olds hehe.
Winnie Chebet: wow,beatiful and perfect indeed.i love it
Kerrian Jackson: It looks good on you, luv the shade!!!!!!!!
Oliviah Ongere: Looking gorgeous
That Bantu Chic Amwai: My trouble is always on the ear part, the lace doesn’t stick well however much I add the glue, ama it’s because I never tie anything after I blow dry it. I use your technique because it’s a lot easier *Video dropping this Wednesday on my channel *
Hazel Chanda: Please send me details of that wig and where you bought it from It's awesome You nailed it
MANZI MARIEL: Bigger and better indeed. Love love it!
Aisling Audrey: Looking bomb queen of inconsistency
Yvonne Nyambura: I love this wig so much
Arina H.: Love it on you
ngare ann: Beautiful!
Sunshine118: Looking amazing
Shůgů Koori: Who else thinks Joanna looks like Serah Ndanu on this one? Looking beautiful
Marina Mumbi: Such a beauty I’ve missed your videos!
ttm k: where you been you gorgeous human?,.... glad you are okay also that hair looks so beautiful on you❤
TRENDING 411s: I've never been this earlyI'm a really great fun of you Joanalooking great❤❤❤❤❤
Lixxy Love: Looking good girl
Norah Bahati: Beautiful ❤❤❤
Joy Hannah: Hey Joanna..Happy to see you..It's been a minute..Please dont be long again
Carol Ciku: Awesome video. Thanks!
Cåt ll: Please! Don't fall for this. They send the best wigs to influencers. They're scammers and they offer you $30 dollars to make a positive review. Don't buy from this company!
Lucy Kabu: Eissssshhhh, unakaa poa And that song in the intro, loved it.
Cynthia Chemutai: This wig is iiiiiitttttt
Purity Kai: You look fire, cute, I like it.
nancy mutua: Looking nice Joanna, where can I get that hot comb?
Bonakala Zoey: You look so beautiful
This Is Nurse Zee: You look beautiful Joanna
It's Mimi: beuriful
Deborah Samba: It's sooi cute
ann wangari: Woaw I love......please do make up tutorial for beginners
Jel': You amazing sis
Sunshine118: Where did you get the wax stick?
itschanel: This is fireee
sherrie makeup: Wow Joanna you look so beautiful
T QUEENS EMPIRE #Thee Afro'Queens: woooow i need such walai. dope i'll wear one on my vlogs to.
Samantha. J Ptallah: Wow beautiful
Mary Tifa: We missed you♥️
Catherine Onyango: Joanna you've been missed
STARS SHIKO: Which app or software do u use to edit
ubax.kitchen: Hair colour plz wow it looks beautiful
Londy Dlomo: Notification gang Hey beautiful
Whitney Thuo: Finally
Simone Randall: Omg
Dolphine Anyango: Yaaaaani Wow!!!
Irene Nyatichi: Hey. Where did I you get your mannequin and stand?
Faith Wambugu:
Serah Terah: If you have watched 13 reasons why, please tell me if she looks like jessica
Venus Parlour: Wig ni supuu lakini Bei ni salary yangu yote
maggie heziborn:
Joana Njeri: Yaayyy namesie
Bonakala Zoey: Oooh My look at You
anita odhiambo: Weeeeeh sisemi kitu..iko fireeee
Mariam Najib: Bigger and better
Carlos Orare: Smoking hawt Joanna...but yaani ulisema hutawai nita wig aki
Kenyan Watermelon: As early as me.. Where is the cake
Mary Mucina: Yeeeeyyyy no. 1
rebecca nyangweso: Which song is this please
Janice Odhiambo: Khai Khai,,,, woi woi,,, Mathwiti na makekitukunywe
Zainabu Ruth A: Instead ya kufanya vlog ya wigs afadhali unyamaze tu aki