Curly Pixie Cut Wig, Pre-Plucked Wig! Fake Scalp, No Glue, Easy Install Hairvivi
- Posted on 18 November, 2020
- Fake Scalp Wig
- By Anonymous
This video is reposted from #Hairvivi Wig In The Video:Ashley Bedeck.
https://www.hairvivi.com/products/8inc...
BLACK FRIDAY ☆ ★ BUY MORE SAVE MORE
(BIGGEST DISCOUNT OF THE YEAR! )
☆ ★ Coupon Code: BLACKFRIDAY ★ ☆
►► BUY 1--SAVE $30, BUY 2--SAVE$60, BUY 3--SAVE $90 NO LIMITED!!►►
Hair Length: 8 Inches
Hair Density: 160%
Cap Size: Medium
#Fakescalp color: Cappuccino-Light Brown
Your Put on & Go Wig
Beginner Friendly Wig
HD LACE WIGS:
https://www.hairvivi.com/collections/1...
#BOBWigs: https://www.hairvivi.com/collections/b...
360 #lacefrontwigs:
https://www.hairvivi.com/collections/3...
Follow Hairvivi on Social Media:
Instagram: https://www.instagram.com/hairvivicom/...
YouTube: https://www.youtube.com/channel/UCWK7J...
Facebook: https://www.facebook.com/hairvivicom/
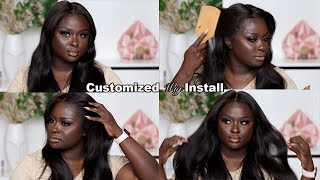
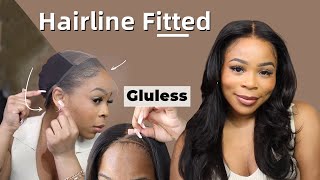
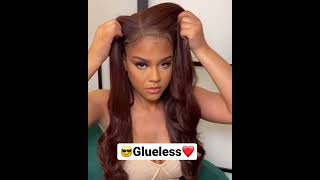
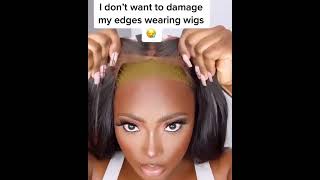
What'S popping my loves, i'm back with another video, of course you guys know it's another hair tutorial, i'm going to be slowing it down, for you guys and showing you how i install this wig super flawlessly. This one comes courtesy of hair vv and, of course, i'm actually, if you're tuning in for the first time go ahead and subscribe. If you love my content, there's going to be so much coming up for the holidays, but for now we're going to just go ahead and jump right into the tutorial so rocking my burberry scarf. It is time to slay i've been looking a little bit crazy and under the weather for the last week or two i had surgery and i've just been chilling and laying low, but i am back and feeling better again. This package did come from hair vv. They sent over this bag of goodies, which, if you stay tuned to the end of the video i'll, show you exactly what's in the bag. But i wanted to get straight into the actual hair tutorial and show you what we're working with. So i love that, even though this wig came in a bag or a box, they also included the dust bag to protect your wig, and it came really nicely packaged to preserve the curls. Now this is a curly pixie cut esque fake, scalp lace, wig. It does come clueless clueless or glue. Is it comes glueless with the elastic band, and i love the fact that this one is adjustable and it can adjust literally super super super small or super big just depending on the shape and size of your head and then, of course, the fake scalp is going To make it super easy to install, you don't have to bleach knots, tint lace, it's literally ready to go. So this is what the wig looks like on when i first put her on and as you guys can see, they plucked the hairline for the gods. I honestly did not need to customize anything, i'm going to go in with my electric hot comb and show you guys really how well the hairline looks and also it came as a side part we're kind of going to cancel out the side part and just let It go kind of backwards and sideways and just look real. You know fun and flirty. Thank you. I know this one looks a little bit crazy on to start again, it's a very short cut. I would say it's longer than a pixie cut, but it definitely gives you that vibe gives you that, like i just broke up with my boyfriend, or maybe i'm breaking up with 2020, and i'm just feeling myself and fly i'm in the process of losing some weight And this is kind of the hair vibe i like just you, know, wet it and go again. I like to use my electric hot comb. This helps me to kind of press out the hairline a little bit and it helps to give more of that plucked. Look if you are a beginner, and you don't like to pluck out your wigs yourself, you're afraid of balding out your wigs. This is a great one to start with, just because you don't have to do anything to the hairline and again, if you want it to look really really really sleek, just press it out with an electric hot comb. You can do this on a mannequin head. If you are afraid of you know, burning yourself, because trust me, i do it often and as you guys can see, it looks really really good. The lace looks super amazing. Of course, all the details, lengths links and everything is listed in the description box and i am slowing it down for you guys. I don't want to speed up too much during this video, i'm showing you how i cut off the excess lace. Now i use a eyebrow razor. This is my favorite way, but you'll see me. Do it interchangeably like today i'll use the eyebrow razor tomorrow i'll use scissors? You know it just depends on my mood, but if you just look really closely how like, as soon as i hit the lace with the razor it kind of just like cuts and tears away, it gives a little bit more of a natural feel because it's not The super super straight blunt line. It kind of helps, because you guys know if you have friends and family who wear wigs, it doesn't matter how slight it is. You can see, especially without baby hair. You can see that line of where the wig is going to start, no matter how well it's installed, and this kind of makes it kind of jagged. So it kind of helps to camouflage it just a little bit and also don't forget to customize your wigs around your ears. You definitely want it to fit and not sit on top of your ear, but you also want to make sure that it's not like too small, so be careful not to cut off too much product. So everyone knows that arrogant. Tay is literally the best stylist on the planet. There are so many good stylists, especially you know all over instagram, but he's the one who literally literally deserves all the credit for helping us all, get our hairlines together and get these wigs together because honey. He knows what to do so. He swears by the ors brand. I went ahead and picked up a couple of products. I'Ve used this brand quite a few times over the years, but i'm trying a few different products in a different way today, and these are pretty much from my understanding from seeing his instagram the products that he loves to use for a glueless install where you're using Any adhesive, but you're not using glue now. One thing i will mention is that i do have a large forehead and, as you guys can see, i'm going in front of my hairline, even though my hairline is thin. I don't want any product on my hairline at all. My sideburns are a little bit different, but in the front i'm not going to touch the product on my hairline at all. Just because again my hairline is thin enough and i don't need any extra strings or strands pulling, and even whether it's glueless or not, i'm not having it. So the first thing was like a gel. The second thing was a spray. I was expecting it to literally spray, but it kind of um you know, has a different texture kind of drips, so be careful with that again. This was my first time using this combo. So for me typically, i would take you know a couple of times of just getting used to a product. I really liked it and if you've seen the intro, you know how slayed and beautiful this wig install turned out. I absolutely loved the products that i used but again when you use products for the first time, especially if they have a different formula than what you're used to you just kind of have to navigate and see what works best for you now, typically, even with the Glueless install i like to work in sections and i completely admitted that technique during this process i was so focused on you know, applying the products right, seeing how it was going to dry, seeing if i needed more, that i forgot to just put a little bit In the center do that and then do the sides. I was literally focused on getting the whole wig down at once, which is a no-no if you're a pro, and you can do that. Definitely do so, but if you want to make sure that the product doesn't dry too fast, i recommend doing the center first and then you can do one side and then the other side. So now that i've gotten it down - and i kind of pulled out some baby hairs, sometimes it's fun to like pull the baby hair forward, while the lace is still wet with the product that way when it dries down, it kind of is like the hair will Be trained to go in that direction and it makes for like a more natural look. I don't know if i'm making sense or explaining it properly, but just go to float and you'll, see exactly what i'm doing. You definitely want to dry the product in with the blow dryer back in the day i used to let it air dry and it just never felt like it dried properly, and my wigs were not slayed. You cannot do this. In my opinion, without some kind of blow-dried heat now, heat is not the answer. You want cool. Let me be clear, use a blow dryer, but use it on a cool setting and the reason you want a cool setting is because, whenever you do it on a hot setting, it'll dry, faster and it'll dry, really good, but you'll get that white. Crusty hairline that everyone hates and it's you can clean it up, but you rather have a clean, install from the jump. So typically, what i would do is once i apply the the product, then i apply the lace on top. Then i blow dry on a cool setting until it gets pretty dry way, past tacky and then i'll turn my blow dryer to the hot setting and then let it go the rest of the way. But if you go from like wet product to tacky product to dried product with heat, it's gon na give a little bit sticky tacky white residue-ish. If that makes any sense, and still sometimes i'm a little hard-headed - and i will you know - do a hot setting or even a warm setting like right here on the sides, i did it on a warm setting, because i was in a rush and i was trying To get it done, but, as you guys can see it's not as flawless as the center now, because i'm going to do baby hair, i'm going to be able to cancel this out. But again, if you just want a flawless install from the jump. Trust me use a cool setting now for time sake, i did the opposite side off camera, but it pretty much came out the exact same way. Now i'm going to go in and form baby hair. This lace is very flawless and if you choose not to do baby hair, i think it would be a great idea. This is an ideal lace for those of you who do not like baby hair, because it's soft, it's thin, it blends. It looks like skin. It is literally as flawless as it gets, and that's why i love working with hairv. They literally have some of the best lace on the planet. You will not need to be an expert or a pro to make. This lace look good on you and it definitely works for all complexions. Dark skin is definitely the hardest to make a lace blend. Just because, obviously you know you want it to match brown skin and it never comes in a dark enough shade or i won't say it never does, but it has to be the right lace to look good on the dark shade, because every lace doesn't look good On us, you'll see in just a moment i'm going to add powder at the very end to set it off, but this looks really really really good and i'm super impressed with the lace. You'Ll also see me style the curls in just a moment, but as i'm going through and just kind of playing with the baby hair. Sometimes i get the baby hair right, like literally you know, first shot and then there's times where i'm literally playing with it. For 20 30 minutes, because i just can't figure out what i'm doing this was one of those times when i should have separated the sides out and you know, did it that way, but i didn't, but now that we've survived and i've done the baby hair. I'M going to use the elastic band method to just tie a little piece of elastic around the hairline and allow that to dry and set. You want your baby hair to set for the most flawless looking sleek. You know sharp look in my opinion and while i do that, i'm going to use another method that i've adopted from arrogant hay, which is i've, always used mousse to style my curly hair, but typically i would wet it first and then apply the mousse. Lately. I'Ve been applying just straight products and i've been loving the way it comes out and, more importantly, i've been loving the way the curls last day to day. I can just go in with a little bit of water and there's enough product in there that i don't have to keep applying you know day to day now, i'm going to go in just one more time with the blow dryer. The reason i'm doing this with the elastic band on top is because again this is a glueless install. I didn't use a real glue or bond, so, if you're, using like a got to be glued type of method, or with this case the ors it can lift. If you use a wet product on top, the mousse i use is alcohol based, but it's still wet, so it can help to lift the lace. So i just really want the lace to be completely dry and, of course, to set the baby hair. Now that it's set and the shape is taken on you can go in and just kind of like play with the baby, hair and reform it and it'll be so much easier. I did that off camera, but for now i kind of just left the baby hair. How it was focusing on adding powder to the hairline and making sure everything fit and looked super good now. This is the powder that i love to use along my hairline most times it's a chocolate brown. It'S warm it's not too red, but it definitely blends with my complexion and, of course i have it linked in the description box and that's pretty much it. As i said before, i didn't want to do a part this time around. You can do a part. You can do a center part, a side part, you can, you know, add some custom layers to it. The hair itself is absolutely beautiful. I got minimal shedding with this one. I'Ve co-washed it since this install and it co-washes beautifully. The hair is absolutely gorgeous and i don't mean to sound like a sales pitch, but this hair is absolutely beautiful, be sure to check out hairv. I have a link to this wig in the description box. Also, don't forget to subscribe. Share this video with your friends. The holidays are coming up and i'm committed to vlogmas, for you guys and more importantly, for the kids, because they are ready to share some videos and some content with you guys some diys and some fun stuff, and here they are now. So. Thank you guys. So much and as always i'll see you in the next one smooches diamond size, smooches papa you
Comments
Ja’Quela Palmer: Did you choose option one or two with the wig there are two different curl patterns for this wig