This Wig Got Metwisted! Watch Me Make This With The Fake Scalp Method? Pt 1 Of 2 | Annettebeauty
- Posted on 20 October, 2019
- Fake Scalp Wig
- By Anonymous
#Outre #SpringyAfroTwist #fakescalp #wearproof
VB's, I’m coming to you with another DIY wig but this time its with a twist. Video features detail tutorial on how I made this wig, close up, 360 view and my opinion. I’ve also added the Fake Scalp Method, Wear proof cap which makes this wig an easy out the door slay. Check description below for link to purchase and product details.
Product details:
Outre X-Pression Twisted Up Springy Afro Twist Color 2T1B/350
*Other items used to make this wig
Singer Sewing machine (any make or brand)
Wig Block (or foam head)
Lace Top Wig Cap (or spandex dome cap)
13x4 Lace Frontal (or closure)
Scissors
T pins
weaving needle and thread
Foam or lotion (optional for baby hairs)
Pantyhose (only used for Fake Scalp)
Link to Part 2 review how to add FAKE SCALP METHOD for wigs. No glue needed.
Link to Purchase:
http://www.ebonyline.com/outre-x-press...
MUSIC BY:
https://www.youtube.com/channel/UCy6Fp...
https://hypeddit.com/track/4k9d5h
https://www.instagram.com/iamdices/
THANK YOU FOR WATCHING!
DON'T FORGET TO SUBSCRIBE!
***LIKE*COMMENT & SHARE***
***JOIN MY FACEBOOK GROUP***
Visionaries of Beauty
https://www.facebook.com/groups/250349...
*****Contact info.*****
https://www.instagram.com/annettebeaut...
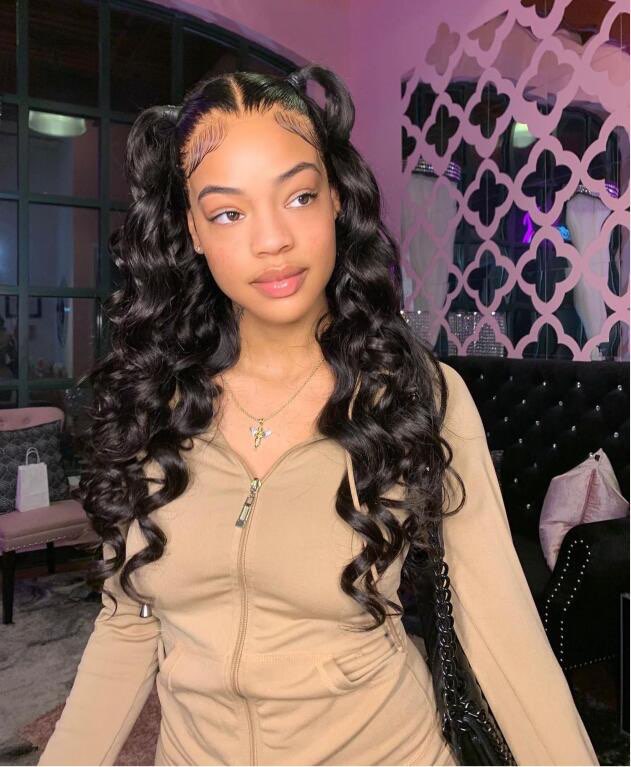
Thank you so much. I really appreciate you stopping by and for those who returned, hey girl, oh boy and I'm coming to you with another one of my units, DIYs projects, so mercy more on how I created this gorgeous fall ready unit right here, then please continue to watch them. I purchased some hair from ebony line. I purchased four packs of outre expressions twisted up springy afro twist. It'S pre separated and pre fluff perfect for spring twist and BOM twists, and it is he sings now. I know little patch of hair that I purchased. This is the last fact that I have as much as I have luck. It comes with about 30 strands per pack, which is a huge plus when you try to save money, and I believe, is about ten dollars or less, for the packs depend on where you go good luck, locally, spa or online. So I purchased, like I said, pull back some everything on and also ended up purchasing one pack for my local beauty supply store, but just was a to t1b 30, I'm going to probably pop in every now and then to tell you what I'm doing or the Supplies that I'm using and for most part it's gon na, be a watch and learn. So, let's get into this video first things you're going to need, but some things are optional and some things aren't needed. The optional item will be the sewing machine now. You'Re gon na need a dome cap. You'Re gon na need your braiding hair or whatever. Here you of your choice, a front 2 or closure of your choice and or a crochet needle, depending on how the method you're gon na apply the hair needle thread, hair clips teeth, pins and some kind of curl cream or twist cream. And, of course, your wig block and wig stand. If there's anything, I left out I'll also leave that in the description box. So that's what it'll be, but first you want to do is place your cap on your wig block and prepare to install the front you're gon na want to clip a braiding hair out of the way. So it's easier to sew down the front to this next step is completely optional, but I went ahead using my sewing machine and sew down the wick Holmes at the back of the wig, along with my adjustable strap and as well as stitching down the front to Further to secure it now using some Jam, I pre twisted to here to make the job a little easier now that our pre twists are done and the cap is fully constructed it's time to do. The install here are all the tools you need for the next step, using about two and a half packs for the back of the unit. Once you pre twist, the hair can either thread the hair, not it and then twist or you can just sew on a twist that you pre twisted, and that makes sense now in this situation you want to lay the hair in a brick laying motion you want To skip every other one and then when you go back to the top, whichever one you skip in that space, you want to add a braid. So it's like a brick laying method. So that way, it closes up the hair without seeing so much of the scalp, and it gives you that phones that you need without putting too much hair in the wig. Now, once you complete the back of the cap, then you want to go ahead and work. Your way to the front sectioning the hair and twisting the hand you can also pre section, a hair bike or rolling it into sections and then, as you're, going working your way up to each twist make subsections to make it go faster and so that you're not Trying to figure out the parting situation that way you see your parts before you goes to here. You also want to braid down your edges for your baby hairs, just leave just a little bit out so that you can have your being here once you're completely done with twisting. You want to take down a baby handsome to prep them for customization. It'S not heavy! It'S it's really well and I absolutely loved the outcome. If you're looking at the cap when you like hold on you scratch it ahead, I know this mannequin head is pink. How does it look like a hat scalp? Well, that's my seat, you for part two. So this is going to be a two-part video. So if you want to see how I got this new wear proof, fake scalp method that I've been seeing all over social media - and you want to check out the next review. So I hope you guys enjoy that DIY project of minds. Now I'm gon na go ahead and give you a close up here. We have the 350 and that's what it's looking like and then over here we have two t1b 30, which I do like, and this is what the twist pattern is looking like, and here is my scab äj --. So I can part this anywhere and you'll get scout. You wan na see how I cheat the Scout method, where you can throw away that ball cap method and you can slit every day without that extra weight and it's so breathable and hypoallergenic. So let me give you that 360 Selassie this video - I hope you guys enjoy it. I hope you guys learned something over bites and make your own way. I would love to hear about your week's you've made and come back and slay some more of me. Let me know how you feel about this particular DIY. Let me know in the comment section that be sure to get back to you I'll, leave all information and link to purchase any supplies down in the description box. So don't forget to check that out. Like subscribe, comment share and if you want to separate me, please check out my social media on that beauty on instagram and visionary beauty. That'S my group on Facebook and I hope to see you guys over there as always stay fabulous and be your own vision. Wt. The next time think I won't keep marching with my fist up in the air


Comments
MariaHarris: Great job. I love this unit
JD Free by me: Very beautiful. Love the twisted hair of the unit.
Lisa Rogers: Beautiful outcome tfs!
Marjorie b: Fascinating! Good job... can't wait to see the second part
Amore Love Warthen: I see you doing your thing, I love it❣❣❣
A. Yasharahla: This don't have enough views!! Well done
Evelina: Love jt. Where do you buy the cap?
Tawanda Hale: Yasssss
Felicia Cat: How many packs of the hair did you use and how many twists please