Ali Pearl Deep Wave Lace Front Wig Unboxing/Review
- Posted on 16 September, 2019
- Fake Scalp Wig
- By Anonymous
●▬▬▬▬▬▬▬▬▬♛Alipearl Hair♛▬▬▬▬▬▬▬▬●
Hair info: Curly lace front wig, 22 inch, 200 density, M size,
❤30% Off for the same hair → http://bit.ly/2ZVtUbI
Body wave lace front wig→ http://bit.ly/2ZV2S4d
2019 TOP SALE lace front wig →http://bit.ly/2ZUxoLm
Website, BEST DEAL→http://bit.ly/2ZY2jXb
➤10$ Off in Store use Code: alipearlyoutb
Instagram @"alipearl_hair" → https://goo.gl/SjMrzq
Want to win free hair? Click here → http://bit.ly/2H0Gmmc
Alipearl Hair Amazon Store: https://www.amazon.com/alipearl
3D&5D Mink Eyelashes: https://www.amazon.com/dp/B07S1DRY7F
Alipearl Wig Grip Band: https://www.amazon.com/dp/B07R12QXXJ
E-mail: [email protected] (Provide Wholesale)
WhatsApp: 0086 17719937661
FaceBook @"Ali Pearl Hair" → https://goo.gl/GFnwNk
Twitter@"Ali Pearl Hair" → http://bit.ly/2Wb7J08
#alipearlhair #curlywig #closurewigtutorial #transparentlace #blondelacefrontwig #preplucked #makeup #tutorial #affordable #bobwig #wiginstall #hairfromamazonprime
___
SUBSCRIBE for more ElleForLexxi: http://bit.ly/SubElleForLexxi
Follow me on my socials:
FACEBOOK: https://www.facebook.com/ElleForLexxi
TWITTER: https://twitter.com/SkyeRains
INSTAGRAM: https://www.instagram.com/elleforlexxi...
SNAPCHAT: https://www.snapchat.com/add/elleforle...
Watch more:
Most Popular: https://www.youtube.com/playlist?list=...
My Natural Hair Journey: https://www.youtube.com/playlist?list=...
Hair Reviews: https://www.youtube.com/playlist?list=...
Makeup Tutorials: https://www.youtube.com/playlist?list=...
Hauls: https://www.youtube.com/playlist?list=...-
I'm Lexxus! I'm a lover of all things beauty related. Come on over to my channel for makeup tutorials, hair reviews, monthly favorites and more!
Contact me BUSINESS INQUIRIES ONLY. Hair weaves, products, branding, marketing, sponsorships [email protected]
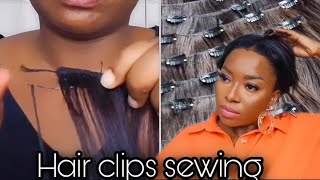
Okay, guys so today, I'm gon na be doing a new video awesome hair from Ali pearl. But this time I did not get individual bundles front tool closure or whatever I actually was sent a lace front. Wig, a 13 by 4 deep, wave lace, front wig that I'm gon na be reviewing for you guys so here's the box that the way it came in so I'm just opening it up and things are already falling out. So so, at the top of the box came this elastic band and if you guys don't know when you do lace, front, wigs or a premade lace front, wigs, it's kind of second nature to add in the last advantage is for extra security. In addition to using adhesive or got to be glue gel when you're using or are you trying to secure the lace? So this is what came in here. They gave me these wick help. They gave me these wig caps. You know how that goes. Here'S a little baggie says ally, pearl 100 % unprocessed human hair, even though deep wave here is actually processed, that's the teeth, and here is the actual wig. So this the wig comes in a little plastic baggie with um with the wig and the hairnet. This is the wig in its natural state. Show you guys. So this is the lace frontal part. It comes with combs yeah, two on the side and then one in the back. It has the adjustable straps too, of course, adjust your head size, and this is the hairline on this, and I'm sure you guys can tell that the knots are not bleached. So that's exactly what I'm about to get into, because in order to have a very, very, very natural-looking lace current we need to reach the knots it's not mandatory. However, for me it is I like to bleach the knots on all of my lace pieces. So this is what we're working with so far, so I just want to show you guys before I start manipulating the hair. I want to show you guys how I pluck it, how I apply it all that, so, let's get right into it. Oh yeah, I forgot to mention they also have care tips on the back of the box, so it says how to care condition here with shampoo no higher than the pH 7. Once a week, Pat hare, with shampoos out there do not directly apply shampoo to the hair, wash the hair going in a downward motion. Finger combing preferred apply, conditioner and comb them here from ends working your way up to the scalp rinse thoroughly natural air, dried. To maintain natural look, do not use heated styling tools when hair is wet, may damage the hair so and then hair maintenance do not use oil products on pond. Here it can cause matting, do not brush your comb, the hair when dry it can cause frizz and ends meet ankle. Do not rub the hair when shampooing or drying the hair do not call curly, curly style, hair finger. Combing recommended avoid heavy and oily styling aid to achieve natural style and avoid using volumizing shampoo. They can frizz out the hair, so yeah just want to kind of run that for you guys before I start bleaching these knots. Okay guys, so I told you guys we're gon na bleach these knots, so I'm just going to show you guys, it's very, very simple and quick to me. I'Ve been bleaching knots for some years now, so I kind of just know how to do this. Like the back of my hand, so I have my little mixing bowl with a spoon. I have my clear off pure white 40 volume developer and then I have my Clairol BW to powder. We all know that this is the OG bleaching powder, probably not the best quality bleaching powder, but it gets the job done and I go back in with my shimmer light shampoo to get rid of the brassiness that this particular bleach leaves behind. So yeah. It'S pretty easy, so I'm just up, and then I used about two sinks level it off so about two scoops and the goal. So when you're bleaching, your knots is to ensure that the consistency of the bleach is very thick so that you can smooth it onto the lace like that. Bless me, okay, so the the goal for bleaching your knots or the consistency of the bleach is to make sure that it's not too runny, and that is thick like toothpaste. So you can soothe that run to the lace, so I kind of eyeball it cuz. I know you know, which is what it's too much, but it should never be runny, so you can see I'm mixing it. That might have that add a little bit more because it's not actually not a liquid at all. I just kind of made everything curdle up, but I rather do it in increments, like that, so I don't have to actually add too much developer into the mixture, so you can see it still curly. Okay, now we have some paste consistency going along and trust me. You do not want to try to be a daredevil, acting like you're gon na be okay. If it is runny, because you don't want the bleach to seep through your hair and bleach accidentally bleach the roots of the lace that shirt. You know that you're working with so just make sure that it's very thick, it's not going to run off of the spoon or whatever apricot that you're using for this method. So, as you can see, this is like super super thick like it's not going anywhere, and this is how I like it well, I think I can loosen it up just a little bit, so maybe just just a little bit. Okay still thick not as dry but thick okay, so that's a one see how that's smooth, but it's not going anywhere period. Okay, so get this developer out of the way - and I know people II may be crazy because I don't have all any gloves but, like I said, I've been doing this for a long time now. So um aside with me, so here I'm turning the unit's kind of inside out, so I can have a better look at it. So I just start from the back and I use the back of this phone because um sometimes I think using a regular applicator brush. Can make it seep through the lace and then this is really just like a effortless smooth application, so this song, I'm doing I'm just smoothing the bleach to the lace. So this is what I'm gon na be doing, so I'm probably gon na fast-forward. This hey guys. So today, I'm gon na be talking to you guys about this wig that I'm wearing right now. This is a premade lace, front wig that I from Ali pearl hair. I will leave all of the links and aspects in the description box below so you guys can. Oh, it's nutty! Well what I have on its head, especially if don't get to hear me or not video. So this lace, front wig, is a deep, deep wave lace, front, wig and 22 inches, and I believe this is 200 % density. So it is pretty fool if I do say so myself. So basically the company created this unit. It comes with adjustable straps and three cones, which I have. I really don't use the cones for, like maybe the one in the back I'll, probably use but then just kind of tuck the end, let the cones that come on the sides and like right here smack dead in the middle of the frontal. I don't want to use this really, no purpose for me to use it because you know it's whatever so um these wigs come in three different cap sizes, small medium and large. I got the medium size which I believe it's 21.5 to 22 inches in circumference by hand. Side is a 22 inches circumference. I probably I probably could have gone up a cap size only because one thing that I really noticed when I would make my own frontal legs was that I will place the frontal in front of the cap a little bit further so that it can cover all Of my edges, because my edges do protrude out pretty far onto my face, especially this side and really on this side as well, even though I think I did, I think I did a decent job, but at the end of the day, some of my edges are Still kind of out, because the whole entire lace front was not able to cover all of my edges, but we got it down for the video. So that's what we all that matters. So if you guys already saw it in the beginning of the video how the weight came to me, how I bleached it not to prepare for making it look as natural as possible and how I applied the unit using the got to be free spray, which is What I've been using so far, if you guys don't know if you guys follow me on instagram, you know closer than all of these other. You know social media accounts. I really don't like to learn front tool. That'Ll work really like to wear lace fronts anymore, strictly because last year I lost my edges due to build up, got to be cool, gel and spray. In my hair and like I remember taking my braids out after one takedown and like literally clumps of hair, which is coming out in the areas where I will be using a lot of the got to be glue, gel and the spray. So after now, it's very traumatized because I really had a bald spot on this side of my head and I lost here on this side. So I said that I just really convert over to closures and my edges start to go back. My interests are 100 % back in action and I'm trying to keep it that way. So I take these wigs off every night. I don't sleep in these wigs anymore. I really need me wearing this frontal wig right now is is something different strictly because of all of this stuff. I'Ve been saying, I've been getting frontals to wear and I've been like nah. I can't even commit to this, but I'm scared. I don't want to lose my hair again and that's just been what it was so um yeah. But aside from that, I really have been confused about this hair strictly because it is deep way, but this hair does not look like deep wave to me. It looks like curly hair and a lot of people who have seen me post about it on Instagram and stuff have been asking me like it's a curly hair and I'm like no, it says deep, wave hair. So I'm just going off of what specified what was specified to me upon receiving this way so um and honestly, this is a very, very great quality here. I'M gon na hold you up. It'S very fluffy. I really don't have anything in it, except for some mousse. Some Aussie conditioner and water, which was in a spray bottle, which I used to you, know, take the hair and I let it air dry. Air drying is asking the best way to do it while the wig is off of your head. So I kept literally just mold the curls together in a uniform pattern, and you know just so it won't get messed up by touching it too much or just being on your head, so yeah. I just prefer to do after try to do the maintenance of this hair, while it's off of my head and really I don't really have to do anything to it. I really like it like it says: 200 % density. I had the least amount. Of course you want, you don't want to see the black dots and I actually did cut a little bit of the lace, excess lace off of the front because, like I said I I just protrude out pretty far so I had to pull the cap down a Little bit further - and it was a little too far on my forehead, so I did cut off a little bit of lace with some hair on it, but it didn't really bother or affect the wig too much. But yes, this is one of their affordable lace, front. Wigs, so if you guys have been looking to try out a Lee pearl hair, I would definitely recommend this lace front wig. If you don't want to make your own front to where you just want to kind of get just of the quality of the hair itself. I would definitely recommend this, like I said it's 22 inches medium cap, size, 200 percent density, natural color. I did not dye this hair at all. This is literally the natural color that a came in to me and, yes, guys, um, that's pretty much it. I hope you guys enjoyed this video make sure you check out the description box for all of the links and all the specs. You guys didn't miss anything and if you have things that you want to take to me or anything that you want to add so make sure you leave that in the comments below - and I will see you guys in my next video bye, guys


Comments
Asher Dellon: Soon as someone says “I was sent a wig”, then I know it’s a fake review. They are getting paid to give the company a good hair review. I can’t stand it.
Devine_Beauty77: This wig is really pretty. I have deep wave hair from beauty forever that imvwaiting to use because in so in love with my curly hair.
Sincerely ThaPoet: The hair is so pretty
Tierra Jones: Just ordered mine. 24 in 150% density. I can’t wait
isitme: The Alipearl deep wave I have does not look like this one. My one has a looser wave.
Jazmine Williams: Youre really giving me Thandie Newton vibes!
Joy King: what was the density of this wig ?
Bubblez Suarez: Your really beautiful... Awesome vid
Bubblez Suarez: What??? Really srry to hear about your edges but what did u do to have your them grow back...??
Itss Pvmpkin: LEXXUSS!!! Where have you been
India Gibbs: Yessss
rihj200: That makeup does not look good or those lashes