Just A Lil Valentine Slay ~ Side Part W/Bang Ft. Hurela Hair #Hurela #Queentea #Sidepartbang
- Posted on 15 February, 2023
- Full Lace Wig
- By Anonymous
Hey Hey my Royal Squad thank you for your continued support!! To my new subscribers welcome and thank you for joining me!! If you just stopping by it’s nice to have you. Please don’t forget to SUBSCRIBE ❤️ I hope you enjoy the video and as Always please like, comment, share and SUBSCRIBE. Keep chasing your dreams and stay Royal ~ Tina
Direct link to wig: https://m.hurela.com/hurela-dark-99j-b...
Length: 16Inches
Texture: Bodywave
Cap Construction: 13x4 lace front
Cap Size: Average
Density: 150%
Hair Color: 99J (Burgandy)
Products Used:
Knot Eraser Kit: https://www.hairfetishdolls.com/collec...
Hot Comb: https://www.amazon.com/Andis-High-Heat...
Foundation: 3D FACE CREATOR - Ruby Kisses HD 2 Color Foundation + Concealer (Level 11)
Melt Belt & Wax Stick https://www.ibhslays.com/
EBIN WONDER LACE SPRAY: https://www.amazon.com/gp/product/B08Q...
Social media info~
Follow Me I Follow Back!
YouTube: https://bit.ly/3zRWpfhQueenTea
Instagram: queentea1969
Facebook: https://www.facebook.com/groups/sipnsl...
Snapchat: msbosslady44
Business Contact Info: [email protected]
Intro Song:Queen Tea
KP Hustle On The Trax
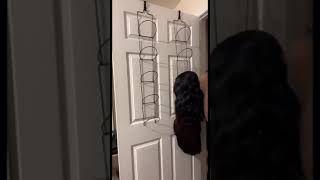
You wake up in the morning with a bad hair day, but you really want your hair to be slayed. Go to Queen T go to Queen T go to Queen tea, hey, hey! It'S Quintin! Welcome back to my channel! If you're new here, thank you for stopping by and don't forget to hit that subscribe button and click that notification Bell, so that you too can become part of my Royal Squad if you're already part of my rose Squad, thank you for continuing to rock with your Girl, you know how much I really appreciate you guys so today, I'm giving you guys a Little Valentine Day look and I saw this hairstyle on Tick Tock, and so I wanted to see if I could duplicate it. So if you want to see how I achieved this look stay tuned, okay here, I'm going and showing you the inside of the wig. It'S a 13 by 4 has three Combs one on each side, one in the back and in decibel straps. Now I'm going to go in and I'm going to tint the lace and I'm just using my Ruby, kisses 3D foundation in the level 11.. Now I'm going in and I'm cutting off the ear tabs and making sure that everything is fitting straight now, I'm going to go in with my even wonder: lace in the gold can I'm going to do two layers, so I spray one layer. Then I blow dry. It then I spray another layer and then I'll blow dry it till it gets sticky. I work in sections, so I start and at my forehead first and then I'm going to go ahead and work my way on each side, foreign foreign. Once I get everything laid down, I go ahead and with my ultimate melt belt and I tie that down for about 10 minutes. Okay, so after I let that sit for about 10 minutes, I go ahead and take off that elastic band. I'M going to go in there with some of my Ruby kisses foundation and I'm just cleaning up the edges to get rid of some of that ashy cast on there and to help it blend a little bit better. Then I'm gon na also go in with my Fantasia Spritz and I'm gon na put that on there, so that I can go ahead and get it to melt even further. Now I'm going in with my wax stick and my hot comb to get all those edges pushed back and then I'll put on that melt belt for that second melt: foreign, foreign, foreign foreign, thank you foreign! So now I'm going to go in I'm going to cut the bangs you guys. I was so scared to do this on camera. Normally I do this type of stuff on my mannequin head, but again I'm trying to level up and step outside of my comfort zone. So now I'm just going in and I'm uh hot combing that to get that bang to kind of lay flat before I flat iron it or I'm sorry before I curled it now I had to work on these bangs and I worked on them and I worked On them I had to cut some more. I had to pull some more hair out. You know just to get them right because, like I said I prepped it on the mannequin head. So once I got it on my head, I needed to see where I had to make some adjustments, so I went ahead and did that and so I finished the bangs actually off camera, but you'll see the final look. Thank you, foreign foreign, okay. So I'm back and I just finished styling the hair and I put on a little bit of makeup, got my little Valentine Day. Look going on so yeah, so this little cutie I picked up from perella hair. This is a 16 inch. I do believe 99j body wave, so I did bleach the knots on this um, but you didn't really have to, but you guys know that I'm extra, so I'm always going to do some extra stuff, always just make things harder for myself. But yes, I believe this is a 16 inch, but I will put all the details Down Below in the description box and it is a 13 by four. So what you guys see me do I went ahead and installed it. I'M using my even gold in the gold can so I just you know, put it all the way. All the way around lay the lace down tied it down with my ultimate melt belt. Let that sit down or uh. You know stay tied down. While I went ahead and did my makeup and then when I took the band off, I went ahead and went in with some more of my Ruby cream foundation um in the level 11 um to kind of just get rid of some of that little ashing and The kind of help it melt in then I went in with my um Fantasia - make a whole Spritz in my little uh Beauty blender this. So I wouldn't get it sprayed everywhere, and you know I can control where I want to put. It went ahead and tied that down and then I went ahead. This is um like I said this is a tick tock viral hack that I've been seeing. I'Ve been seeing it on Tick Tock all over. I might be a little bit late to the party but um, so it's a side part with the bang, and I threw some curls in it just to kind of jazz it up a little bit. But I like it - and I think that I did okay um with the bang, so it's my first time really cutting bangs on camera, not on my canvas yet, but I think that I did okay, so I did do some pre-prep on my mannequin head like I Got the side part part of that where I wanted it, and I got the bang piece part of that where I wanted it and you know braided that I separated that out um and then I had threw some curls in it and I did a little pin. Curl, so I would curl it and I pinned it up and I left it sitting on the mannequin head for a while. I sprayed it down with some Spritz after I curled it to kind of get it to help the curls hold and so um. I think it did okay, I had to go back in and kind of touch the curls up a little bit from when I was messing with it, but I think that I did pretty good. I think that it's a pretty cute look um, definitely Valentine um, to say the least, but I, the hair, is really super soft um. When I did wash it. I did get some bleeding, which I do kind of expect, that with some of these 99j wigs or colored wigs um, but once it dried, I'm not getting any. You know I'm not getting any stains on my hand or anything but like I always tell you guys, I mean, like I don't know, what's gon na happen, if you get caught out in the rainstorm, I don't know um, but once it dries it's cool. I'M not like, I said, I'm not getting any bleeding there, but yeah. So let's go ahead and get into this uh lace. I really do like the lace and stuff on her Bella hair. They um their laces tend to really just melt. I have a few wigs from them and I am absolutely pleased with it. Um here is the sign yeah, so I think that um definitely, I would recommend this wig, especially if you like this color, it's not your typical 99j. It'S a little bit darker, I think, and I think it has a little bit more of a more of maybe a red to it. So it's not like so bright and up like fuchsia like um, but I I'm really digging the color um. I think I'm gon na go ahead and I'm gon na pop some of my not concealer in this part to kind of jazz that part up make that part Pop. Let'S go ahead and do that because I didn't pluck the part or anything so we'll just go in and we'll just put some of this, not concealer in there to kind of make that pop that part Pop then blend it out a little bit yeah there you Go I really like this thing, so I got this at the Dollar Tree, so I got eyeshadow thingy, but I use it to blend out my little when I put in my little foundation and stuff and my four seconds to blend it out in the work. It'S just perfect, but yeah so see just bring that that part to life there. So we're going to go ahead and we're going to get a 360 on this. So you guys can see it um. My the curls probably fell some in the back. So I'm not really sure what the back is looking like, but this is the front. This is the right side. This is the back, and this is the left side, so you made it this far, so go ahead and click that subscribe button and hit that notification Bell and become part of the royal Squad. We have a good good time over here. I hope that you learned something from this tutorial and, if you have please give me a like comment down below, I kind of want to do a get to know me video, so you guys go ahead and drop some questions down in the comment box. Anything you want to know about me about my processes About Wigs, whatever um, because I really like I said I really want to do a get to know me because I have been doing this for a few years now. I feel, like you guys, really know me. You know those that know me in real life yeah. You know me, but those of you that are just my my subscribers that I love so much. You might not know the inner me. So if there's something that you want to know, go ahead drop that down in the comments I respond to all comments I interact in my comments. I love interacting with you guys now, I'm sitting at 350 subscribers I'm trying to get to 500. so go ahead. Yes, click that subscribe button - if you haven't already done so and remember if you don't chase your dreams, you never catch your dreams until next time. Bye, okay, like subscribe below, like subscribe below

Comments
Tricia Murphy: I love this color and the bangs on this wig this one is absolutely beautiful good job slaying this one ☝ ❤️❤️❤️
Denise Howard: Love it!!!
Denise Howard: That color is beautiful