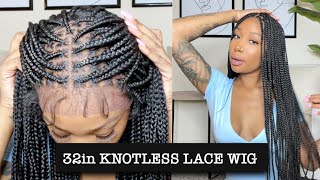
How To Wash Braided Wigs | How To Make Your Braids Wig Look New - **Updated**
- Posted on 06 April, 2021
- Full Lace Wig
- By Anonymous
I share an updated video on how to WASH AND CARE for a BRAIDED WIG. HOW to MAKE YOUR BRAIDED WIG LOOK NEW. I share tips on how to wash and care and maintain your braid wigs.
This is an UPDATED video on how to launder your braided wigs in 2021. I normally get asked by closed friends, how to care for a braided wig or how to revamp a braided wig. This video houses some of the simple tricks i use to get this done. Washing box braids is very important to ensuring yourbraids remain looking brand new and is well maintained and cared for.
#howtowashandcareforabraidedwig #Howtomakebraidswiglooknew #howtorevampbraidedwig #howtolaunderbraidwig #howtocareforbraids #howtowashandcareforabraidedwig #howtowashboxbraids #washingboxbraids
Braids timecode
0:00 Intro
0:54 - Understanding the type of care braid wigs need
2:22 - Products needed for laundering / washing braided wigs
2:40 - Demonstration on The washing laundering process: Washing the braided wigs
5:54 - Demonstration on The washing laundering process: Styling the braided wigs
8:24 - Halfway through styling- Before and after results of the braids wig
9:36 - Adding finishing touches to the braided wigs to ensure it looks well laundered
9:57 - The Final reveal of the laundered braid wig
12:30- Conclusion
SUBSCRIBE TO MY CHANNEL: https://www.youtube.com/user/lotachee?...
CONNECT WITH ME:
Instagram : www.instagram.com/lotachivanessa /
Twitter: www.twitter.com/lotachivanessa
Facebook: www. facebook.com/tachi.ng.9699
Also check out my small business on ig: www.instagram.com/tachi.ng/
_____________
_____________
CHECK OUT MY OTHER VIDEOS:
BRING YOUR OLD WIG BACK TO LIFE :https://youtu.be/NB3wzY9NF-A
HOW TO WASH AND CARE FOR A BRAIDED WIG - HOW TO WASH BOX BRAIDS AND TWISTS NO FRIZZ - https://www.youtube.com/watch?v=F9MLmd...
7 Wig Tips | Storage, Maintenance, Care, Revamp and Revival | Maintain / Restore Your Wigs Beginners - https://www.youtube.com/watch?v=4sBcS0...
- WHAT WENT DOWN DAYS TO MY TRADITIONAL WEDDING!!: https://www.youtube.com/watch?v=jSXmHz...
I post videos every week.
____________
DON’T FORGET TO SUBSCRIBE.
____________
ABOUT ME:
My name is Lotachi Vanessa. I am a Nigerian girl living in Lagos, Nigeria. I am a career woman with many interests in beauty, fashion, food and all things beautiful. I run a number of small businesses from baking to retailing hair and accessories. As you must have guessed, I am a firm believer that multiple streams of Income is the new black. On this channel, I will be creating educating and inspiring content on food, beauty, lifestyle and career by drawing on my own experiences. Come on this journey with me and be inspired. My wish is that you leave my channel with renewed bursts of positive energy and light .
Please, hey guys welcome back again to my channel you're new here. My name is lutachi vanessa and if you are a returning subscriber thanks for stopping by okay so guys today, i've come to do an updated video on laundering. Your braided wig, unlike human hair, wigs braid wigs, need another type of care because this hair, this hair is like made with kanekalon. I don't know what kanekalon is made of some people say it's horse, hair, trying to say it's just made with plastic, but basically it is not real hair, it's not human hair. So, unlike our weaves and our um, our weaves, that weather is made from human hair. These are not made from human hair, and so in as much as it is so beautiful, it is also very very, very easy for these hairs to get um tangled and messy. I did a video previously showing you how i launder my grade week, but this video right now is an updated um week. Video and i think this updated method is going to be like the best way. You should be laundering your weeks in 2021. You get me try to see how i you know go from this like this hair over here that cannot even it cannot even um separate like one one. It'S just a mess like, as you can see, clearly, is a mess. If you don't see how i go from this to looking like a bombshell over there, definitely stay tuned, definitely continue watching and i'm gon na show you a few tips and tricks a few things that i never thought that you could try on your week. So without talking too much, let's just get right into the video all right guys, so we'll start off with the products while we'll be needing. Today we need shampoo and conditioner, preferably moisturizing. I like the tresemme's one optionally. Here we have apple cider, vinegar. We also have hot water, a paddle brush scissors plastic bag and a plastic bowl onto the laundry process um. The first thing you do is take your plastic bowl and put a little bit of water in it and put some shampoo in it. This is the best way i like to wash my wigs and i use a. I basically use my fingers to run down the wigs in a downward motion, after, of course, soaking it in in that water. So you can see how i do it please. This is use a very gentle motion to do this. I also gently wash the closure part of the wig, because i do not want the closure to um to start um shedding or anything like that. So yeah um, just gently wash the closure part and use a downward motion to ensure that you really get out all the debt from your weak. These wigs can easily accumulate a lot of products on to the next one once you've, you've rinsed off the shampoo from the wig and you've dried it with a towel, use a handful of conditioner and douse the wig in conditioner avoid putting conditioner on the closure area. It just really makes the closure weak and i concentrate especially on the lower part of the closure at the closure area, so optionally. This is apple cider, vinegar. I use about five cupfuls of the cup of my apple cider, vinegar, and i mainly concentrate that at the bottom of the wig and as you can see, you see that bunching up that was happening over there. That is no longer um quite visible, and then we use the plastic bag and we just tie it in there with the conditioner and the apple cider vinegar, and we set aside for about 40 minutes for everything to seep in well. After 40 minutes. We are back and we just rinse off the wig, with some water lukewarm. In fact, you can even use like cold water, but not like freezing cold water and then dry it off with a towel, and then please and dry, your wigs. Now you can just see what the wig is. Looking like, you can see, it has a bit of shine to it, thanks to apple cider, vinegar and it's. My fingers can now go through the wig, but you can see it's not as flawless as it can be. So please just set this aside to dry, so i'm setting this aside to dry, like i said you want to air dry, the wig so just space it out a bit so that it dries well and after a few hours the wig has dried completely and you Can see that now that it's dry, even though it's not as bunched up already it's still um, if this will be bunched up and it smells so good. So the next thing you want to do is get your boiling hot water and soak the tips of the wig in it ensure that the closure area penetrates the steam of the hot water. Please be careful not to burn yourself and use a towel to dry this or you can up optionally. You can decide not to use a towel. Just allow the water to seep through it so that it doesn't get bunched up, and then i allow that to a dry in front of a fan on a mannequin, and i just allowed that to you know air dry now on to the most important part, which Is the styling process now this is the week fresh out of all that lingering it smells so amazing, thanks to the tresemme, shampoo and conditioner, i love how it makes the wig smell and i'm using coconut oil here and i'm just going to use a little bit. Please do not over saturate your hair in product, it just builds up and then i go ahead with a hot iron. I set that to about 120 degrees and i'm doing a patch test first, because, as you know, this is no human hair. So we want to ensure that the hair doesn't get burnt. We also divide the hair into sections just so that it's easy for us to manipulate so now. The first thing we do is obviously we've set our hot iron, and i think i set that to about 150 degrees centigrade in the end, so um, basically just that flat ironing the hair, concentrating especially at the bottom part of the hair, where it was bunching up. But i also took that up to um near the closure part of the hair, so um yeah - you just do that for the entire hair um the entire week. If you get what i mean and then yeah just make sure that you get the ends well, please do not ensure that your iron is not too hot. It is going to burn the hair. The temperature i used here was 150, but i kept testing this iron because you never know whether there's a fault with the iron, so um yeah, and i advise that when you do a patch test. Please do a patch test with hair at the back, so that you won't damage visibly damage your hair, no yeah, guys, i'm hoping you can see how the hair is looking. This is on the left. We have the hair that has been done and on the right. We have the hair that has not yet been obviously um flat ironed and you can just tell the difference: can you see how smooth and how nice that is? Looking it's already making me want to leak the screen, oh, let me say yeah so just get rid of some of the extra fly aways i'm using these scissors to obviously just trim through that um and then this tip here use a blow dryer and a comb Or a brush and then that just helps to get rid of some extra flyweights. Now this is what the hair is. Looking like check out the ends. It looks so beautiful. It looks so nice. This looks like braids that have just been done. If you're loving, these tips give this video a like, if you haven't, subscribed, subscribe and yeah so um, let me introduce you guys to your master. What i'm calling this um the mannequin, i'm sure you can see how flawless the ends are. Looking yeah, guys um. I put a little bit of coconut oil. You don't want to over saturate the hair in any kind of products, any kind of oil, so um yeah, that's the update so that, basically, so that it keeps the bounce just like this, so guys. This is the secret that your hairdressers don't want to tell you, i'm also going to use a hold and mousse swiftly if you're liking. This video so far give this video a thumbs up. I'M expecting your comments in the comment section. Did you learn something new? So i hope that with this used always go back and you know launder your wigs yeah guys. I have them guys, you can always brush down the bead. That'S a good thing about um, william bradley, okay, yeah. So guys here is the wig on my head. Obviously it's looking like it's not settling down well, because, obviously you can see what i have to contain it underneath that hair, so yeah, um, yeah, okay, so guys yeah um. I'M sure that you um, obviously can see what the hair looks like yeah, beautiful, yeah beautiful. I know there's only expression attachment this attachment here and i actually bought the closure extremely lightweight, as you can see so. Um yeah just make sure that you're not getting like heavy heavy um xm braided mixers. Trust me know what is i'm going to just apply some mousse on the crown area of my head. Yeah i'll be going to apply some mousse over there just to get rid of some of those extra slices, i'm going to apply any at the tips, because i just like the way it feels naturally once that dries down. It'S just going to be amazing. How it looks and like i said, i'm just going to apply some holding spray over the top of the hair to make sure that it holds everything in place all right, guys, all right guys, all right guys. Thank you guys so much for watching. I appreciate all of you that stayed on till this moment and if you have watched this point and you haven't subscribed come on, are we fighting like i'm sure, i'm not fighting? I know that we are not fighting so please smash that subscribe button down below give this video a thumbs up, and let me know your comments. Let me know what you learned. Let me know how you'll be using these tips and please don't spend your money on hairdressers again, don't spend your money or don't throw them away your weeks because you feel like they are old. You can always revamp and revive. It trust me trust me all right, guys i'll see you guys in my next one. It'S been so long say:


Comments
stylebyejay: Wow! Didn’t know I could revamp my braided wigs to perfection. Thanks for this tutorial
Mayowa Owoeye: This came at right time, I was already thinking of bringing my braided wig out for spring. Now i can go and slay
Everythings Plug: This was so good!!! Definitely learnt something absolutely new!
ABIGAIL IFEOMA: Thank you so much for this beautiful video it’s so informative and you explain so well that anyone can do it ❤️
ALLY BERRY: Thanks for sharing this… let me get to it. Haven’t worn my braided wig for a while now and the amount to revamp it at the salon is ridiculous. So I decided to check YouTube. And I have everything at home. Except styling mousse sha.
Njesh Kymani: Wow!!!looks just as good as new
Mae Ekaette: This is really helpful. Would really love tips on how to launder curly hair e.g the loose curled ends
Correctcode6: Thanks for sharing this
Mae Ekaette: Definitely learnt something new
Nazerinne: Just Wow!!!!
JOY: Omg it looks soo good. Looks new wow you used a straightener and e no burn oya lick screen na
JOY: I wish i saw this video before leaving 9ja i left my braided wig back in 9ja for this same reason is that scissors not a kitchen scissors
Iheadikada Ugwu: omo... see the tips of the hair... like brand new!!! Thanks for sharing
Hassan Adebanke: I tried revamping my braided wig and it's wavy presently which I don't like How can I go about it and get the original straight result please?
Blessing Theodore: Nice one ma