How To Dye Wig Without Dying Lace
- Posted on 05 November, 2017
- Full Lace Wig
- By Anonymous
SUBSCRIBE! :)
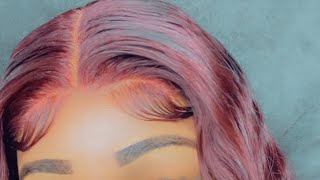
In this video I show you how I dye my blonde wig red. Although I did dye the lace red in some areas where I got sloppy you can use the same technique I used at the hairline area to dye your whole wig if you want to be extra careful.
Wig is from Best Lace Wigs: http://bit.ly/2ieUl8k
This exact wig: http://bit.ly/2gUmemg
My unboxing of this wig: http://bit.ly/2gMaYYD
Customize a wig hairline to look more natural: http://bit.ly/2zi1cbQ
Colour used; Loreal Feria #74: http://amzn.to/2zzcMQ6
Follow my IG: @Janna_Niki
Hey guys welcome back to my channel so as you can probably notice, I'm a redhead now just kidding it's a wig. You probably knew that from the title or something. But if you didn't come into this video, knowing it was a wig, would you think it was? Let me know in the comments below, if you think this looks natural or if it looks really Wiggy, I'm curious to know your opinion and what do you think about the red color? I have dyed my hair, like my actual hair red in the past like a few years ago, and I really liked it being a redhead is like the second best thing to being a blonde. I feel like redheads, have a lot of fun too. So in today's video, I'm gon na show you how I die my wig, this red color, so basically how I took it from this blonde color to this color right here. It'S probably gon na be pretty simple, just straightforward: how iodide the wig and what my process was. So I got this week from best lace, wigs I'll link, the exact mic I got down below and I also have a couple other well. I have like two other videos about this week, so I have an unboxing, so you can see what this would look like straight from the box, and I have another video on how I made the hair line. Look a little bit more natural versus like that think. Wiggy doll, hair look, so let me know if this looks good to you guys um, so I'll link those down below if you want to check that out as well, but in this video, I'm just gon na show you how I died. This wig from the original blonde color like this to this color. Here it's a pretty simple but I'm just gon na show you the process that I went through and yeah. Let'S go straining hello, that's me just showing you the wig, so I put it on to the styrofoam head, so it'll be easier to die, and this is the color I'm going to be using from L'Oreal, obviously write it down in the description, so you can find The exact color, if that's, what you're looking for they have a really nice red hair collection. So I'm just showing you. This is how I mix it. I pour it into the bottle first to shake it and then I'll put it in the bowl and lifehack okay. So this is the stool for my here and I found out that the hole on the bottom of the Styrofoam head would fit onto the stool, so yeah. If you can find something like that to put your head on like your styrofoam head on, it makes it so much easier because then it doesn't move around and you can really get at it. Okay, so the way I start is I work section by section from the bottom, so I just take a small section like that and then I'll start working in the hair dye and make sure to get the bottoms and underneath and then, when I get to the Top I like to put all the hair off to one side and then start from the opposite side. Oh - and here I got some seven, what's the called dye on the lace, I was freaking out I'll show you that later in the video, okay, sorry, my voice sounds like a little sick, because I am sick. But let's ignore that so yeah I'll just take section by section and go through and then when we get to the top of the head or near the hairline. This is where I feel like you have to be really careful as to not die the lace. So, as you can see here, I'm taking a good amount, but I'm not bringing it all the way down to the root, so I'll kind of put it in the middle of the hairline. And then, when I get to the root, all I'm taking lighter strokes and then once there's like less color on the brush I'll kind of brush through the roots a little more lightly and still saturating the hair. But I'm just being very careful not to drop anything on the actual lace. So that's what I'm doing here so, as you can see, I'm being a little bit more light handed a little bit more gentle once I get to the actual root area, just showing you over there as well, and so I just washed it all out - and this Is what it looks like fresh out of the shower just giving you a look and, as you can see, there is no hair dye on the lace, and this is the final look on. I'M really liking this color. So this is the final color. So I probably okay imma show you you the parting here, so you can see the blonde brutes and kind of see it here as well. I probably could have pulled the red down a little bit lower, but honestly, I think it's fine, for this bright spot is just because um of where the highlights are placed, there's, like literally, should take off the wig and show you there's literally polka dots, don't mind. My hair, but I just wanted to show you what the inside look like so here. Let me just kind of flip it around. So this is all dyed red. You can see the splotches. This is the back of the head. Oh, my guess I did get some on the front too, there's a little spot there, but well. I was mainly concerned about there's some spots like by the actual hairline. I really didn't want that. So, overall it turned out pretty good and then I think you can kind of see there. The polka dots that I was talking about in the lace and I don't know how they made it, but in every one of those polka dots. That'S where the highlight color comes through, so I'm not really too sure if that's like how they plan it or how the actual process of making the wig goes. But all those polka dots are like the highlighted pieces, so you can kind of see. Actually, I don't know if you can really pick it up on the camera, but like those brighter pieces, those are all like the highlight pieces, because this wig has about maybe three different colors in it and then, if you look at the parting, I actually I thought That was one of the polka dots, but it's not what that is is the actual band right here, so you can see that through the parting, which I don't totally love but yeah, the parting is something I'm gon na keep working on. I think I just am like move my wig cap closer or I don't know, I'm gon na figure something out I'll. Let you guys know if I do something, but it's not that bad, but it needs some work but yeah. I just want you to get that. Yeah, it so gives it like this little bright spot here and then my wig cap is back here so don't mind the actual like parting, I'm just trying to show you the blonde routing, I'm happy with the way it turned out, because I was just really nervous About dyeing the actual lace right, I really didn't want to have to go through that and like go through the process of removing the color and all that stuff. So, that's why I you know left that room there with the blonde routing it's in the back, where I didn't really care so much about the routing or anything like. So you don't see it cuz, I'm not gon na part, my hair all the way down, but if I did part my hair all the way down like in the back, you would see that the lace is dyed red and it looks weird right. I mean in the back it looks like uh zit makes your hair like honey. You don't really sing it, but if I had like a red parting here, that would look really weird and it would just be a house a little deal with. So I'm really glad that I didn't have to deal with that. I'Ve seen videos where you can just use haircolor remover on the lace and that will get it out, but it just seemed like so much hassle. So I didn't have to go through that. So yeah tip for you just to be very careful around the roots if you're dyeing your wig, especially like a darker color, so yeah overall, I am very pleased with how it turned out, if you guys have any questions about dyeing wigs or anything like that that You want to ask me: just leave them in the comments below and I'll be happy to answer your questions and if you found this video helpful, please give it a like and subscribe. I'M trying to make my videos so maybe I'll so you guys can stick around and until next time I'll see you guys later bye.


Comments
Janna Niki: Update: You can also try spraying the inside of the lace with some got2b glued spray which will add some protections to the lace. You can also try spreading vaseline on the inside of the lace to protect it, and then use a dish soap to wash off the vaseline after.
sitto wardi: It looks so natural. I honestly would never have known you are wearing a wig. Great job!
Loving Life: FYI-- The wig-head will also fit on the spout of a large, empty wine bottle. You can even fill the bottle with water to make everything more stable. The new color is beautiful on you!
L S: Oh wow, that color looks great on you! This is the exact video I needed too, I have a blonde wig that I want to dye auburn and I wanted to see someone else do it first =)
Shoshi: It looks amazing. Using the highlighted wig, as opposed to one that was bleach blonde all over created a multi-tonal effect which made it look more like a natural red. I am going to be getting a wig to dye ginger, and I was originally going to get one in the lightest blonde available, but this has made me change my mind! Your technique for avoiding the lace also made it look more natural. Very helpful video, thanks for sharing!
Lori M: I love this red eye job!!! I had no.idea you could just use box due on wigs!!! I have two blonde wigs..that is love to dye, since blonde really isn't my color...and this red was amazing!!!! It looks so natural!
Dawn Rambles: Love it! Great info and it does look real and not fake.
Tammie Parrish Miller: I'm sure you already know about this, but in case you don't, I use my face powder and a small makeup brush and dab it into the lace on the part. I do it underneath and on top. It totally masks the lace and really helps blend that band. I really hate those bands. I wish it wasn't so prominent but if you want a lace front, that's what your gonna get. I think it turned out great by the way! I would have made my partings a little thinner as I got toward the top just to be a bit more precise with the color so you didn't get it on the lace, but you really did a great job and you look great as a red head. I'm sure you have fun no matter what color your hair is!
Supergurl: It looks amazing!!!
Lady Aradia: I sprayed a few coats of hairspray on the lace inside a wig and let each coat dry before doing a hair color to try to help to keep hair color off the lace. I have also heard of people spraying clear spray paint on the lace inside the cap to protect it from hair dye.
NADINE FORLIZZI: Get your foundation on a Kabul brush and cover the inside of the lace. Don't glob it on but dab it. It will help mask the parting.
NoBlandMakeup: This is so useful!! Now if only I could find a cheap lace front to play around with lol
Ea Jesse: It looks totally natural and real.
Agnieszka Skalska: This color is my hair goal
Irina Brilliant: Great video. I found very helpful
stephanie moody: it looks natural too me it gives me jessica rabbit vibe and it looks great on you.
Natasha Eccles: What I see most ladies do is foundation or concealer being put on the lace in the hair parting.
BelleDeJour224: How long do these wigs last?
ThatThick WhiteSnickers: Really suits your complexion
JHR: 100% natural omg
ThatThick WhiteSnickers: Super natural
Eliza May: Suits your skin colouring. Nice.
Lil Paws: Swear red hair is better 1. Dark red hair / red orange hair 2.dirty blonde 3.light brown 4.blonde 5. Very light blonde 6.brown 7. black
Julia Lane: You should do your research. If you sprayed your lace with knot sealer be4 coloring wig. It will protect it
Debra's Momma Drama: was this human hair? was it synthetic? can you dye synthetic
M. J: Natural
Bored Weegie: Is this human hair the link not working for me. .it say least in my country ❤️