How To Do: Knotless Jumbo Box Braids On Lace Wig | Pink And Black Omber Brads Style | Vivian
- Posted on 27 October, 2020
- Full Lace Wig
- By Anonymous
Hello everyone, welcome back to my channel!
In today's video, I'll be showing you HOW TO DO: Knotless Jumbo Box Braids On Lace Wig. I hope you find this braid tutorial helpful.
Please don't forget to give it a big thumbs up if you enjoy the video.
Thanks for watching, have a blessed day.
HOW-TO: Jumbo Feed-in Braids On a Full Lace Wig | DIY Half Up Half Down Braided Style https://youtu.be/butN90IyfV8
https://instagram.com/vivianbeautyands...
My second channel https://youtube.com/c/StylebyViv ( Sewing channel )
Braiding Hair 3Tone Ombre Pink to Purple https://amzn.to/3oIcU6u
Wig mannequin head https://s.click.aliexpress.com/e/_Acb7...
Adjustable Wig Stand https://s.click.aliexpress.com/e/_9yzN...
✨SWISS LACE NET FOR WIG MAKING✨
1/4 Yard Swiss Lace https://s.click.aliexpress.com/e/_A9cN...
5 Style Closure Lace 4*4, 5*5,13*4, 13*6, 360 https://s.click.aliexpress.com/e/_9JqK...
✨CROCHET LATCH HOOK AND VENTILATING HOOK✨
3 Pcs Pin ventilating needle https://s.click.aliexpress.com/e/_AN69...
Small/ Tiny Latch Hook https://s.click.aliexpress.com/e/_A4Eh...
✨✨CAPS✨✨
Spandex Dome cap and Mesh cap (Small-Large Size) https://s.click.aliexpress.com/e/_ADYh...
Thick Mesh Dome Cap (Net Free Size) https://s.click.aliexpress.com/e/_A328...
Black Elastic Band For Wigs https://s.click.aliexpress.com/e/_A2dR...
More videos
JUST ONE BUNDLE NO PRE-MADE CLOSURE: How-to/ DIY Closure Wig Side Part https://youtu.be/-oQXwQ49lrc
How To Natural Texture Hair: DIY U-part Crochet Wig With Leave Out https://youtu.be/kXzGeAApKGs
HOW-TO: Lace Frontal Crochet Wig Using One Pack Of Braiding Hair! |Straight Crochet Wig https://youtu.be/bVY7Ulf9LfU
How To Make A Lace Frontal Crochet Wig | Yaki Straight Hair https://youtu.be/3PMboDarNCs
DIY 2*5 Lace Closure Straight Crochet Wig Using Braiding Hair https://youtu.be/FbjtbxL_1xU
HOW-TO Braided Lace Front Wig With Baby Hair Using All My Leftover Braiding Hair | DIY Ombre: https://youtu.be/dtU2WsZGsBE
HOW-TO: DIY 8x6 Lace Closure Wig With Kinky Curly Human Hair Bundles https://youtu.be/6BKSo9sNpGE
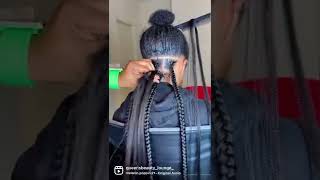
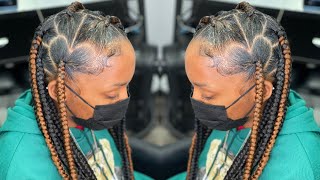
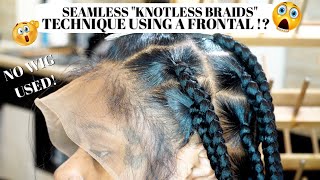
Hello, everyone welcome back to my channel if you're new here you're welcome - and i hope you all are doing well so in today's video i'm going to be showing you how to make a jumbo box braid. So well with that said, let's go straight into the video. So the first thing we're going to be doing is to make a line so we're going to be doing like line by line. So, first you want to go ahead in session of your first line, so once you're done doing that this next step is to make a session for the box. Braid again, you want to make sure to come through the hair to make sure it's tangle, free, okay. So once you make sure of that, you want to go ahead and make your session for the box braid. Okay. So once you have your session, the next step is to take your edge, control or hair wax and apply that on the roots of the hair. So to this we have to tame everything in place. The little hair or the ones that are proven, stubborn trying to run away from the group, so the edge control or the hair wax will help to tame everything in place and also adding the air. The hair box or edge control on the roots of the hair kind of helps you to give you the neat, uh and beautiful finish on the braid. As you can see right there, the parts look really neat again. You want to go ahead and comb that, through the hair, okay, so before we start, you want to go ahead and take the braiding hair, the amount of braiding hair you're going to be using for your jumbo box braid and divide that into three equal pieces. Okay, so once that is done, the next step is to move on to the braiding. So for the braiding, you want to go ahead and divide the hair into three sec into three sections as well as you can see in this video and go ahead and braid. It so you want to make sure to have a firm grip on the bottom, so you just want to cross it over like one time so next you want to take the first piece of hair and place it in between your index finger and your tongue, just As you can see in this video, so you unless you want to rotate the hair on that, you want to rotate the braiding hair extension on the the main hair okay. So once that is done, you want to go ahead and braid. It again just pass it over like that. So again, you want to take the second piece of hair all right and place it again between your index finger and your thumb subject. You just want to tucked it in so again. You want to go ahead and rotate. The braiding hair extension under the main hair so once that is done, go ahead and continue braiding just cross it over one and back around okay. So just like that, so next you want to go ahead and take the third one and do the same thing place. It in between the index finger and the thumb making sure to tucked it in so the hair i'm using is a bit slippery. So i'm trying to maintain the hold on the uh on the hair. So again do the same thing: rotate the braiding hair extension under the main hair that, if you're using a colored hair, this part is really uh impotent. So you want to make sure to rotate the braiding hair extension under the main hair. So once you add your toad braiding hair, this is how it should be looking so for this box braid, the hair i'm using again is really really slippery and it's not the same texture with expression, braiding hair, so with expression, braiding hair. Once you add it, it's going to stay put, but when you're using a different texture of hair and if the hair is slippery, it's a bit difficult to have it right. So for this case, you want to make sure you have a firm grip on the hair. Okay, all right, so i'm going to show you guys one more time, so we're going to be doing the same thing. I'Ve already applied the hair, my head, so i've already applied the hair wax on the roots of the hair. Also, i've already went ahead and divide the braiding hair extension into three pieces. So right now, i'm going ahead to divide the main hair into three. So that way i can continue braiding. So again, you want to go ahead and start by braiding the hair. You want to make sure to have a firm grip, all right, just like that. So next you want to take your first piece of hair and add it again. You want to place it between your index finger and your thumb, making sure to tuck the braiding hair extension under the main hair, just like that, okay and just braid, it again rotate the braiding hair extension under the main hair and pass it over just like that. So next you want to take the second piece of braiding hair and do the same thing so take that again place it in between the index finger and your thumb just like that. Okay, as you can see right, there again rotate the braiding hair extension under the main hair and continue braiding just like that, pass it over making sure to maintain the hold on the hair okay. So next you want to go ahead and take the top piece of braiding hair and do the same thing place it in between the index finger and the tongue. Okay, just like that again remember: rotate the braiding hair extension under the main hair. So once that is done now, it's just for you to continue braiding the hair. Okay. So once you add the third one again, you want to go ahead and continue braiding the hair, so the next part, if you're using a colored, hair or an ombre hair. As you can see in this video, you want to use the same technique. So you want to rotate the braiding hair extension on that your natural hair or under the hair on the wig so get into the ombre part of this braiding hair that i'm using i'm going to be rotating the black hair color under the colored hair. As you can see right here and continue braiding, so you want to do that again: rotate the black hair color under the colored hair and continue braiding. So this we have this. We have to hide the dark hair color in between the colored hair. So, just like that wrap it around the dark, hair color and continue braiding so yeah, i just uh did that and braid it all the way to the tip so because of the texture of hair. Because of the texture of hair that i'm using it's not like a here where you braid it, and then you twist the tip of the hair and it's going to stay put with the texture of hair that i'm working with today with this, if i decide to Twist, the bottom it will unravel so what i did i decided to braid it all the way to the tip, and i did a really tight braid on the tip so that had to seal everything in place again. The hair is really slippery. The texture is totally different from expression brady head. Okay, so as always, you want to make sure that the next braid you place on top falls between the space on the bottom. So when you make the session want to make sure that it falls between the space on the bottom, okay, so once you make sure of that, go ahead and use the same technique and do your knot less box, braid, okay! So right now i'm going ahead to do the tight braid on the bottom part of the braid. So i'm just going to hate to take my time and braid. It make sure it's tight because i don't want it to unravel, although i'm still going to be dipping the tip of the braid in hot water, but i don't want it to unravel before dipping them in hot water. So i'm just going ahead taking my time to make sure i have the ends sealed by doing a super tight braid on the bottom. So by doing the super tight braid on the bottom also helps to give you the thin finish at the end. You might be the one okay guys, so we have come to the end of today's video, so this is the two-part video, because i have a different style for the front of the wig, but for now this is the end of the not lace box braid. So i hope you find this video helpful. I hope you enjoyed this video. If you do, please don't forget to give it a big thumbs up and also, if you're new to my channel, please don't forget to hit subscribe button down below if you already subscribed. Thank you so much for subscribing. Thank you so much for popping by today and again i'm going to be posting a second part of this video showing you guys the front of the wig, because the front is going to be a different style. So that's why i'm cutting this video into two parts. If i decide to put all the clips in one it's going to be too long, so i don't want to bore you guys with a super long video, so i decided to divide it into two parts. Okay, so this is the first part which is the uh, the not less box braid pad, so the next one will be the full wig. Okay, all right guys! Thank you all so much for watching. Thank you all so much for popping by today and i'll see you all in my next one. You

Comments
Queen Irene Mckibbens: Good morning sis! How are you doing on this blessed Tuesday morning so far and love how you done your hair it is beautiful ❤️
Fantisha Sherifa: Hey n gm Vivian! Very informative video! I love how ur very detailed!
Temitope Olaide: How do you make the full lace wig, without a cap
Yanna Summer: Heyy, Thks for this How to vid .really helpls alot. Do you think you could do a parting video on How to part for large box braids.thks
Fatima Abdallah: I love all ur work they are really amazing, pls what's the durability of the lase frontal u made before now, does it last for a long time? Am sorry Am not supposed to ask it hear but pls I really want to know cause u are an aspiration to lives, thank u
Amber Bond: Where do you purchase the full lace wigs?
Fatima Abdallah: Pls can any other lace be used apart from Swiss lace
Aïssatou Bâ: Very nice viviane
Roberta Drummond: Blessing my Queen
Temitope Olaide: God bless you
kim song: I want to other for the hair
luz gomez: Vivin i want a video how paint a wig kanekalon