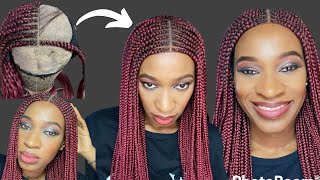
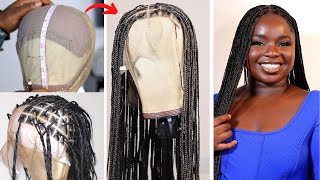
Diy! How To Make A 360Closure Wig Cap For Braided Wigs Making. Easy And Quick Steps.
- Posted on 16 October, 2020
- Full Lace Wig
- By Anonymous
Hey beauties! Welcome back to another interesting video. In today's video, I showed how you can make your 360closure using the easiest formula I made. Hope you find this video helpful and interesting. And please don't forget to subscribe to my channel for more videos.
Check my other videos out
How to make a frontal
How to make a lace frontal wig cap
How to make a cornrows wig without a human hair closure
To order my braided wigs and wig caps, click on any of these links
Whatsapp Message Serenity Hairz on WhatsApp. https://wa.me/message/K6SO75G2RD2KL1
Facebookhttps://www.facebook.com/serenityhairz...
www.instagram.com/serenitybeauty18
For business and collaborations you will get me on here
Thanks for stopping by my channel ❤❤❤
So beautiful people welcome to my channel in case you're stopping by for the first time hi. My name is welcome and in this channel i show my tips, my tricks, tutorials, hair, tutorials, beauty, tutorials and the lifestyle, so don't forget to hit that subscribe button. So you join this family, this amazing family and hit the notification bell icon, so you get notified whenever i post new videos for you, my old subscribers, i'm very very grateful. I appreciate your coming back. I appreciate your support so in today's video i want to show you in details, step by step, how i made this three system recap if you're interested in saying that you have to definitely keep on watching sit back relax. I will see you guys soon. Now we are back so i'll, be you before this same tutorial i'll, be knitting, your swiss lace for this video, i'm using twist less than your needle, whatever type of little ballet beast mommy do a cup any wig cap of choice for this video, i'm using a Network then you're measuring tape. Let'S go first of all, i always start by. You know making sure that your hair is laid to the girls literally laid flat little, because then you measure your head pyramids very much out. Now your ear to ear my head to ear from the front is 11 inches. Then i will go ahead and measure my ear to ear from the back the way i'm doing in this video um. It came out to be 10 inches. Then i'll, go ahead to measure my head circumference by wrapping the tape measuring tape around slowly around my head. As you can see, my sacrifice is 21 inches. So when you do the mathematics, 11 inches plus 10 inches, that is 21 inches. I have to make sure that i'm on the right track, then i'll go ahead and make the measurement and that's to maturize the measurement. You know by cutting out all the measurements i already made. My the piece that will be up the front is 11 inches. Then the width should be 6 inches. You know i have to have enough space enough room in case. I want to do baby hairs so after measuring it then i use my marker, my foundation and makeup brush flat brush to mark out where the six inches falls. Then i will use my pair of scissors and you know cut out the measured parts same piece. I added extra half inch, so you know i'm going to because i'll be sewing down the pieces together then, after that, the next one we cut out our measure and cut out is the piece that will go to the back, so that one will be 10 by 3 inches that's 10 inches length and 3 inches width and after measuring it out, i cut it off using my scissors as well. Then i bring out the piece guys. I am super excited to do this tutorial because i have been thinking. I'Ve been cracking my head. Even thinking of this making this thinking of making this wake up, i was giving me a lot of stress. I searched on youtube. No one was giving me a clear video of what to do so. I have to figure it out myself. I did the mathematics. I didn't have some chatting and doing everything i can do, but i'm very very excited. You know that i got this so i decided to come and share with it with you guys. You know i like to share. I will share everything i learn i'll come and share with you guys. So these are the pieces i'll be working with. Then i'm introducing my canvas head now and start up in the pieces. Let'S stop fall. I always start with the piece that goes to the back. You know, then, the one in front i pin them together using my pins before i proceed to sewing them down, then, after making sure everything is set in place using my pins, so guys this part, you know the mistake. I made yes because i'm going to tell my mistake so that in your own um same time you don't make some mistake. Instead of cut adding extra half inch make sure you add, like one inch pills, i'm finding it difficult to mesh these pieces together. That'S what i've been fighting with. I got, but thank god everything came out fine. So i don't want you to make the same mistake. You know i've tried it. I'Ve gone this way. I don't want you to repeat that mistake. Make sure you add extra enough extra. Then, after pinning them down together, i'll start sewing them and for the sewing i tried. I looked for a straight swing shred that matches the color of the net list, but the one i found is the one i got almost the same color, but this one is a little bit brighter than the swiss lace, but never mind i'll still work with it. Then this is me, sewing down the pieces together using the my needle. You don't need this. We need to use this cup metal, that's the one i can find at the moment then sew the pieces together. As i'm doing, i will show you this part on camera. At the end, other part, i will do it off camera i'll, come back and show you the finished look guys. I forgot to mention that the canvas head i'm using in this video is 21 inches. Okay. So if your hair circumference is 22, you use the conversation. So this one is small size of week, so my head is size. Small, i can use 21 or 21.5 even depends on one that uses 21.5 pounds to use this wig cap so make sure you use the right converse hedge for manufacturing hedge, when making this video or when making this wake up. Please make sure you sew the net together when sewing, make sure that you are putting the needle that little passes through the two laces make sure i sew them together so guys, as you can see from my voice. I'M very very sad. This is the middle of the night that i'm doing this very so uh. Please bear with me again. I want to beg you if you have not subscribed to my channel. Please subscribe, share this video and make this video to go forever. I got the code, you know what it means that i got this girl that i finally got discouraged share. This video share with family and friends share with people that you think that need to see this video keep sharing and please, if you haven't, subscribed subscribe to my channel. Let'S get this ministry to the permanent site. You know please subscribe subscribe. Please keep subscribing. Let me know what you think about this recap in the comment section: okay and i'll be adding this recap in my with collections, my um, when i am among my projects, you can now order for this recap. As i said in my previous video, you can order social media cap frontally cup braided wigs. Even this one, the other one is coming. Let me not mention for the new in this channel, i'm going to give you back-to-back hacks for those difficult, tutorials i'll, be giving them to you all. I needed to do just to subscribe because all these things when i see that people are watching my video, it makes me happy it makes me want to do more. You know show me love share this video comment comment. Let me know what you think about this tutorial share, like you know like this video. If you haven't subscribe and subscribe whenever i see these things happening on my channel, it makes me happy - and i would like to do more and more not to entertain and to keep you coming. How so tired, then, after sewing, make sure that you secure the knot properly the way i'm doing here, then you cut off the excess stretch. Okay, so i'll go ahead and do the other part of camera side stage i'll come back and show you so guys. This is what the wig is looking like. Now this is the first phase. The first process, then we're going to the next stage, which is attaching it so into our weak cap. First of all use the recap that i'm using for the video that's the net cap place it on my canvas head. Do what i'm doing make sure that it is laid flat and smooth, then i'll, introduce the 360 closure make sure that the edge the back of the closure is. I am of the same place on the length with the recap or the back place, make sure you place it properly before you slow it down till you recap, then, after making sure everything is well set, then i start sewing it down. Just sit back and watch what i'm doing so. Let me know in the comment section, if you guys gon na try this. If you try this, let me know tag me. Let me know that you tried it. Yes i'll, be excited to see your own type. Your own um cap, you produce, or you made so guys, keep watching. I will come back again i'll. Show you i'll talk to you, so i'm so tired. My please bear with me so now so so guys after sewing it on the recap. I will go ahead and cut off this part. It says cup and so guys i will still leave the link yeah you can buy my product from in the description box, so feel free to check them out and make beautiful an amazing better week. Also, if you want to order your wake cap beat any type of wig cap closure with cup front. How we cut, including these three system, i'll put the links to how you can get them and please don't forget to subscribe. If you haven't subscribed yet - and let me know what you guys think about this tutorial - i hope i tried so guys. Don'T forget i ship worldwide, so this house she's, not barrier wherever you are. I will shift to you. Do supporting your girl share this video. You know comment, i want to see what you guys your thoughts on this recap. So after cutting it off, i will go ahead. You know and try it on my camera's head and also try it on my own head. You have to test our work to see if i try. So this is what it looks like on the canvas head. So guys don't forget to check out of my videos. I will leave some on top of the screen. Then, at the end of this video i will leave my playlist. Don'T forget to check out my videos you'll, be like them they're, interesting videos as well, so guys. This is what it looks like on my head. I am super proud of myself. So what do you guys think about this? It looks so professional just check out and stay tuned. I'M going to come back again in my next video to show you how i ventilate this wig cap. So thank you very much for sticking with me. I hope to see you again in my next video till 10 remain blessed and stay fabulous. I love you. I will see you guys again thanks for watching bye,


Comments
Iyekeoretin Sylvia: This is absolutely awesome, I will definitely try to make my own 360 lace closure. Thank you for sharing , love your work and it inspires me
Given's Closet.: Amazingly done, thank you really needed this
Uchenna Iheme: Beautifully done. Thanks for sharing
Adannaya Oma Umehea: thank you so much. you have no idea how helpful your videos have been to me♥️
Juliet Onyedikwa: Thank you very much for this, you are highly appreciated. Much love from me. Can't wait to see you make a wig with it
Deborah Adeniyi: You're doing a great job
Benita Jonah: Your videos are really life saving .
Debbie Ifeoma: Thanks sister, God bless you I have been searching for this
king unknown: Big sis thanks for sharing with us.u made it easy.
luposhbeauty: Beautiful
reign220: This is amazing work But i wanted to ask cant it work if you just cut the lace direct to 21 and not dividing it in half like 11 and 10?
Joan Wickham: Awesome
Sylvia Chisom: Lovely
Bella Charles: Good job ma'am
Sylvia Chisom: I can't wait for you to make a wig with this
Iyekeoretin Sylvia: What is the texture of the lace like, is it very soft or strong because the one I first got didn't work well for me cos it was too soft, please reply
loverainthunder: Thank you.
mc potoski news: Dis is really good I am here to learn
Martha Ossai: Thanks
Ajiboro Olaide: How did you get the measurements for the width
Temi Kojo: Pls can you make a video of how to attach elastic band to the 360..... thanks
Nifemi Aremo: Nice
karen nancy: How can I get the frontal wig cap from you,and where is your location
Titilope Abimbola: Good job. Where can I get there lace plsa
Iyekeoretin Sylvia: Where can I find the Swiss lace please
Ebubeogu Ruth: Can I use mannequin head instead of canvass head
queen Esther: Pls make a wig with it and show the installation
Goddess Manbo: Child you got patience great video
Ebubeogu Ruth: Please, how can I get this swiss lace, am in Lagos
Temi Kojo: Thank you so much for this clear description Pls what kind of net can I buy...the one I got is not strong. I just subscribed to your channel
Enoch Kunda: Where can I get the race
Kerry Carol: What material is that please..
Arinola06 Funmilayo: How can I get the cap and the your location
Neisha James TV: I would like if we can do a collaboration