Crochet Braid Wig | From Start To Finish! (Marley Hair Take #2)
- Posted on 09 March, 2015
- Full Lace Wig
- By Anonymous
SUBSCRIBERS PLEASE contact me at:
Products Mentioned WERE ALL PURCHASED AT A LOCAL BEAUTY SUPPLY STORE:
FOUR PACKS OF Freetress Equal Cuban Twist 16 inch Color #4 ($5.99/pack)
ONE PACK of Janet Collection Afro Marley Braid M4/27 ($4.99/pack)
Biosilk Thickening Conditioner (OPTIONAL)
Taliah Waajid Curly Curl Cream (OPTIONAL)
Fantasia High Potency Intercellular Hair Polisher Styling Foam (OPTIONAL)
Diane Cold Wave Rod 9/16" or PURPLE COLOR RODS! (brand may vary, but you can use WHATEVER ROD SIZE YOU'D LIKE)
Nylon Mesh Net Wig Cap ($1.99)
Latch Hook Needle (Can use beading tool in place of needle) ($0.99)
FREQUENTLY ASKED QUESTIONS:
Watch - Michael Kors Women's Slim Runway Watch Gold
Lipstick - Mac "All Fired Up"
Music: "The Champ" by houseshoes
http://www.soundcloud.com/houseshoes (CHECK OUT HOUSESHOES!)
Visit My Crochet Braid Playlist to LEARN HOW TO INSTALL CROCHET BRAIDS LIKE A PRO:
http://www.youtube.com/playlist?list=P...
For more videos on Crochet Braids (A Form of Protective Styling), Check out the following videos:
How To | Braiding Pattern for Crochet Braids (& Hair Care)
How to | Installing Crochet Braids / Crochet Braid Installation
HOW TO | REALLY WASH YOUR CROCHET BRAIDS & SCALP #tastePINKDELIVERS (Pure Comedy)
How To | TAKE DOWN / REMOVE Crochet Braids FAST ! (DEMO)
CROCHET BRAID WIG | FROM START TO FINISH! (MARLEY HAIR TAKE #2)
EASY DIY | Natural Looking Crochet Braid Wig (Using Harlem Braid)
How to | FULL Crochet Braid Tutorial by tastePINK (entire process)
Crochet Braids | Scalp (Moisture) Maintenance Routine
How To | Maintain Crochet Braids
How To | Night time Routine for Crochet Braids
How To | Crochet Braids Using Marley Hair
How To | Maintain Crochet Braids Using Marley Hair
How To | Install Freetress Deep Twist Crochet Braids
How To | Nighttime Routine for Freetress Deep Twist
How To | Crochet Braids Using Kanekalon (Invisible/Knotless Method)
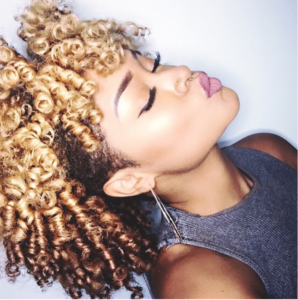
I used four packs of free tres equals 16-inch Cuban twist in the color number four, along with one pack of jannat collections, afro Marley, braid, m4, 27 mix and for the first process. I wanted to use bio silks thickening conditioner, because I do not like to manipulate or detangle on a dry medium, so I'm applying a generous amount of the conditioner le hair, and this just helps to create slip. As I am maneuvering my fingers throughout the hair and notice that I kept the elastic band at the halfway point - and this helps to contain the hair during this process for the next step will be clarifying. Now you can use whatever shampoo you like, I'm, showing a less expensive option and a more high-end option, and I'm just going to use this moisturizing shampoo by Fekkai. And I think that this is a great step to employ, especially with packaged here, because you want to make sure that you remove any residual dirt, grime or residue that may have accumulated during the packaging manufacturing or shipment process. And, as you can see, I'm immersing the hair in the water and I just added room-temperature water. It should be more of a coolness versus a warmth to the water because we do not want to add any unnecessary heat just yet and under flowing water. I am going to use a motion where I just take my hands straight down the length of the hair to clear out the shampoo. Now, in my previous marley crochet tutorial, i used to lea widgets curly curl cream, but today I'm using Fantasia's high-potency, intercellular, hair polishes styling foam, because I absolutely love this product and I've been raving about it since - and this is the cold wave rod that I'm talking About just focus on the color versus the brand by the purple brand. Just listen to me, girl, I'm saving you, I'm saving you coins. Now. This is one individual piece of the Cuban twist and, as you can see, it's pretty thick, so I'm just going to separate it into two, because this gives you more hair to use per pack. So you get more bang for your buck. Now I'm just going to drag at the ends to taper them, because I do not want the blunt look and I'm just going to add one to two pumps. You don't have to add too much because the water, because the hair is already damp, so I'm just using this downward motion to saturate the entire length of the hair and with my cold wave rod, I'm going to attach the hair and do a 360 degree turn To secure it and then I'm using this winding downward motion too tightly coil the hair around the cold wave rod - and you want to do this until you reach the very end of the hair, and it should be a very continuous, very fluid mode. And I'm going to use the clasp to secure the hair into place. Now I'm placing all of my cold wave rods into the sink, and I want to pull upward on the knob of the faucet and this just Stoppers the sink to prevent any water from draining. And I'm just going to add a little bit of the thickening conditioner. By biosilk, just before I add my boiling hot water and I'm completely immersing the cold wave rods in this hot water for about 15 to 60 seconds and then once that time is up, I am going to push downward on the knob of the faucet. And this is just going to drain the water. I love doing this in the sink, because it's just in one general area, there's no mess, there's no movement from one container to the next. It'S all in one area. Now I'm going to use this messy net wig cap and it's great it's very durable sturdy. It has great structural integrity, so I do recommend looking for a similar mesh cap and I'm just going to secure it in place. I did not have push pins so girl. I use the next best thing, which is safety pins and I just inserted those at the temporal or side regions, as well as the frontal portion and the nape just so that it does not move. Now I have my cold wave ride and I let my hair dry overnight, verses. 15 minutes to an hour. I just like that to make sure that I'm not going to create any frizz when I'm separating the hair, because it's wet so wetness will create some type of frizz, and I just wanted to avoid that. So here is what my finished curl looks like it's very springy, with my latch hook, needle I am going to insert it very close to that dark band and I'm going to go through about three holes in total. I'M going to attach the here underneath the hook. Push the latch upward, closing the latch hook you and I'm going to rotate it 180 degrees and slide it in the reverse direction. And I am going to open up the loop, which is on the bottom position. But after we pull the length of the hair through, the loop will be on the top, which is great because this creates a neater finish in the hair, lays flatter and I'm going to pull the two strands to secure the knot. Now that was fast, I'm gon na slow it down slow it down real slow for y'all, with the latch hook in the open position, meaning the latch is in a downward position. I am going to insert it about two to three holes away from my previous nut and I'm going to go through four knots in total. You can do this anywhere around the temporal or side regions, not the crown and I'm going to insert the hair underneath the hook close the latch, I'm going to rotate the needle 180 degrees and slide it downwards so that I do not interfere with any other holes. As I'm coming in the reverse direction, and I am going to open up the loop - which is at the bottom and when I pull the length of the hair through, that loop should be on the top. And I will pull the two individual strands to secure the knot and it should lay flat and neatly ooh. I just did that. Yes, now you're like okay, this is two strands. I still don't know how the hair looks. Okay, so I'm where you see this seam starts to come into play and I'm just going to push the mesh cap inward, because I really want to cinch these seams so that it becomes smaller and we're not in a situation where we have to use more of The mesh cap than we need to so I'm going to push the electric needle through and then outward again and I'm going to gather the mesh cap so that I can reduce the size of the seam, introduce my hair to the hook closed electric needle reverse. It rotate it 180 degrees and slide it downward going to open up the loop and then I'm going to pull the length of the hair through the loop, and I just did this until the seam was smaller in size, and this just helps to make the crown Area much more full, which is something you really want to do, because you do not want to have your top missing. So just just make sure you do this: okay, yeah, alright, so um! So my mannequin, you know she's she's, doing real good! You know her name is Shaniqua she's cooperating today and, as you can see at the crown I like to space the knots closer together, so you may want to go through two to three holes versus four to five holes and once I'm in the front, I cut The hair in half so that I can create somewhat of a side bang, but I did incorporate longer pieces at the front because I just like to make a more natural looking tapered bang, not that blunt bang across the forehead. That'S not what I'm going for here and when I'm done and looked a little something like this, you


Comments
MarieMakesMagic x: this is the most well-spoken and informative crochet hair video I've seen!
Endenezjia Graham: This wig is like a breath of fresh air. I am going to try this style ASAP! I love your videos keep the creative flow going.
Kela Harris: I love this video, and appreciate how thorough and concise you were with your directions... especially the tip about the sink. How many packs of rollers did you need for this wig? New subbie. I'm going to try this! The wig looks so natural on you :)
shoneabril7: OMG i'm going to totally try this on my own. This was a wonderful tutorial!
shannon: Absolutely gorgeous! I'm definitely doing this next week, you explained every step perfectly. ❤️
Tanya Ndip: Wow. i didn't even finish the video! in awe! on 4.21 mins in. so thorough and professional! love it! love it. love it! Thanks in advance
Melanated Lady Trucker: This is sooo pretty !I might try this and I've NEVER rocked a wig=-O !!!
Joyce Tee: Great job! I just made my first crochet wig and it came out great thanks to you. Washing and hydrating the hair before putting in on the rods is key, if you don't the hair is going to come out frizzy. Thanks for sharing.
Kaveeke: YAAAAASS GIRL!!!!! That is gorgeous!!! i love your tutorial. Very easy to follow. I am definitely making a crotchet wig. Thank you so much for this!!!!!
MizzezJaxon: I really love the first few seconds of this video girl you slayed it lol
Nadia McIntosh: This is one of the most detailed and clearly explained hair tutorial videos I've ever seen... and so nice. I felt like I was listening to a chose girlfriend give me instructions lol... thank you... <3
Shikita Ford: Thanks so much for this tutorial. I'm gonna try this. This style is beautiful on you, by the way.
Pat Ci: This was genius! Love it and love the look! Thanks.
Embrace Grace: Thank you for such a very detailed tutorial. Very easy to follow.
cheryl bradbury: Girl...you did that thing! Thank you for taking the time to show each process step by step and not fast forwarding the video! So worth the time and effort to watch. Love it!!!
Min. Rashida: I just subscribed! Great tutorial - love how professional you are!
ElleMonet: Yess!! I've been waiting for YOU to do the tutorial. It turned out fabulous.
Gerry Gold: Wow this is a beautiful crochet wig. You are sooo talented. Love it Love it Looooov it. Now I have such a valid tutorial to do my crochet wig. I just would not start it because of what I heard about the crown area been exposed. But now I can see how wonderful your hair turned out. Great professional advice. You go girl the Queen of Chrochet !!!
Just Jailyn: This is great I can't wait to try this!
seebark55: Girl this is the BEST crochet tutorial i have seen yet! Thanx for speaking clearly with good info! God bless...
Kiara Brown: I've been looking for a good crochet wig tutorial, yours is definitely the best. I will be trying soon thanks!
Matuikuani Dax: This is amazing and thorough! Thank you
Keynu Lee: Absolutely GORGEOUS! Do you recall how long it took you to make this wig? Thanks in advance!
Nakia Monique: Thanks for this video. Super helpful and looks easy enough for me to try. Aside from the 5 hour drying time, how long would you say the whole process takes? And how long does it last? I mean wigs purchased in the store seem to last forever if taken care of.
D P: You give me EVERYTHING... Im doing this, this weekend !
TheCarnivoreSoprano: thanks for this!! it looks simple. I definitely want to try.
Tiara Bree: this video was SO helpful. I have never done anything like this before and i followed your video step by step and I'm almost done with my own!! and it looks awesome! thanks so much!
thirteen FortheWire: I love that you know when to add music to your videos. You must do this for a living. Your vids are so professional just love watching the crochet everything
Jasmine ThePsychNP: I watched your video several times and was brave enough to make mine. I love it and it came out superb all thanks to your video
Kyienn: Thank you. The style is lovely and from a lovely person. I totally enjoyed the video & really really hope to try this sooner than soon. Waiting patiently for your other video concerning this style. You are talented.
kieboo87: I love how you add conditioner to the hot water during the curling process. That definitely makes a difference with the frizz. Great job!
Sheniqua McNeil: That looks so pretty. I love it and I want to try it. Tfs
sincerelymattie_: This is THEE best tutorial I've seen.. Thank you for sharing! Xo Mattie
KiKi Smiles: OMG!!! this is absolutely wonderful! Thank you! Thank you!
Patrice Carr: Hunny!!!! You did as wonderful job, I am getting up bright and early to do this hair style. Don't worry I will follower you on IG and show you the finish product (please follow back) lol. Btw you look beautiful. Let me and subscribe.. Love this video
1908prettylawyer: absolutely AWESOME tutorial! new subbie! :-)
Tezreec Nicholls: LOOVE this! deffo going to try it out one day
Marshanna Johnson: I absolutely love this tutorial. You were very precise. You were well spoken and knew what you were doing. I just wish the ending was longer so we could see more of the finished product! But you rock sista!!!
LaCora Stephens: Come on Vocabulary! You're giving me college degree, sister girl, comedienne, structure and a touch of class all in one! I love it!
Christina Jackson: Crochet braids wig is easier to maintain when you take it off rather than keeping it on your head and its more comfortable to go to sleep without messing it up.
BeautifulCreatress8: Loved that you washed this hair for preparation. I used a body butter I made with oils and Shea which made the hair sooooooo soft. Definitely wouldn't mind giving this technique a try as well. Beautiful job !
SheAnatural B.: I absolutely love your tips you give in this video! I've made two so far (wearing on in my picture to the left).
MsNatualTee202: You did a great job, Thanks for sharing!~
Dante Velasquez: wow a ventilated crochet wig. excellent!
Angela Maynard: Love the look. How long did it take you to complete the crochet wig?
Juleen Forbes: Beautiful wig very thorough instructions
Shaneek Hemmings: I never had interest in wigs but seeing this made me change my mind about using it
Roxanne Joseph: Ta daaaaaaa! The best I've seen so far, I am so doing this and will post a pic, thanks girl ;)
Tammi Lorraine: Thank you so much for this video. Purchased 10 packes of the Cuban hair bcus other vbloggers were raving about it and after receiving the hair I couldn't understand how they made it work bcus the hair is super coarse... Going to try this method in the morning!!
Salt and Light Scents: This was soooooo easy to follow!!!!!! Thank you!!!!
L. Olive: I love your style! So classy and creative!
AAde: Big support from the UK! Love your videos and love your passion for crochet braids! You always inspire me to return to crotchet braids and I would dearly love to, but I have very thin hair and no matter what braid pattern i do, I tend to have spaces that the braids do not cover. Do you have any advice?
Gam Col: New subbie ! I love to see a professional woman with some class
LaTonya Daniels: In complete love with this. Don't know if I missed it in the video, but did you use one strand at a time or split one into two when you put the hair on the perm rod. And you did say two bundles right. I am obsessed with this wig. You completely slayed that thang. One other thing. How do you keep your wig head still.
Deanna Nichole: I can't wait to try this!
SloMotionDiva71: I did learn a lot about moisturizing the hair from watching this video :-)! You really need about 3-5 minutes I think depending on the hair (JMO)!! Great job ;-)!
tastePINK: Oh heyyyy. My latest hair tutorial is #crochetbraids anddddd it's SUPER different! I decided to do a crochet braid wig! For all my ladies who are nervous about braids, NO WORRIES! TRY THIS! Or even if you're ready to take your talents to a new level! TRY IT! I hope you all enjoy! I appreciate the support <3 #protectivestyles #crochetbraidwig
Hey Karmen: I looooove your videos and I always look forward to your crochet braid videos because they're the best in my opinion but one small issue is volume. Your videos seem to always be really low and sometimes it's hard to hear... Could you maybe fix this for later videos
IssaJ: Just finished mine using 3 packs of kanekalon hair. Took 6 hours to do. Thanks for the tutorial. I couldn't find my Crochet needle so I used a Bobby pin it was really annoying glad that's over
Maria Ndebueze: this is really amazing ....I learnt a lot nd its quite easy
jacqueline lewis: wow!!!!!!!! really love this style
Kimberly Gilliard: I really love your hair! I went out and bought the Cuban twist and now I wish I hadn't. Did you cut the hair in half before curling it? I want mine to be nice and long like yours!
tallbeauty1: EXCELLENT TUTORIAL!!!
Oya Osun: How long does this style last? Great video by the way!
Latoya Cooper The Songstress: Hello, thank you for sharing the steps, how long will the wig last?
Melissa Walford: Awesome! How long will this wig last before having to sap the hair out for fresh hair?
Kattronique Musique: You look like you're laughing your way to the bank! Beautiful! Can't wait to try this!
Miss workingitout: Yassssss honey...all types of life has been provided with this wig!!!!!
Sun Kara: I love your video!! I was wondering how do you know how much hair to put in when its full, do you skip a row of rows or holes or spread them out, i had made a wig and ended up taking some out, i dont like it to big
Rachel Mukendi: I love it!!
Behind The Knot: great tutorial!
Orne Son: how many rods did you use to do all the wig? it's sooooo beautiful
EveryDayPray: Your wig came out great! I want to make one for my mom, and this is just the tutorial I was looking for. One question, did you put any tape on the mannequin head? I noticed that some woman do it to widen the head.
JaiLo Babii: that was fantastic!!!
Beverly Richardson: so pretty!
DiggingHerStyle: Best I've seen! Great video.
LISA CALDWELL: Awesome, good job!
Hair Designer: waw,your really good at this,well done xo
Flairelle: aThat wig is DOPE. I need to get up right now because I am not going to watch your videos all day. Tempted but I need to stop it now. Good stuff
L R Gordon: Thank you, I will try it.
Shawn Grasso: Great video! Wondering what did you use to keep your wig head stationary?
Emefa: i love it. i just love. you did a really magnificent Job booboo. muuahh love you and stay blessed.
Crochetfauxlocsbraids: Hey beautiful one. Thanks for this vid
spicychic94: VERY Thorough detail ! :)
Spirit Fire Starseed High Priestess : I love this look! Can you pull the hair back or wear it up with this wig?
shelley shelton: Awesome Job!
T R: Omg this is gorgeous
Thereal_dashiki CoachTee: U go girl that's beautiful and so are you
Bre Wilson: This is to cute. Just what I'm looking for. About how many perm rods did you use?
J Q: Love the way you talk. "I'm now going to introduce the hair to the hook" lol! Great vid!
Tulla Gborfu: I am hooked on your videos starting from now, wow
Tulla Gborfu: I am hooked on your videos starting from now, wow
Tulla Gborfu: I am hooked on your videos starting from now, wow
Onique Augustine: Heyy so i loveee this this so gonna try it . Question though 1. where does the marley hair come in and 2. average how many rods with hair did u use
Chantel Phassions: wow will try this ,its a great idea
Josie.: Amazing!
shrekipep1: Wow, Girlie, this TUTORIAL is FABULOUS. Your instructions and patience with teaching is COMMENDABLE. Thank you!!!!!
Janice Marie: I love it!!
Lovelies Me: I love how u use less expensive techniques and hairstyles. I love doing ur methods. And is that hair synthetic? Won't it matte and fray up when u add water? Especially when it's curly?
via Simone: Flawless af OMG!