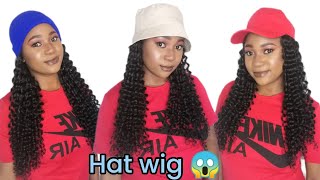
How To: Install A Crochet Wig! Diy Silky Braiding Hair Wig! This Is 100% Kanekalon!
- Posted on 11 October, 2020
- Full Lace Wig
- By Anonymous
Welcome back to my channel, in today´s episode I´ll show you howI install my crochet braid wigs on my clients - for it to look as realistic as possible.
Thank you for being on my channel.
And once again I wish you all a wonderful day/night
CoCo Covie
Social medias:
Instagram: @beautifiedbyconny @CoCo Covie
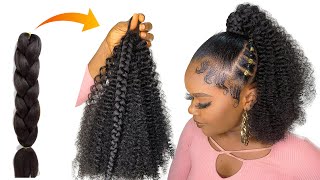
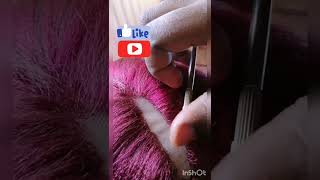
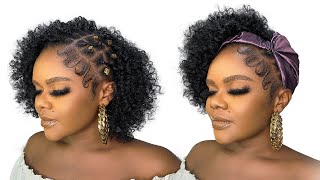
Foreign yep yep welcome back to my channel, i'm coca-cola for all you guys, i don't know, and that clip you saw right now is not human hair. It is 100 normal synthetic braiding hair. In today's episode, i'm going to show you how i install my crochet wings. Some of you all, even dm'd me on my social media accounts on how i install my wigs, so i'm going to show you some tricks, take some notes and just keep on watching customization process. As i've already said, this video is not about how i made this wig it's about how i install the hair. This wig is a 22 inch unit with a 4x4 closure. I pinned the closure down onto this mannequin head with little pins, so i'm removing them now for me to show you the hairline that isn't as full as i would want it to be so i'll show you why i would customize the closure see the insides of This wig bomb free, no lumps no bombs very neatly done. Thank you very much for all the comments i've been receiving. Thank you for saying that my work is very neat. I always try my best to keep my work very neat. You see this inside piece right here. I just cut it right off so that it's more visible. I use a sharp scissors to do that and please be aware: you have to really be careful when cutting this stuff, because you don't want to cut your closure that you work too hard on doing. So. That'S the piece - and this is the hairline on my skin. It isn't as full as i would want it to be, so i'm going to add some braiding hair to add to the closure, so i'm putting the wig back onto my mannequin head for me to see the lace even better. Once i placed my wig onto my mannequin head, i used the tiny little pins that i showed you at the beginning to pin the wig down so once that is done, i take my braiding hair and start ventilating. This is how i loop my braiding hair onto my hand, so that it's easier to grab for me. I already explained how i make my ventilation. I have a technique that line by line technique. So that's the technique, i'm following up here. Just take your time doing this really don't rush, because if you rush, you might rip the lace and that's not what you want. Believe me. If you rip the lace, that's the end so be careful. Take your time and don't rush. As i previously said, i take two to four hairs in between two to four hairs: see how the hairline is now coming into place. It looks very scanty before and now it's kind of full and nice looking healthy. Looking since my client wants to have a middle part, i have to really keep aware of the middle part line so that i don't ventilate on top of the middle part. So this is the full closure right now after the customization process - and you see it looks very, very healthy and full this is the wig. I love this wig. I love black wigs. It just looks like human hair come on. You can tell me that this is braiding hair, like my straightening treatment, let it be my secret for now, when i'm ready, i'm ready. Okay. So thank you for your understanding installation. My client has short relaxed hair and her hair was very, very soft, so i parted the hair for me to be able to braid it. I use something like hair wax to just make the line sharper. After that i just start braiding. I see some people adding attachment or synthetic braiding hair to this process, but i don't like adding braiding hair. First of all, i don't even know how to do that and secondly, it's just bumpy the more hair. You add the more higher your braid pattern is going to be, and that's what you don't want to have, because if you have that your closure, your closure will not lay down as flat as you would want it to be do so. I just continued this process. All over the head and you'll see the end result in some seconds: voila everything neatly braided down. So now i add my wig cap and i chose this color because i felt that this color matches her skin tone best. Then i take my measuring tape and measure out four inches. Why? Because i have a four by four closure. If i would have a five by five closure, i have to measure out five inches. If i would have a six by six closure, i have to measure out six inches. So now i use my got to be glue, the black version and add it to that lines that i already created, and then i use my got to be freezing spray to really make sure that this lasts. I use this product because they're very friendly they're easy to remove with simple water. I don't like using wood, glues because wiggles rip out your real hair and they are not friendly to your real hair. The reason why you should wear wigs is because you want to protect your real hair, not damage your real hair, as my client is blow drying her gel. I use that opportunity to just use needle and thread to sew the wig cap down. Now i trim off the excess wig cap now carefully trim the edges of the hairline. Then i use powder in her shade to make the wig up look like scalp. Now i put on her wig and i shift the wig to her liking. Now that two elastic bands in the back - i just closed them up and then the wig is secure, do now lift my closure use a little bit of cut to be freezing spray just a little bit. I don't like using too much product because the more product you use, the more messy your insulation gets. I blow dry it just a little bit for it to get tacky and then i put back the closure down and then press it onto that freezing spray. Be very careful while cutting the lace and it may look like a straight line, but if you look very closely, i didn't cut in straight lines. I really took my time to have that zigzag action. You might not see it on the camera because i don't have a macro lens, but i did a zigzag motion so now onto the baby hairs. I use my handy dandy, eyebrow trimmer and trim down little hands from the closure so now on to swooping the baby hairs. I don't know how you would want your baby hairs to look like this is just the way i prefer to make the baby hairs, and this is the finished look. She looks so gorgeous and stunning. She really looks flat like come on. She was feeling herself. I really loved the way she was happy about her hair. She really loved the hair and she really looks so amazing like it suits her, so so. Well, i'm so happy that she's happy. So if you want to see more videos like this just leave a comment in the comment section down below and i will make a tutorial so see you next time. Bye, you
Comments
Viktoria Wieser: Beautiful video showing your process! One little critique though: The music is way louder compared to your voice overs, maybe consider matching the volumes, then viewers don't have to switch the volumes all the time.
Myia Sorrells: I love this, this is beautiful. I plan on making a wig like this very soon.I subscribed to you this week after watching you videos! Keep up the excellent work!
Quintasha_Kylian Mommy&Me: New subscriber here. I love making wigs, crochets mostly. And I live what you're doing. I just learned something a bit new here. And I practice after watching on here. I literally never pay to get my hair done. Thinking to pursue this as a business since it's my passion.
Sonia Momnougui: Your work is truly amazing ! Thanks so much
Rhonda Thornton: @CoCoCovie I absolutely love your tutorials♥️♥️♥️ I would also like to know how you space out your rows. My units some times come out bulky and I have to use thinning shears to thin it out. You are AWESOME♥️
Sessy Glory: Thanks for this video, was very useful But where can I get the lace from?
Magdeline love: so neat and beautiful will like to see how you make your wig so straight and silk
Latifat Omoniyi: So sad you don't want to tell us what you use in straightening your hair but your works are awesome I must confess..... keep it up ❣️
Joyclyn NG: Beautiful . Please could you share your straightening treatments
Swish Bear: i love your channel. i binge watched all your video!!! ps- you're absolutely beautiful
Joyce Lauryn: I was waiting for this
abdul ganiyu asiata: Please can you do a tutorial on how you make your closures?
Keliza Keith: I love your tutorials so helpful ,do u do only straight wigs?
Aquarius 4life: I wish I had the patience to do these wigs. They are cute do you sell the ?
Saint of God!: NICE! You are REALLY a hairdresser.
WEIGHT GANG: Please what products do you apply on the braid hair that makes it look like human hair and tangle free?
GASAWAY ELIZABETH: Where do you order/get your wig cap? Love your work
susan ozougwu: Hello Please can a hair mousse be used in place of the freezing spray??
GASAWAY ELIZABETH: Do you make the closure for customers to order
Crazy Daisy's Multiverse: This is superb
Alinkia Stuart: Amazing
Ovie grace: How many pack of expression hair can I use
Daenys Martinez: Not about the wig but you look sooo stunning ❣❣
Ojo Precious: Superb
ezeuba chiamaka: You are just the best
Danielle Souza: Also what is your straightening treatment?
Neon Camille: Lovely....every inch and nerve of me is waiting anxiously for the blow dry treatment...i hope its before the rapture
Johannes Saayman: How do you get it so silky and straight
Opusigi Merit: How many inches is the hair?
Fuseini Khadi: Please what do you do to get the hair to be that slik
Kim Walker: So this isn't human hair? You're telling me this isn't human hair? Damn!
TIA silicone mom: How much u charge to make it
Emeka Jude: Please are u not sewing the edges of your closure with niddle and thread
Victoria Ikediashi: Please how do you straighten . From a naija sisterejor edakun
Omor Anitalia: Muah
Work in process: How can you get the baby hairs thinner please they are quite thick
Ojo Precious: First viewer! ❤️❤️