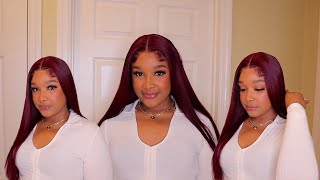
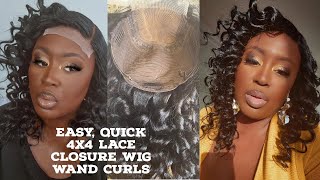
How To Ventilate A Closure Using Braiding Hair/Beginners Friendly/Detailed
- Posted on 08 December, 2021
- Full Lace Wig
- By Anonymous
Hi guys welcome back to my channelthis video is a BEGINNERS FRIENDLY TUTORIAL on how to VENTILATE A CLOSURE.please i will like you to watch this video and if you find it interesting and helpful please give me a thumbs up,drop a comment,share and please subscribe
FOLLOW ME ON MY SOCIAL MEDIA ACCOUNT
Instagram @ https://www.instagram.com/p/B_FI622lUH...
Facebook @ https://www.facebook.com/profile.php?i...
EMAIL: @[email protected]
Thanks for watching xoxo
Hi guys welcome back to my channel. This is clowns by aki if you're interested in seeing how i achieved this 4x4 closure wig with a braiding hair, please keep on watching okay, so i'm going to be using a braiding hair. If you watch my previous video, you will see that i've done something like this, but i wanted this one to be detailed, so i have to zoom closer for you guys to see how i crochet or i ventilate this closure using a crochet spoke and a braiding Hair, so this is the color of attachment or extension i'm using. So this is a beginner's friendly on how to ventilate. If you are new and you want to learn how to ventilate yeah, i'm doing this video for you. So what i'm doing is i'm ventilating right now and i am using this crochet pin. It is very small. You can get a ventilating pin if you can get it, but right now, i'm using this crochet pin and um just putting this pin inside one of the holes in this list, like i'm using at least and this as pose. So i am shooking. Oh i'm putting this pin inside one of the holes and i am picking two strands of a yes. I am picking two strands of hair when you are doing this kind of ventilating. You want to make sure that you are seeing like where you are where you are sitting. It has light for you to see the strands of area picking right now. I am picking two strands of a all the airs i picked in this particular closure. I picked two strands of a when i got to the front that hasn't picking one. So let me explain how i did it so i put this pin inside one of the oh. Sometimes i pick two holes. It depends because sometimes when i pick one, i tend to rip the lace, because this is not a ventilating pin. This is a crochet pin. So when i put this pin inside it, oh i draw two is two strands of s. Then i do one loop like one knot like a tying something: yes so, but i'm using the paint too tight instead of my hand, then i'm using my other hand, like my left hand, to control the amount of edge that i'm picking. I don't know. If that's what i'm trying to say, i am using my right hand where the penis to pick the ears like the air is, in my left hand, and i am picking two strands of a. I am using this pin to tie all to blue piece. I'M just doing one more thing with that pain, i'm not using my hand, but i am using this my hand to control the amount of hairs down. Can you see where i'm doing it? So i don't pick much i'm trying to control it with my left hand and i am using the right hand to loop the air into the hair into the lacery. So that is what i did all through, and you want to be very, very careful because you can at any point in time make mistake like you can pick more than more than two is you can pick three eggs depending on how you want your hair to Look like, but i will i would advise you to pick one or two eggs, because it's going to make your lace or your frontal look realistic and look natural. So this is what i am doing. I am just doing the same thing, picking two strands of airs, dragging it through the hole, then i'm looping it with the same crochet pin. That is what i did or true, and this is how to achieve a um, a perfect closure and a perfect frontal. And if you want a more secured closure, you can do double knotting, but i would not advise you to do double knotting, like towards the begin. Like the front side, don't do double knotting if you're going to be doing double knotting make sure it's in the back and the middle. When you get to the front, you see that you do single knotting. So it's going to be like the the knots would not show so you understand. So that's what i did and this took me three days because you have to be patient with it. You have to take your time to do it. So when i was done, i uh i did crush it like. I did a week, a cruciate with this um closure and yes, i just styled it on a model. You guys will see it. When i was done, you guys will see how the light came out. Like it looks so fine so like it was looking like a wig, at least the people even know that it was braiding hair used, except i told them that it was burning here. That is how natural the closure was looking, and i made the wig look. So beautiful so just keep on watching and you'll see to the end. If you have watched this point and you are yet to subscribe - please kindly subscribe to my channel and put all your notification. So whenever i upload any video, you will be notified and please give me a thumbs up if you find this video interesting and if it was helpful to you drop me a comment in the comment section and if you have any question, just drop it down in Comment section yes, watch to the end and i'll see you guys in my next video bye, bye,


Comments
Pasa Hair Official: Love this ❤️ but how do you make the hair look this silky tutorials please
queen love: Can you show us the installation . Please☝️
dorcas Oj: What colour attachment is this? It's lovely.
Miz Sandy: This is lovely
justy ujuaku: What's the color of the braiding hair you used?