Replacing A Closure On A Vendor Made Wig
- Posted on 17 May, 2021
- Full Lace Wig
- By Anonymous
NEW VIDEOS EVERY WEEK!! c
Hey yall, I'm Tee and I'm a full-time entrepreneur. I own a wig business known as Stylish Styles by Tee LLC. I'm super excited to take you all along this journey as I grow in my business.
Thank you for watching!
Wait! Before you exit be sure to give this video a thumbs up, subscribe, and make sure you click the bell icon so you won’t miss any uploads!
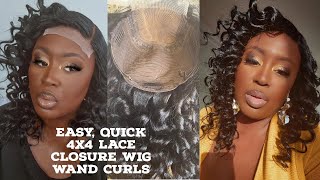
What'S up y'all, it's your girl t and i'm back with another video tutorial. So in this tutorial, i'm simply going to show you guys how i replace the closure on this. Um fat remain wig, so this wig was made by my vendor um. It was sent back for refresh. I was going to try to make the closure work, but it's balding. So it's definitely time to replace this closure. So i had to order another closure and this is transparent lace and it's been um tinted with the lace tint here. So, that's why i look a different color, but um we're gon na go ahead and get right into it and start off by taking the closure off. So for me, i like to put it on the head. I was gon na just cut it, but i like to know exactly like how wide the closure is. So if i pin this, then i'll know how to replace that immediately. On top. So without it being like stretched out and trying to like figure out where it fits, so i'm gon na put this closure back on here and this a wig, i'm gon na, pin it on the sides. Try not to pin the closure, i'm going to pin the back all right so here it is. I'Ve already separated the back part of the wig to the front. Now, normally, if this was a wig that was made by me, it would be easy to just go across and cut it um. This is actually don't. Look like it's going to be that hard, either i'm not trying to salvage the closure, so it doesn't matter if, let's see first of all, this thread ripper. This is a thread ripper um, it's dull, as heck um, i'm just gon na use this, i'm just simply trying to cut to close it out there we go yeah. You can use scissors too um, it's just the easiest. For me. You see how it's coming off. Like so, you know what i'm going to put a pan right here, so that don't slide a bit. Let'S get this be careful not to if you do use this to cut into your own mannequin, okay, because you don't want to split minute head and cord all over the place. You just don't want that all right here we go we're getting it off. You just want to be careful in general. There we go all right. So even if i cut that that last part um like that little black part from the cap off, that's, okay, it's okay! I promise there we go all right! So all right, so we got this closure off. Look at this closure. Oh she had holes and repaired been through it. She just been through it, take the little lace up all right, and this is what i mean by keeping it pinned on on the thing, because it's i know exactly where the way is now. I don't have to try and figure out where it goes or how it how it fits okay, so actually i may have to lift it. Oh, i might have to lift it up. So what it's looking like all right, so here's the collusion, we're gon na pin these sides down. First, i noticed this sunny even oh! Well, i painted it so i'm gon na try to even it up with the other side. Okay, so we're going to pin this closure pin in one side i do go a little past. The start of the cap pin the other side, and this is a six by six close yourselves. It'S kind of big and you know 6x6, when pinning them they can be challenging. Let me see if i can get this yeah, i could get it. I think so. We'Re gon na pin this side and we're gon na, pin it actually we're gon na put it right on top like that, i'm going to adjust it, but for the most part, i'm just kind of trying to see okay, this fit right here this, of course, i'm Gon na get another pen, this will come up into this before i put a lot of pins over there. Let me check this side, so this will come up soon. You kind of got ta put a little uh tightness. You kind of got ta put a little strength in it to get it there. We go all right, y'all see that, so i had to pull it just a little bit. Let me see this side if i got ta pull it up. Ah yeah a little bit. Okay, actually here we go all right, so we have this closure pinned in place as to how we're going to sew it all. So i'm going to put this hair out the way and i am going to hand stitch it because it's just easier for me to go ahead and hand stitch this. Since i got all these pins in it and i have it, you know pinned so i'm enhanced. Okay guys so i have finished hand stitching the replacement closure on now, i'm going to go in and i'm going to reinforce it with the sewing machine um. You know just for extra security, so uh. The only thing that i would recommend, if you do this, is try to get your closure to line up as close as possible uh with the wig like with the replacement you want, it lined up as close as you can possibly get it and don't worry if You do have a little bit of space like this wasn't completely flat for one. It wasn't because it's a 6x6 closure now, if it's a smaller closure, then it should um lay flat, but the six by six is okay, so i'm just taking off the pins. Okay. Let'S take it off stitch a little bit of plastic. Sorry guys, i'm talking low, my baby is asleep. Okay, so here is the closure replaced. This was the old closure. This is actually going to be a thumbnail y'all. So that's why i want to knit still for a second all right. So let's go over to the machine and let's secure this okay, so this might not be the best angle for you, but um, i'm just using my um, not my industrial machine, i'm just using my heavy duty machine to do zigzag stitch because i wanted to catch Both ends instead of my high head machine using straight stitch so like so, and it's back soon all right y'all. So i have successfully replaced a closure on a factory made wig or vendor made wig um. It'S just like put replacing one as if you did it. All you need to make sure is that your closure is the same size. If it's the same size, then you'll be just fine and from the same vendor, because some of them are made um like square shape, and if you have a rounder closure that you're taking off, then that may be a little bit difficult. But it's the same vendor. So it was easy to replace the closure on a vendor made wig um same with frontals make sure it's the same. If you decide to replace it now, i can go in and i can style this wig and bring her back to life. If you enjoyed this tutorial, please give it a thumbs up, make sure you're. Following me on all my social medias and yeah, i will see y'all in another video bye, y'all


Comments
BlackLives Matter: I have a factory wig off Amazon and I wish it was a this easy the way it’s constructed is crazy
Brown Nipples Are Supreme: Great video, very informative!
BlackLives Matter: Turn old lace into smaller laces like a 2x6 or 2x2 4X4
Dionne Sanders: Great information
blahblahsmilieface1: do have to use a sewing machine? or would basic sewing work as well
k noel: Thank you so much have so many wig pocket saver
Kat P: How much does this service cost?
Beautiful Dreamer: I take it you can only replace a closure or frontal once on a used wig; is that true?
Deanna Scott: You did that !
A J: I JUST found your page.... can you let us know if you will be doing the wig mentoring program again?