250% Hd Lace 13X6 26” Wig Install| For Beginners |Ft Siyun Show Hair
- Posted on 08 March, 2022
- Full Lace Wig
- By Anonymous
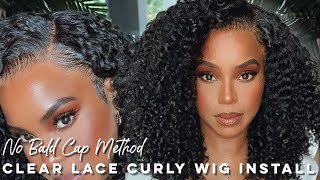
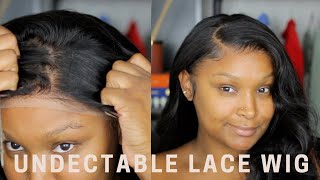
What is up you guys and welcome, and welcome back to my channel, it's your girl, damayani shy for today's video, i'm going to be installing the scion show hair unit. So let's get started. They started me off with some nice cute little lashes as well as some stocking caps, and this is the unit 13 by 6, 250 density, 26, inches, says period, so the hair straight out. The pack is very soft and very shiny, and it has a lot of bounce to it, as you guys can tell and 13 by 6 inch transparent lace. It is transparent. I'Ve never had transparent lace before so. I can't really give it much of a like critical review, because i've never had good, transparent lace to know what bad transparent lace is. You know and the sides it gives you two inches. I know 13x6 is normally like you know all the way around, but yeah whatever. I guess, and it comes with four clips - actually yeah four clips, as well as two straps on the back. If you wanted to secure it tighter or not, and it actually helps if you don't want to use glue so starting off with the stocking cap, i'm going to go ahead and place it on my head and then poke some holes in for my ears and then After that, what i'm going to do is go in with my ghostband glue and put that around the perimeter of my hairline to secure it. This is what your bald cats will look like after you're finished, and next i'm going to go in with some true match. L'Oreal powder just something to match my skin tone and i'm just going to place that all over the bald cap to help the wig and the lace further blend more seamlessly baby. We can make a fire okay. Ladies next, i'm gon na use this sally henson leg. Airbrush makeup and i'm gon na, let you guys in on a little secret if you don't like bleaching your lace or you feel like it's too expensive or whatever the case may be. This is a very inexpensive way to tint your lace without having to pay for bleach and going through that whole process or getting really expensive, like lace tint from hairstylists. This works wonders so definitely give it a try and let me know if you tried it and how it worked out for you but anyways. What i'm basically doing is. I just sprayed it on a flat surface and then i took one of my makeup brushes and i'm just dabbing it into the lace making sure it seeps through and is like reaching those knots so they're not showing so badly. And after that, i'm going to go over it with my got to be glued spray and i'm just going to saturate all over the lace and then i'm going to throw my blow dryer over it, locking it all into place. So now, using my ghost bond glue, i'm going to go ahead and get ready to lay my lace, i'm going to just put that around the perimeter of my hairline. You guys know the drill to this. Just make sure that before you lay your lace, that it's nice and clear, and also you want to make sure that you're using nice thick even layers of the glue, because you don't want it to be too clumpy. And you also want to make sure that, when you're laying your glue layers that they're not too thick, i got to stress that, because it'll take way too long to dry and it's going to be very annoying and time consuming and right here, i'm just trying to Push some of that back because i obviously overdrew with the glue there so just pushing that back making sure i don't have any excess glue where i don't want it, because when i go to lay my lace, i don't want there to be glue. Sticking out of my lace, because that'll turn black and it'll just look really ugly and just not cute. So after i did that, i just went ahead and took some alcohol and just wiped over the surface, where i had removed the excess glue. And now i'm going back over it because most of the glue from the first round has dried. So i'm just going to use like two layers - i guess for today, and this actually held up for like five days. So two layers was definitely more than enough. So now waiting for that last layer to dry, i'm going to go ahead and use the blow dryer to help speed the process up a little faster, because i don't know i just felt like this. Application was just taking a little too long for me. So once the glue is ready, this is what it should look like nice and clear, then what i'm going to do after that is, go ahead and place my lace gently over the area that i want it to be now, i'm just pulling down those side pieces And then i'm going to gently push them in with my fingers, making sure that they're exactly where i want them to be, because for some reason this part every time i do this, i always end up messing up somehow either don't pull them down far enough or The like application process isn't secure enough, so it always ends up lifting more than everything else now using the rat tail, i'm just really locking everything into place and securing its positions, making sure that they're exactly where i want them and that they're not going to move Now, just going in with some scissors, i'm just going to cut off the excess lace and normally i would use my eyebrow razor, but i really don't know where it is. But i find that as long as you snip really small, with the scissors, you don't get that really straight unnatural. Looking line that everyone talks about now. What i'm doing is taking the end of the rat tail comb and i'm just sectioning out the ear tab piece that i'm cutting out and separating that from the rest of the hair. So i don't cut anything unnecessarily and then off camera. I'M just going to do the same thing to the other side. Now, what i'm doing here is just sectioning out my baby hairs and my sideburns and honestly. I really like to do a lot more with my baby hairs than just like these two little swoopy doops and my sideburns. But this the perimeter of this wig is actually very thick and it took me a long time to pluck like longer than normal and, as you can tell like, it's not that plucked so like. I didn't really want to do too much if that makes any sense, like i kind of just wanted to get it done, because i actually had something to do the next day. So i was really just trying to hurry up and make sure it was done before. Then and plucking the wig as much as i did, took up a lot of time and, like i said you guys, can see that it barely looks like i plucked much of anything so for the baby hairs like. I really just wanted something simple and something that wouldn't take like 30 minutes to try to perfect. You know after sectioning off my baby hairs. I just went ahead and threw a scarf over it, and now i'm just trying to put some heat on it to help it melt into my skin. To get that seamless look. So while i have that lace setting i'm going to try to tackle this hair and as you can see like when i go to part it, it's not giving flat natural scalp scissors, so you know we got to fix that now, i'm going to go in with My mousse and i'm just going to put that all over the part in the top of my hair and i'm going to go in with a hot comb and you guys says listen. I have been second guessing getting a hot comb for literally years and i just want whoever's out there. Second guessing, i just want you to know sis. This is your sign to go ahead and do that because it literally worked wonders. I don't know why it took me so freaking long to just go ahead and get one, and i actually got this from amazon and it was literally only 16 and like 37 cents. So it was really inexpensive and it shipped within two days and it's so much easier than me, trying to flat iron on the top of my hair or using like a the back of a curling wand like this is so much easier. Now i'm just gon na go ahead and cut my baby hairs to the length that i want them as well as my sideburns i'm taking my flat iron, i'm just gon na go ahead and get as close as i can to my scalp as possible, and i'm Just going to curl them a little bit and it's going to make it a lot easier when you go to lay your baby hairs, and i know the whole arrogant tape method is to use a smaller flat iron, but this is what i got honey. So this is what we use in you feel me next, i'm going to take that same rat tooth comb from earlier, and i'm going to take my got to be glued spray, and a little trick i like to do is just spray. Some of the spray over the comb teeth - and i feel like this is a lot easier for me versus trying to use like mousse or something because i tend to realize that mousse messes up my install like it'll, start to lift it and stuff so yeah. I definitely recommend this. It'S a lot easier. It'S a lot less messy and yeah. Let me know if you try it out now, just doing some finishing touches, just making sure that everything is nice and sleek back and flat, as can be okay guys. So this is the complete finished. Look of the zion show 250 density 26 inch, 13x6 lace wig first impressions. It'S really not bad, like it's really soft. I feel like it's kind of like too soft like i feel like it could be fake. I really like the color of this unit. It'S really dark. I normally like to dye my hair, like jet black, but this looks really nice and like natural and honestly, when i first took it out of the package. It didn't really look like 26 inches to me, but then again i haven't had like a really curly wig in a while, so well, it's more like wavy, but normally typo eggs. I get are like more on the straighter side, um the lace. They said it was hd lace and honestly, i've never had hd lace before um, but this is honestly the best i've done on myself with the wig before in a long time. So if you're like new to hd laces too - and i would definitely suggest giving this a try, because she's really cute but yeah like i said - i got 250 density for the most part, it seems really thick i'll show you guys also i'm 5'3, and this is How long it is on me just for my friends what so yeah first impressions definitely really like. This wig definitely recommend it. I was really skeptical at first because, honestly, when i bought this wig, i didn't even know that that britney girl had reviewed it and that it got so much attention like. I just thought it looked really nice and the reviews were decent but um more. I looked into it like there were some youtubers. That said, how amazing the wig was and everything, and then the comments, though, like on aliexpress, the people were talking about how trash the wig was and how you know just talking junk about how basically just talking crap about the wigs saying how don't waste your money Or whatever, whatever so boom, so i was like kind of skeptical, but i got it anyways and i'm glad i did because i like it but yeah. Thank you so much for watching this video. If you enjoyed it, then please give it a big thumbs up. If you want to see me review more wigs and install more wigs or whatever go ahead and click that like button down below and click that subscribe button on the right hand corner with that little bell, so you get notified every time you go put a little Bitty and i'll catch you guys later peace,


Comments
Cooking with Gemma: You made it look soooo easy!! I’ve always wanted to buy a HD lace, but worried it won’t suit me. Great video
Melanin Renae: Love the video❤️
Melanin Renae: You slayed sis