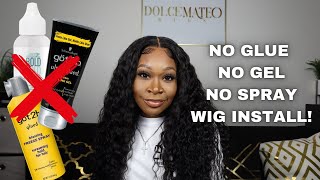
How To Install A Lace Front Wig Asteria Hair Water Wave Wig 26 Inch (Wig Install Tutorial & Review
- Posted on 01 June, 2020
- Full Lace Wig
- By Anonymous
Hey Guys,
I'm back with another video and it's time I stepped up my wig game! I'm finally here with with a wig tutorial for you. I will show you step by step how I install my lace front wigs. I tried to make this video clear and easy for beginners to learn from, so please let me know if this helped you!
I will also be reviewing a wig that I bought from Asteria Hair. This is their Long Water Wave Lace Front Wig in 26 Inches. It's honestly the best curly hair I have bought!!
- Long Hair Wigs, Water Wave
- 26 Inch
- 180% Density
- Size: Medium
- https://m.asteriahair.com/water-wave-h...
(There are different types of Water Wave wigs on their site, please have a look and see what is best for you before purchasing)
- https://www.instagram.com/asteria__hai...
Also guys I finally have a YouTube intro! This was made by the talented artist, Michael Rusakov! I am so happy with the results and how much it reflects me and my style. Here is a link to his Instagram:
- https://www.instagram.com/michael.ny/
CLICK & JOIN THE FAMILY ↓↓
--------------------------------------------------------------------------
https://www.youtube.com/channel/UCsfV7...
--------------------------------------------------------------------------
FIND ME ♥️
--------------------------------------------------------------------------
♡ Instagram/TikTok/Twitter: Naomichanson
BUSINESS ENQUIRIES: [email protected]
Products:
--------------------------------------------------------------------------
- Conditioner: Pantene Pro-V (Repair & Protect)
- Shampoo: Shimmer Lights
- Hairspray: Got2B Glued Blasting Freeze Spray
- Mousse: Creme Of Nature (Argan Oil Style & Shine)
- Defining Cream: (Creme Of Nature Argan Moisture & Shine Curl Activator Creme)
- Serum: Creme Of Nature (Argan Heat Defence Smooth & Shine Polisher)
- Gel: Gorilla Snot Gel Punk (Yellow)
- Bronzer: Fenty Beauty (Mocha Miami)
- Concealer: La Girl (Fawn)
- Lipstick: NYX Soft Matte Lip Cream - Berlin
- Lashes: Tatti Lashes: TL4
Chapters:
--------------------------------------------------------------------------
0:00 Intro
0:16 Wig Unboxing
1:09 How I Wash My Wigs
1:57 Wig Install (Tutorial)
6:16 Defining Curls
7:18 Baby Hair
9:46 Wig Styling
10:36 Final Touches
Last Video!
--------------------------------------------------------------------------
⇢ Tatti Lahses: https://www.youtube.com/watch?v=wOaHXI...
Music:
--------------------------------------------------------------------------
⇢ Losing You - Deanz
⇢ Goodbye so Long - spring gang
⇢ Love on Me - Katnip
⇢ Don't Need You - Mindme
#AsteriaHair #WigReview
Hey guys is nearly Cristina welcome back to my channel if you want to see how I laid this wig keep watching the week that I have for you guys today is from Styria hair. This is the first time I purchased a wig from this company. This is their long, Walter Wade, lace, front wig in 26, inches the density, a hundred and eighty percent - and I got this in a cap size medium and for a close-up. This is Swiss lace in a medium brown color, which I like, because it suits my skin tone really well for the inside. It comes with adjustable hooks and the three combs, but I personally prefer to cut those out. They really destroy my hair and inside the box. I got a pack of two wig caps, the elastic band, to secure your wig, a satin scarf, which I loved, because I really did a new one and also a setting bag to store your wig. This is just after I bleached my nuts I'm running my lace under warm water, making sure everything's rinsed out. I always use this shimmer light shampoo, I've over-processed my wig a little bit, so this is perfect to get rid of some of that Brasa tone after that is rinsed I'll, be deep conditioning with the Penton repair and protect conditioner, I'm going to leave the wig soaking In warm water and conditioner for half an hour just so, the hair could be moisturized before styling, and these are the results. This step left the hair super soft and shiny. I also recommend this conditioner. It'S really easy to detangle the hair with I'm starting by placing my wake up over my head and I will cut out holes for each ear. Next, I'm taking my bot to be hair spray and spraying. My hairline I've placed my blow-dryer on a medium heat and I will continue until the cap is completely dry. I personally like to repeat this step for blow-dry straight away. To prevent lifting starts. Cutting off your excess wig cap would be very gentle around your edges. I'M tying the back of the cap in a tight little knot to prevent it slipping up. Taking my fancy Beauty buns up in makka miami. I then want to start tinting my wig cap, and you want to focus on areas where you part your hair. Next, I'm placing my wig on my head and planning where I want to start cutting my hairline: try not to cut the lay straight aim for small zigzags around the hairline. This looks much more natural. I like to completely cut off the lace around my ears and use my natural hair to blend of the wig, but you will see how I do this later. I always keep a damp cloth nearby to wipe off any excess hairspray using my got ta be spray again, I'm going to be sticking down the wig in three sections, starting from the middle, have a little fool to make sure the hairspray is tacky then begins ticking Down your wig use the back of your comb to start pressing down your lace, but try to avoid sticking any hair with it. I'M going to repeat the same process. Everything is stuck down. I go through again of my hairspray. If I feel like this areas that haven't been stopped down that well you're going to use your damp cloth again to remove any left over hairspray on your skin, then I will wrap my hair for at least five minutes to make sure everything is stuck down. I'Ve done nothing to the hair right now, but I am in love with the volume it's super pretty and the hair is lightweight as well. I filled this spray bottle the same conditioner I used earlier and water and I'm going to wet the hair and define the curls. This pick was super easy. The hair is really silky, so the comb went straight through and I only got a little bit of shedding. So after five minutes is done, I'm going to move the setting scarf and I'm gon na start spraying the front of my hair. So now the side thing where I want to pop my hair and I'll go over side parting, because it looks so good at this carpeting. I didn't really want to pluck the front of this week. This time looks like overclocks, my last wig, so I'm just gon na pull out some hair and create some baby hairs, and I tried to cut the hair at an angle, so it looks more natural. Then I used my cream of nature, hair, mousse and slicked. The baby hairs I prefer to use mousse on my baby hair instead of gel. I just find it easier to move the hair around, but try not to get the mousse on your lace. It can start lifting and putting more mousse on my hair to create that swoop, and then I'm going to create more baby hairs. I'M now putting the mousse all throughout the hair to define the curls to blend my ol hair with the wig I'm just using a little bit of gel and I'm just licking my hair down at each side. Also just another tip guys. The mousse definitely wasn't enough. If you want a super defined curls, there was another cream of nature products that I use, which I will leave in my description, because this hair dries pretty big. I'M taking this cream of nature, heat, protectant, serum and I'm putting it all throughout my hair. Just some moisture and shine whenever I have my hair to the sides, I always like a little bit of gel just to hold the hair in place, and I'm just gon na use my blow-dryer to make sure there's no flyaways. The hair was still damp. You can let this air dry, but for the video I decided to crunch up the curls a little bit and then I wanted to put a little bit of gel on opposite sides. Just to give the illusion that I thought the hair have what I didn't. So two picks up my hairline, I'm just going to be using my la girl, Pro concealer and placing that on the lace. Then I'm taking an old black mascara that I have and I'm placing that at the roots of the hair, just to fix where our over bleached in ops. Lastly, I'm taking my fancy Beauty bronzer again and I'm placing that on the front of my lace so that it blends well with my skin tone and they have it guys. This is the finished look. This is personally one of my favorite pearly, wigs that I have bought. I absolutely love the hair texture. I couldn't be happier his hair guys. As I said, I got it in twenty six inches, so I want to show you guys the back super bouncy really long. I really really recommend that's the end of the video. I hope you like this, please don't forget to Like comment and subscribe.
Comments
Naomi Christina: Hey Guys!!! Thanks for watching. Please don't forget to like, comment & Subscribe!!! Xx
Steve Khan: Wow Naomi! I didn’t realise what a process this was! You make it look easy though. Hair looks stunning as always ✨
Iman Barkhadle: loved watching this video!!! Sis you really make it look effortless! It was so interesting to see
Rocky Annmarie: Wow this was such a great video! I'm getting water wave hair soon and I'm definitely styling my part and edges like this
Astreezy _: Simply Beautiful! I’m planning on ordering the 30” one. Do you recommend using a diffuser to maintain the curls?
Jodi H: Great job as usual
ASTERIA HAIR: Hey you did great, make it look so easy
Kari: this girl is so gorgeous i love her eye shape lmaoo
Rishy Ghuman: Beautiful eyes u are very beautiful stay safe take care
Galactic-Alliance: Awesome. Can you do a video about how to care for the wig when you take it off etc.
Bella Jones: How long can this style last for or do we have to keep redoing the front
T Mayxx: Do you have the link for the wig on AliExpress
PRESLEY CHAWANDA: how much was it
blumagiq: How tall are you?