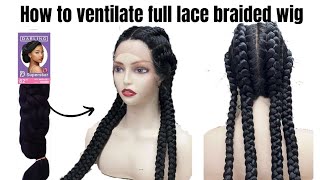
How To Ventilate| Make A Full Lace Frontal From Scratch
- Posted on 17 December, 2021
- Full Lace Wig
- By Anonymous
Hey guys welcome to my YouTube channel.
This video is a tutorial on how to ventilate a full lace frontal.
it is a wig making tutorial on how to ventilate a lace closure and frontal.
in-depth step by step method is on wig ventilation from scratch.
item used:
measuring tape
ventilating needle
350g weavon
scissors
dummy
T pins
video that might be helpful
How I transformed my old closure to new one
https://m.youtube.com/watch?v=qZApIbuQ...
How to ventilate with crochet hook
https://m.youtube.com/watch?v=REajTWUe...
How to ventilate curly hair/weavon
https://m.youtube.com/watch?v=W6rpGf36...
How to ventilate a closure
https://m.youtube.com/watch?v=xgDrRF4_...
How to make draw string afro ponytail wig
https://m.youtube.com/watch?v=94C5u9M8...
pls subscribe to be part of family.
Instagram handle:mipresh_official
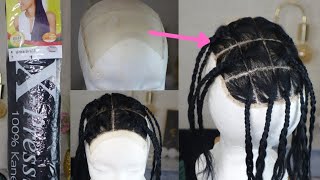
What'S up guys welcome back to my channel if you're new here? This is what we do today, i'm going to show you how to make a freelance once a week is step by step, guys shift this setting and keep washing okay. The first thing i'll be doing i'll, be cutting out my neck. This is the nails i'm using and for this video i'm going to be making use of 13 by 4 inches size. So i use my tape to measure out dating by four i'm going to place. The tape underneath and make it out 14. reason why i'm doing this, because i want to give a one and she's extra for the measurement. So because release is 2b, i'm going to just cut out cut out the 14 inches then cut out the four it gives. You five inches so after cutting out the maid, i'm going to be placing my cat on my manicure head this guide. That is definitely used for a full list. Also, so now i place my nails on my cup. I place the net on the cap. Remember all we will see it was a rough sketch measurement. So now i'm going to use my skin to put down the lid. Then i'm going to do the action measurement to give an accurate result of four type one i'm going to be doing the measurements again, which is 14 by 4 inches or radar 18 by 4. Inches at the front i'm going to be making four inches body is giving me five inches and then to get four inches. What i'm going to do, i'm going to be removing the pinch, which is meant this out at the same round, i'm going to be cutting out, we cut at the front, i'm going to be cutting it out, then cut out the excess mesh at the back. This way you can use a transparent thread for this. One i'm using a black hole doesn't mean anything as long as you use the swing to cover everything, so it doesn't mean now i place my cap on my manicure head, then pin it down to give you like, where i'm going to be ventilating in the line Where i'm going to dive into this thing, this is how it looks. This is how the back looks. Let'S proceed for this hairline, you can place it on your head, achieve exact headline and for the begin i'm going to be using this weave on is 350 gram and comes in four bundles i'll, be using one bundle for the ventilation, then to the bundle for the Week, i've already done some off camera and i'm going to be showing you in detail what i did these some of them, that actually we are used to this. All i did was we used my ventilation needle and from here, take them out so put the needle in a single hole fold the line and pull out one or two strands of hair, pull it out and type this my needle is a new needle. This is a new diy ventilation, needle which i'm using for the first time. I started this video with already made photo conventions in andrew, but i'm ending it with this long silicon shot, my needle filled them in block and honestly i felt so bad. I felt really bad because i've, given myself a stimulated time to achieve this week for the devil, came in action, which i didn't want him to forster me. So i devised a means of getting this diy nature, which i'll be showing you guys in my next video. So i'm adjusting myself to a new lifestyle. Is this learning how to use it, as you draw put the needle in your whole pool and tight after lining the front part, i'm going to be doing this one repeatedly almost a welcome before they missed it. So keep watching so so this step, i'm doing, is optional. I'M doing this on in case if you want to leave a center part in your frontal. Well, if you don't want you just close everything up, so you can actually get his performer. If not, you can leave it like this. Whichever one is. Okay, i'm done vince listen! This is how it look. You can see the line is showing or if you don't want the lines to show you can cover it up for your glorious frontal, i'm going to be using elastic palm to hold down my wig cap, so you use your shade and and green. This video was helpful, for you, give me a thumbs up and leave a comment or what you think about this video and please subscribe to my channel, be part of the family and for more updates, see how the back looks so flawless. Thank you guys for saying love. You bye,


Comments
EMMANUEL KWARTENG: Very nice but pls how many holes did you leave for it to look natural please
Ohemaa Jane: How many holes did y leave at the back? And when u got to the front how many holes did u leave to make it look natural?
MERCY ONYINYECHI: Nice one is helpful Pls what's the name of the weavon you use and price
Ohemaa Jane: And how many days did it take u to complete everything?
Modukpè Rola: How many days plz?