Diy Rubber Band Criss Cross Braided Wig | Diy Braided Wig With No Frontal For Beginners
- Posted on 12 September, 2021
- Full Lace Wig
- By Anonymous
Thankx for watching please like share and subscribe for more amazing contents xo
Lace ventilation series
https://youtube.com/playlist?list=PL3l...
Watch the installation
Shop tools on Amazon
1.Brass ventilating needle set
2. Two holder brass ventilating needle set
3. Full lace net
4. Canvas block head
5. Wig stand
6. Tiny crochet pin
7. Styrofoam
8.frontal lace
9. 1yard Swiss lace
10. Coloured tape
#braidedwigs #trendinghairstyles #trendinginstagramhairstyle #diybraidedwig #nofrontalbraided wig
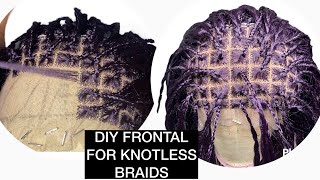
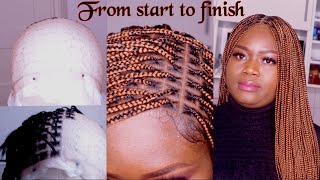
Hey guys welcome back to another amazing diy, braided wig, video from me, okay, so in today's video i want to show you guys how i made this diy braided wig, it's actually a trending hairstyle and i decided to make it into a wig. So for those of you wondering how i sew my frontal lace to the cap, i'm going to show you guys how i do that. So the first thing i do is to fold my frontal lace into two equal parts to get the midpoint. So after getting the midpoint, i place it on the mid point of the cap. Okay, just watch and see what i'm trying to say. So you get the midpoint of the frontal lace and place it on the midpoint of the cap. So you want to drag it on either side and stretch it out and pin it just before the elastic band that comes with the wig cap. So do so, i'm basically just cutting off the extra cap that i don't need from the wig cap. So i can get the parts that i'm going to be making use of so with my concealer and angle brush, i'm basically just marking out where the point where my ears started from so with my concealer, i'm just marking the points where i want to fill with. Braids, so i would have like a guideline on how many braids i want. I normally don't like very full wigs. That'S why you're, seeing that the um spacing is kind of like scanty, so i'm done feeling the back. It is like a normal routine on my channel, like i just basically used my crochet hook, which got bad along the line, and i had to like manage it because i couldn't go out because it was late. So i just used my crotchy hook to feel the back, which i'm going to show you how i did it now, so you want to take take out small braiding hair and for this part of the lace you want to make sure the braids are very close To each other, so the point where you sewed, the frontal lace to the cap, doesn't show so you pick some parts of the frontal list and also pick the net to act as a form of extra hold outside the sewing you already did so it was kind Of very difficult for me, because i was managing my bad crochet hook, but if i was using an actual one, it would have been kind of like easy. So i hope you understand what i just explained here me. So this is what it should look like. You can see how closely spaced the braids are, and you can't see any line of sewing or any point where the frontal lace is joining the cup so for the front parts. The first thing i did was to outline the line that i drew out with my concealer, showing where my ears started from, so i'm going to do that on both sides with my lip liner and i'm also using a meter room, because i want the lines to Be very straight, so the next thing i did was to pin my tape at the point i rolled out, and i pinned it on the other side to get the length in between both ears. So i can also get the midpoint, which is going to be like the center pattern, so it measured 13 inches. And if i should divide that by two, it's going to be like 6.5 inch, which is going to be like the midpoint. So that's where i'm going to mark out my center part, so i'm just basically rearranging the cap, so the midpoint of the lace uh meets the midpoint of the mannequin head. So i can get the actual hairline because i'm customizing it based on my hairline. So next i'm going to be pinning my tip on those lines, so i can divide the frontal list into equal rows and i'm dividing it into 12. Equal rows using 1.1 inch as a guideline. So so the next you want to connect the roads and does by using a straight line across two rows, because you'll be connecting two rows after the whole ventilation process to get the hairstyle. So so i'm going to be using my ventilating noodle and my synthetic hair. You can use any hair of your choice. It doesn't have to be synthetic hair. You can use human hair if you want to. You can also use braiding hair, so i'm just using my synthetic hair, so i'm just basically ventilating the hair along the line and i'm maintaining a straight line. So the pattern comes out neat and clean. I have detailed tutorials on how to ventilate in case you're interested in case you don't know how to ventilate, and you want to learn how to ventilate. I have detailed tutorials on my channels already showing you guys how you can do that. I'M ventilating two lines. A long side of the box, so it will be thick enough to cover the space in between, because i'm not ventilating the whole of the list, i'm just ventilating the side of the box, so just watch and understand what i'm doing so. For the mid part, i scantily filled it with braiding hair or synthetic hairspray, so you can actually do that or just forget about it. But if you ventilate about two or three lines along each side of the balls that will be taken out to help you cover the space in between. So when moving on to the next box, you want to leave at least a line all through just so. You can have a clear pattern. Do do so, my so guys i just finished um ventilating the boxes, and this is what it looks like currently like i'm really feeling this week. Honestly, i wouldn't like to guys i was so super proud of myself with the outcome which you're going to see very soon, so next i'll be using my edge control gel to bring all the hairs of each box together. So you like stick all the hairs together and prevent any flavor or anything like that, and i'm extending it to the strands of the hair just to like basically bring everything together. So next i'll be using my small elastic bands to connect the hairs. So so i'm done with the connection guys - and this is what it looks like next i'll - be doing the knotless braids on the ends of each connection. So i'm done braiding all the ends, and this is what it looks like so far so guys i dipped the wig in hot water to seal the ends and make it look. Nice and seamless - and this is the finished result. I was so so happy and super proud of myself, and i hope you guys enjoyed the video because i enjoyed filming this tutorial honestly. So i'm going to do an installation video soon for those of you that might be interested in seeing how the wig looks on me so stay tuned. So if you find this video useful, please don't forget to subscribe to my channel like leave your comments in the comment section below share with your friends and stay tuned for more amazing content. Thanks for watching bye, you


Comments
SHARON O TV: Items are available for sale on my ig page @wigsbysharon Also shop items from Amazon via links in description box
belle_graciaz: This is so beautiful, I can't wait to try this out
Kurlie KeKe: Wow!!! This turned out beautiful❤️❤️
slim jim: ❤the detail work impress with the explanation and the finish unit is a yes
Mea Green: Looks amazing
Sasheika Tv: This looks great!! How long did it take?
Lydia Daniel: Thank you so much for this great knowledge you have impacted us... This superb!!!
BLISSFUL ERIC : Woo I really love ❤ this beautiful and very neat
Muna Leonie: Very beautiful, thanks for sharing,
Ebyemy: This is so beautiful. You are really good at what you are doing. Knowing that elastic cut with time, what do you do when this happens because all the connected ones will unravel.
Chinny mg: It's beautiful
Verona James: Love it
Vanilla Brown: I’m from Mozambique, and i am allways learning with u ❤️ thanks for teaching us
mitchelle Ofori: I just subscribe because you detail the work and then you take your time. Thank you
IBK BELLEZAS: Amazing
Ajayi Adeola: Wow..very impressive ..
Cookin' With Bree: Hi very nice where did you get the lace from and what kind of hair did you use for the front
Brittney Smith: How long does it take to make
Milfrance Larose: Wow very nice
onneile diole: how long did this take?
Kayla: You have gifted hands. I am truly inspired. How long did this take? AMAZING work
Glorious Spark: Nice job , pleade Can you give the link where you bought the lace ?
Esther Ekong: U did great where can I get the lace
Mrs DFJA: You are truly talented
Mauree Brown: Wow that's so beautiful great job a lot of money for that job
Rachael .M.P. Sheriff Badru: Lovely, I need some too how will i get it
SHARON O TV: I ventilated human hair at the front to serve as baby hairs... really sorry I didn’t mention that
Ronda Lomax: Do you have a picture of the unit being worn? Very beautiful!
Ikerionwu Cynthia: What is the size of frontal
josiah holuwakemiy: How much is your ventilating needle and swiss lace original
miracle johnson: What's the name of the tool you used in making the closure..is that crochet pin too
style by sophie: Another banger great job
Lovely Felix: Good job bb
Namithalie Mendes: ❤❤❤
Remytutorial: Pls sis what app do u use for editing
Rustyben nineoneone: Where do you buy the lace
Bertha Somanje: Just subscribed am ur new fan.I love ur work dear
Margaret Oluyi: I love ot thanks
Omoboye Kikelomo Esther: Please what size of the frontal lace you use, is it 13by4 or 13by6 please
Mary alice Jones:
Alicia Dyer: New sub can you please leave a link below for the product you use and where you purchase them.
BebeJ Recipe: Is it possible to order and if yes how much?
Iyunade Adeola: You did a great job but I'm scared to do it cos that front can't firm
willams ify: How do you customize the hair line for a customer whom you have not seen?
Nico Ebirim: How many lines did u draw on the front pls
OLUWAKEMI OKOGUN: Very beautiful.. please how will I get the net you or what is it called at the market
Sophia Uromun: ❤
Linnett Tabanner: Are all lace the same in space size
Glamourgirldavi Doll: Blessed hands
THEMONA Lifestyle: Please need the wig how can I get it
kay ezbon: Pls did u sell?
fatou Mussa: one is how much
SG: Where are you