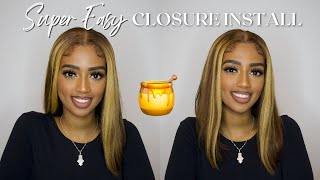
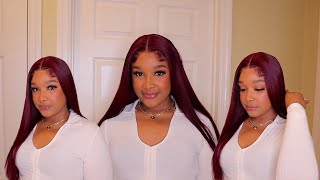
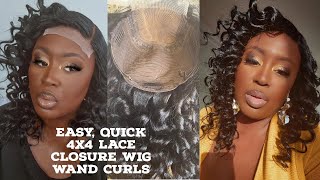
Super Easy Lace Wig Install Start To Finish | Lace Tint With Sally Hansen Airbrush | Ft Hairspells
- Posted on 10 June, 2019
- Full Lace Wig
- By Anonymous
Hello Hello Beautiful, Watch me customize and slay this 24in Lace Wig. I hope you enjoy!
-------------------------------------------------------------------------
|HAIR DETAILS|
https://www.hairspells.com/_p0354.html...
130% Lace Frontal wig
Style: Deep Wave
Color: #1B
Life: 1 Year (Depending on care and use)
Usage: Flat Iron, Straightened, dyed, bleached
Price - $162.00 USD
Shipping USA - 2-3 Buisness Days
------------------------------------------------------------------------
Be Sure To SUBSCRIBE, COMMENT & LIKE
| Weekly Travel, Lifestyle Vlogs |
Flight Attendant Vlogs : https://www.youtube.com/playlist?list...
Beauty Videos : https://www.youtube.com/playlist?list...
| Social Media |
Travel Blog: www.treasureelise.com
https://www.Instgram.com/treasureElise...
https://www.facebook.com/treasureelise...
https://www.twitter.com/treasureelise
Snap Chat: TreasureElise
| Business Inquiries |
Email: [email protected]
Say Good Night by Joakim Karud https://soundcloud.com/joakimkarud
Creative Commons — Attribution-ShareAlike 3.0 Unported— CC BY-SA 3.0
http://creativecommons.org/licenses/b...
Music promoted by Audio Library https://youtu.be/SZkVShypKgM
#hairspells #lacefrontwig
Hello, hello, beautiful welcome back to my channel, so today I'm coming to you with another here tutorial video. I absolutely love making these videos for you. Ladies. So let's get started so this 24 inch Peruvian, deep wave, wake came from hairstyles and it was shipped in this really cute little satin bag. Now this wig is a super bomb, but unfortunately it did not come pre plucked. So the first step, we're gon na do, is go ahead and collect that hairline and we're gon na customize it to how we like it now, there's no special weight on how I pluck my hair line. I just kind of plug and brush out the hair. That way, I can see how much hair is actually left on that hair line to see which parts I still need to customize, because certain parts of the wig will be thicker than other. But I'm just gon na take my tweezers and just keep plucking and brushing, and this is what much hair I came out with. So the density of this wig is 130, as you can tell I'm completely brushing out all of those curls, because I want to make sure that there's no more like you lose hair left from the plucking process. But I am gon na go ahead and wash and deep condition this hair, and this is the results the hair is so soft. Guys like this is my first time having like really fairly hair, but it's super soft and there's no product in this hair. At this moment I just went ahead and washed it, but the next step I'm gon na, go ahead and use a girl activator, and this is a curl free activator that I'm using from gold - and I just did probably like a quarter size and I'm gon na. Try my best to like stretch it out that way, I'm not making the hair too too heavy, because we really don't want that much products on the hair overall. Okay, ladies, so this next step is a very important step. This is gon na, be the key feature to making your lace wig look very natural, so I'm going in with my Sally Hansen, airbrush leg spray. I'M gon na be using the color medium blow. Now this matched my skin to perfection. So I'm just gon na go ahead and cover the entire top part of the lace wig with this airbrush spray. So I did purchase this product from Walgreens. I believe it was about $ 8.99, but I did notice that it is on Amazon as well make sure you guys push back while those baby hairs. I made the mistake of keeping some baby hair in the front, so I did have to go back over just the wash the hairline over, but it was a little hard to spray it at first, but once I started spraying more product started coming out on the Lace - and you want to make sure you cover the entire part of that least, that will be showed if you do decide to part your wig. So a couple things that I do love about this product is that it does come in six different shades and it is water and transfer resistant. So once this product dries, it's basically not leaving that lace at all. So I'm gon na go ahead and complete this process with my translucent powder and I'm just gon na go ahead and dab it in to make sure that this seals, all that liquid another great option to locking in and sealing this product is using the got to Be glued blasting free spray, guys I went swimming in the ocean and this color on this lace did not go anywhere once everything is locked in on that lace. Trust me it's the best way of 10 technologies. If you don't want to bleach it alright, ladies, so as you can tell that lace is matching my skin, so close, don't mind that wake up, but look at that hairline. I did not want to over plug, because I know over time that hair is eventually gon na come out, but look at these curls. This is a drying process and these pros look absolutely beautiful and there's really no product in here now on five six and this hair is 24 inches long, but it can obviously be stretched down. So once we get done admiring our beautiful hair, we are gon na. Go ahead and cut that lace off now I apologize I did have to get out of frame, so I can look in that mirror. I am cutting it off, just close as possible without cutting any of that hair. Now, if you look closely, you can see that I did not cut this lace in the complete straight line, because I do want it to look as natural as possible, but I'm gon na go ahead and use my banana clips and push this hair all the way Back out of my face that way, I can prep it before. I use my bold fold. Lace, blue, hey guys, so this is when I noticed that my wig cap was way too light. So I went ahead and used that Sally Hansen to tint my wig cap. As well next, I'm just gon na go ahead and apply that ghoul to my hairline and let it dry um. Please excuse my little visitor. He did not know what that I was making a video, but we're just gon na go ahead and let that glue dry before we apply that lace wig. Now you want your glue to get super tacky and clear, and I am just gon na pull everything down and make sure it is drying and I'm just gon na use a blow dryer to speed up this process. Alright, ladies, so this wig is officially down, we went ahead and customize that hair line tinted that legs and look at these beautiful curls. So just look at this parting space on this wig, it literally looks like I believed the hair. Now don't get me wrong. I absolutely love that bleaching process, but I noticed sometimes I do have a little bit more damage on the hair when I do bleach it, but this process is super easy super quick! All you got to do is spray it below dry, it and you're good to go all right guys. So I'm gon na take this little toothbrush little baby, hair comb thing, and I am going to part that hairline and create my baby hairs. Now that's another thing that this wig did not come with baby hairs, but no worries. We could just always customize our own and I'm not a fan of huge baby hair. So I'm just taking out a little bit hair and I'm gon na use. My got to be glued hair gel once I get done, cutting it to lay everything down now with this particular unit, we are dealing with deep curly hair, so I just want to make sure that when this hair fully dries, you know I have all the oil That I need, because I don't need big poofy hair on so I'm gon na go ahead and use this shade. Moisture, coconut oil and I'm gon na really focus on the ends with this product because that's obviously gon na be the first thing that poof's up is the ends of curly hair, so I'm just gon na spray. I don't really measure it. I just kind of spray it enough now I don't want to weigh down the hair, but I don't want it to get poofy in about an hour, and this product works perfectly with this curly hair and add shine and moisture to it, and it makes it look. So gorgeous and natural, alright, ladies, so we are just about complete with this beautiful unit from here spouse now. This does have a 13 by 4 top, so you can do a middle part or different side parts or even swing it to the side like how I like to wear my units, but I hope you beautiful ladies, enjoy this video and if you did be sure To comment like it hit that subscribe button to stay tuned for more hair tutorials like this. Thank you so much for watching, and I will see you guys next time. I you


Comments
HairSpells: You are absolutely GORGEOUS!! This curl pattern suits you well
rosa99: U did a good job hiding the wig cap and making it blend in. That's what I have trouble with but I'll try this method
Val: Did you notice any glitter on the hair from using the spray tan like most users have said to experience?
Kira Taylor: Ohhkay I see you girl he is fine lol so proud of you. Keep going babe ❤
HairSpells: Yessss GIRL!!!!