Pre-Plucked Hairline!! Beginner Friendly Clear Lace Install Best Lace On The Market | Xrsbeauty Hair
- Posted on 19 December, 2021
- Full Lace Wig
- By Anonymous
▬▬▬▬▬▬▬▬▬♛ Xrsbeauty Hair ♛▬▬▬▬▬▬▬▬▬●
Coupon: "XRS082" for all products 15% off !!!
Coupon: "XRS082" for all products 15% off !!!
▁▁▁▁▁▁▁▁▁▁▁▁▁▁▁▁▁▁▁▁▁▁▁▁▁▁▁▁▁
Wig in the video: https://bit.ly/31BWgih
Style: Curly
Length: 24’’
Lace : *NEW* 13*6 Front Clear Lace
Density: 200%
▁▁▁▁▁▁▁▁▁▁▁▁▁▁▁▁▁▁▁▁▁▁▁▁▁▁▁▁▁
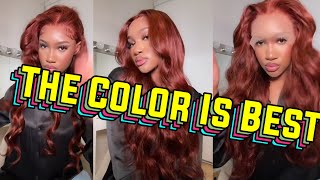
New *Clear Lace* & *Clean Hairline*
*Clear Lace* is Melting with Your Skin.
Clear & Transparent for Real!
*Clean Hairline* is Same as Our Own Hairline
Natural Hairline Transition
▁▁▁▁▁▁▁▁▁▁▁▁▁▁▁▁▁▁▁▁▁▁▁▁▁▁▁▁▁
*New* CLEAR LACE is real clear lace, it’s undetectable on your head.
*New* CLEAN HAIRLINE is much more natural than regular pre-plucked hairline, we customized this natural hairline to make it melt skin much perfectly.
▁▁▁▁▁▁▁▁▁▁▁▁▁▁▁▁▁▁▁▁▁▁▁▁▁▁▁▁▁
—Share looks on facebook, instagram , youtube and tag @ #xrsbeautyhair , customers will get $15 dollar for next order.
Contact Us:
YouTube: http://bit.ly/2KXjerD
Instagram: https://www.instagram.com/xrsbeautyhai...
Facebook: https://www.facebook.com/Xrsbeauty
Pinterest: http://bit.ly/38VFY3a
My Socials let’s be friends! (literally) :)
IG: @kamanijeann
Twitter: @kamanijeann
TikTok: @manijean888
Snap: @manijean
Wig IG: @wigssoldbymani
Email me for business inquiries only [email protected]
Hey everybody and welcome to my channel welcome back returning viewers, so today's install is going to be a full tutorial in a in-depth tutorial and it is also good for beginners because of the kind of lace that this is. So if you would like to see how i installed this wig keep on watching, so for starters, you want to take a wig cap. You want to take something close to this color so that you can manipulate it into the color that you are and then, after that, i'm going to be cutting out my ear tabs. This is for comfort, and also this is just something you need to do before you bring your spray into the equation or glue. You know whatever you choose to use, but i like to use spray today, i'm using the ebb and wonderlace bun adhesive spray. In the version extra mega hoe and i'm spraying a little bit at a time section by section, starting off with the front, then moving to the side and then to the other side and then spreading that out with my fingers all the way around once it's dry. Take my scissors - and i just simply cut it off this part - is very self-explanatory. You feel me you're just cutting off the excess cap. Now it wasn't actually dry right here, so i had to go in and just hold it back down and um. Take my blow. Dryer on cool again and then just continue on with the process of cutting off the cap to make this cap look like our skin to make it look like scalp, i'm going to be taking my ruby, kisses cream foundation in the color rd15. Along with this makeup. Brush that i got from my local beauty supply store, i'm just going to be pressing that into the cap like very firmly putting a lot of product on it, so it can really give scalp. I wanted to give you guys a close-up on this lace. This is clear: lace: okay, not your regular hd lace, not your transparent, not swiss. This is an upgrade of clear lace. This lace comes pre-bleached, pre-plucked and pre-customized. All together, as you guys can see, i didn't touch this wig. It came like this fresh out of the box, and this is the pretty texture of the hair in 24 inches. Now that the wig is on my head, i'm going to be taking my scissors and cutting off the excess lace around my ear. So it's just more comfortable when applying the wig okay, some people like to leave it. I think that it's more comfortable to um, you know to cut that off beforehand. As you can see, i took it off tinted. The lace off camera actually um forgot to show you guys that part, but i use the same cream foundation rd15 and right now, i'm just pressing out the hairline, which i find very important before actually adhering the lace to your skin. So i want to stretch to you guys how important it is to clean off your skin before actually applying glue, because i forgot to do it during this install and my glue was not sticking at all so yeah. Please make sure you guys use a cipro alcohol and a napkin or a cotton swab or whatever, to clean off that excess makeup and oils around your forehead because girl, this wig did not stick. It was not sticking, so i had to do an alternative and just make this a um spray-on type of install. So i use this tresemme holding spray. I was so irritated because i've tried so many times, but i'm using this trust me holding spray for um, adhering this lace to my skin um and it worked. It worked um. I don't know if the lace, not the lace, but the glue ended up working like after it was held down for a minute but um. I think it was a trust me holding spray. So, as you can see, i'm doing it section by section using my finger spreading it out and blow drying it on cool. Once that's all adhered, i'm taking my elastic band, i'm going to wrap that around the lace for about 10 minutes tops and while that sits, i'm taking my hair serum icy, fantasia heat protecting spray and i'm going to be putting that around the hairline so that i Can press it out with my hot comb just because you feel me, i use my hot combs so many times during the install just because i feel like it makes everything more sleek and flat and more realistic, like i use my hot comb in oil so much, But it's necessary. I promise because the results be so good and you see how slow i'm going. That'S how slow you want to go. But now you know just to make time go by i'm showing you guys how much lace this has so yeah you guys it's 13 by 6. You can do any type of parting. You can do rubber bands any type of cute style that you want to do that. You can't regularly do not 13 by 4. You can do it on this week for sure. So now, i'm taking my razor and i'm cutting off that excess lace. As you can see you guys it's going pretty smooth. It'S always a lot of like leftover pieces of lace that i have to cut off with my scissors. But you guys will see that in a minute which i'm trying to get as close to the hairline as possible, getting any piece of lace that really doesn't need to be there. Since i did use spray for this. Install the my skin and just around the lace was looking a little crusty. So i didn't take my rubbing: alcohol, not my rubbing alcohol, but my center for alcohol and um, a paper towel to kind of clean that up and now i'm taking my ghost bond glue and i'm just applying a little bit more around the pieces that didn't get Laid down all the way um, as you guys can see, i recommend you know letting that dry a little bit because yeah. I was pretty much over it, though, not in a bad way, but i was trying to adhere this wig down for so long that i was just like you know: i'm not gon na. Let it dry, i'm just going to um yeah, apply this glue and put it down which the end result wasn't bad, but you know you can avoid some extra white cast with just letting it dry and then pressing it down now the reason that this video is Beginner friendly and this week is really beginner friendly because of how it comes like how i mentioned at the beginning of the video i did not customize this wig at all. All i did was add some makeup to it and boom like the hairline, was giving natural. It was giving like, oh my gosh in person, you guys, if you guys, can see this in person. It gives scalp like the other collab, that i did with xrs beauty here that spoke volumes. You guys seen that, and this is giving the same results like and then the fact that i was a little having a little bit of trouble as a beginner. Would you feel not even just a beginner, but we all you know, can make mistakes, but it's you know a lot more common for you guys to make mistakes being a beginner, and you know this being your second or third or even first time, installing a wig. So like having a lace like this, where you don't have to even customize it and when you put it on, the lace is just going and it disappears after you have everything set in place. Yeah, like highly recommend you feel me: it's not an affordable super, affordable wig, but it's worth it, especially if you don't want to put the work into paying somebody to customize it or customize it yourself, because you don't know how to or you just don't feel like It like this is the perfect wig, but enough of that talk, let's get into these baby hairs, as you can see, i'm taking a very thin amount today, you guys, i wanted my baby hairs to get fluffy and just really natural, especially with this being curly hair And the vibe that i wanted, i want it to be more natural than you know how i usually do, even though you know it always gives natural, but you you guys know what i mean. I didn't want the baby hairs to be super thick, so i'm taking like the slightest amount here and i'm just trying to match it up with the other side making sure i have it all. Even so, you also want to make sure to hot comb. Your baby hairs out, especially dealing with and using curly hair because it just makes the baby hairs come out more sleek, especially when we're going to be curling them later on. So i'm going very slow. While i do this, as you guys can see, and i'm pressing that hair out to the t and i'm going to repeat the same thing over here here - i'm just smoothing the hairline out a little bit more before i add more product, and this just adds more Sleekness you guys, like you, want your hairline to be so sleek that it looks like it's growing from your scalp like that's what the hot comb does so yeah, i'm going over that and then i'm going to be adding product here in a second. So so i'm going to be melting, this lace once more and i'm using my fantasia hair spritz spray and i'm applying a little bit of that and smoothing that around my hairline and then i'm going to be tying this down for another 10 minutes. So, in the meantime, i'm going to be smoothing out this part, even though i didn't use this whole part. I don't know why i still pressed it out like this. I don't know, but i'm pressing this out with my icy fantasia hair serum and, as you can see, still moving very slow with my hot comb. The reason being of moving sole through hot comb is to let that heat process through that hair completely. So now i'm just parting, the hair out for these braids that i'm doing here um. I know i said that this is beginner friendly, video, which it still is because i'm kind of not totally a beginner with braids. But it's not that hard to do. The only thing that you need is patience. Um patience really have patience with yourself when doing it, because i know for me it's really not that um hard once you just really focus and sit there and are okay with having to go over and do it a couple of times but yeah, i'm just pressing. The hair out now, because this is curly hair, even if it was straight, i would still press out the hair very much so so that when i do braid it, it's not getting super tangled and you know it's just a smooth base. So i repeated that on the next section: that's how it's looking that's how the parts are looking so by this time. I did do these braids like three times, and this was my third time doing the braid. I realized the first time i didn't have enough hair parted out, so here i'm just putting out more hair and i'm going to begin braiding once i have that part perfected. So when braiding tips that i can give for a beginner because i'm a beginner as well like, i said i did this braid two times over. This was my third time attempting the braid, but um really want to start with a small section and then just work. Your way up, that's kind of the basics of braiding, like especially with a braid like this. You want it to start small and then gradually get bigger, so you're going to use less hair in the beginning and then gradually add more and yeah. Also, you want to braid tight, you want to make sure you're braiding tight so that the braid is, you know not being loose. You don't want a loose braid, you want it to be tight, so yeah make sure you're, braiding tight, really gripping it and using your thumb to really push that hair up. Underneath you guys it's really not hard to braid like i used to think it was very hard to braid, but you guys it's really not! So if you just follow this, i think you can figure out for sure because, like i said, you just want to start off small work your way up and if you have to start over three four five times, that's okay! As long as you have that patience with yourself, you feel me because it's not going to be perfect the first time it's not going to be perfect, the first time, especially if you're a beginner so yeah and that's the same thing with installs. You guys have patience with yourself have patience but yeah that braid is done, i'm seeing how it would look tucked up under and i'm going to begin on the other braid, because i did have to redo that one too. So now that both braids are completed, i'm just going to be taking the two of them, taking them to the back and tying them in a double knot. Literally like that's all. I did to secure this so now the baby hair, as you feel me, we're going to be shaving them off with our razor here i like to do them in little sections kind of store them so that they can be not so even you feel me, and I go in a diagonal too. That'S how i get them to not be so. Even so, i'm taking my half inch pencil flat iron by kiss. You can find this at your local beauty, supply store or on amazon or on kiss.com. If they have a website, i'm not sure, but i know you can get it online somewhere. If you can't find at your local beauty supply store here, i clearly burn myself. You guys don't want to do that. Make sure you guys are being careful. Okay, do not burn yourself, but i'm curling under this time. You guys, i think it makes them look more fluffy and natural when you just curl under so i curled it under this time and i really did like the results. So i'm repeating that, on the other side as well, i was very excited to do my baby hairs clearly, because i knew they were going to come out really cute, something i got to be glue gel and i'm applying that only at the top of the baby Hairs because when i take my edge brush and when i comb them through, you feel me all that product goes through it. So you don't need a whole lot of product, so i did play with them a little bit before. Actually filming molded them down, not molded them down, but was set on it. Like i played with it a little bit, i had the vision of how i wanted them, but to make sure they came out exactly that way. I did manipulate them a little bit. So you guys can see the technique here, i'm using my finger. I'M swooping and i kind of wanted them to have like a two effect like have two swoops into one and then have some of the pieces curly as well. So yeah, i'm being very light with this. I didn't want to be harsh, not harsh, but firm, because i wanted them to look soft so, as you can see here, what i'm doing you feel me being very delicate, being very delicate, so i'm going to do that as well with my sideburns still tweaking the Beginning because yeah i wanted them to be perfect, not perfect, but you feel me perfect for me perfect for me perfect for me. So then i'm going to start on my sideburns and do the other side. So i hope you guys enjoyed that peace and quiet for a little bit because yeah, i just wanted you guys to watch. You feel me so that when you're doing your hair, you don't have to listen to me talk. You can just study the baby hairs and try to mimic them the way that i did them, but now i'm wetting the hair getting this hair, nice and wet. This is just pure water and then i'm taking this conditioner, i'm not even going to tell you what it is. I just wanted to show you guys, because it's not good quality at all. It'S like three dollars in i couldn't find my um curling cream. I don't know where it went, but i'm applying a lot of this conditioner into my hair to get these curls correct and then i'm going to comb it through. I wanted the top of this hair to be very flat, so i'm taking my bronzer bros tropical roots. Foam and i'm taking that and applying that all over the top of it, and then i actually did at night time wrap this up so that actually helped a lot with getting this as flat as i wanted it to be. I'M just taking this brush here and brushing that through and that made the curls look really juicy guys. I was like oh that's cute, that's cute, but yeah. So now i'm going to define the part with rd11 ruby, kisses cream foundation, and this just helps the part. Look more crisp like you actually really want to do this stuff, like use a lighter concealer. I promise, then i'm going to finish this off with some oil sheen here, and this is the end of the tutorial. Thank you guys so much for watching. I love how this came out. You guys, oh my goodness, but um yeah, make sure to like comment. Subscribe and i'll see you guys in my next one bye.


Comments
cheyanne💕: Love watching ya installs girl
ASHDOLL’S PLAYHOUSE: You speak & explain things so well ! Going to try to install my own wig by following your tutorial
multifacetedphoenix: i haven’t put much effort into install recently and have been trying to get inspired. you definitely did that. subscribed immediately keep doing what you’re doing!
cre m: Fye install, now we definitely need the makeup tutorial for that look!!
Brianna B.: I love your installs so much
Kayla Kins: watching you do hair is so calming
Sadity Gal: I swear your the only person I watch to learn how to do my own hair , I’m getting really good at it
Mzfancyy: Yasss! I love wig install vids and so glad I ran into your Channel
Ciera Evette: This looks too bomb. Love your thumbnail
ina monteiro: Can we get a makeup tut plzzz especially on the brows
Bumblebee: Mani I wanna see you slay a synthetic wig I know you will ❤️❤️
Diamond_ Simplyy: Girl I need a makeup tutorial from that thumbnail
Janiiah Bryant: Do you have videos on how to re-install these types of wigs when they get old and it’s time for a touch up?
Nae !: You make it look so easy lol
Stacy Paris: What is the difference with hot and cool blow drying ?
Chrissy Thic: You did that
Lulith Winchester: Girl this wig is 600$ we are beauty's on a budget
Simply Mary: your installs are bomb
Myriam Petit: Yessssssssss she’s back
Adelle Cross: Gorgeous! What blush did you use in your thumbnail pic? Its so pretty!
Mrs.Aqualee: I bought the wig!
Dona Lima: When it gets dry does it become really big and poofy?
Kyra Spearman: We need a makeup tutorial
Ms.Canela: What is the difference between clear and HD lace?
Coco puffs: I think we all thinking the same thing the makeup tut is needed
Dana Johnson: what are the products you use ?
Ondrasia Jenkins: Would you do a bald cap with the treseme spray or you don’t think it would hold as good as the e in spray?
The1andthe2: Bomb af per usual
Ariel Goma Moukala: yes girl this is fire
DollPhhace Tv: Makeup tutorial pls
Annmarie Coombs: this video is so satisfying
Mini DIOR:
Unique Henderson:
SouthBabySiiya: ❤️❤️
Meraline Moore: can i still dye it tho??
Only Dania:
Haley Lison: I-so-pro-pill isopropyl. You’re so pretty
Zaaall: Queen of this ish
The Real Nana Love: period
Yeaitz shy: I need a hot comb that’s why mine come out ugly , I just don’t got the money for it
BooRose TV:
YING ABBY: SCALP SCALP SCALP
Malasha Danyelle: Tictoc brought me here
Kia. A: Makeup tutorial tho?????
Queen Yolo: No Shade Or Anything But I Thought This Was Sukihana For A Min In The Thumbnail Pic {I Like Suki She Is To Funny}
CHANEL MICHELLE: You should comment and show you're subscribers love thoses are the people who is watching your videos so that you can make money .
Anjali Rangrej: Hi