*Must Have For Summer Hair* Curly 24” Wig Start To Finish Wig Install! | Bald Cap Method Ft Ulahair
- Posted on 06 June, 2022
- Full Lace Wig
- By Anonymous
*MUST HAVE FOR SUMMER HAIR* Curly 24” Wig START TO FINISH Wig install! | Bald cap method ft ULAHAIR
☆☆☆☆☆☆☆☆☆☆☆☆☆#ULAHAIR☆☆☆☆☆☆☆☆☆☆☆☆☆☆
❤️Save $10 Coupon Code: "CLEA"
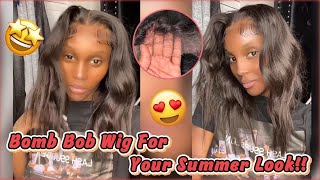
✨Wig info: 24 Inches 13x4 Undetectable HD Lace Frontal Wig Deep Wave 180% Density
✨Direct link for video same 13x4 deep wave lace wig: https://bit.ly/3kgK9gd
❤️Other Highly Recommend Items:
✨Affordable No Glue No Lace Headband Wigs: https://bit.ly/3sgvunV
✨Hot Popular Precolor Lace Front Wigs: https://bit.ly/3hbJE5F
✨Cheap 100% Raw Human Hair Bundles: https://bit.ly/3dLtOfQ
✨Wholesale Big Promotion Hair Deals: https://bit.ly/2IZzO9i
❤️Follow ulahair for giveaway:
✨Instagram https://www.instagram.com/ulahair/
✨Facebook https://www.facebook.com/ulahumanhair/...
✨Youtube https://www.youtube.com/@ulahair
✨Tiktok https://www.tiktok.com/@ulahair
❤️Contact for wholesale:
✨Email: [email protected]
✨Whatsapp: +8618924029739
Hey guys welcome back to my channel and in today's video i'm going to be reviewing your hair. Thank you so much gila hair for sending this beautiful hair through and the package came with some lashes and a comb which is very handy. So this is what the hair looks like black 22 inch 13x4 in lace, and it is deep wave with the curls and i love it so much um. The first thing i'm going to start with, of course, is plucking the hair. As you can see, the hair did come in a little bit pre-plucked, but i'm going to pluck it even more further. So the first thing that i did start doing is sectioning the hair into just two halves. I didn't really put it in half just two little separate halves and i used my foam, so i could use it to comb the hair back and it helps it to stay still like gel and it does help get all these little tiny details and then i Use the hook comb again just to secure the hair back, nothing else more than that, it was very useful. It just gets all the little baby hairs that you can't really see out. You can't really say baby hairs, because there is no baby hairs. Of course we haven't done the edges yet and if you guys already watched this channel or came across this channel, then you already know that baby hairs are my favorite part of doing this installs because they make the hair look extra good, like this little decoration. So yes, right here, i'm just plucking the hair. I did section a little part of the front, then i'm just gon na pluck and i'm gon na do the same thing to the other side. Now that i'm done plucking the hair, i'm gon na start with the install, i already got my hair braided, i'm just gon na place on the wig cap and i'm just gon na put it right above my eyebrows, i mean right below my eyebrows and i'm just It'S just me checking myself out, don't mind me guys, i'm just trying to put it right below my eyebrows and we're going to use the got to be glue free spray yeah. This is the yellow kind and i really like using the yellow kind instead of the one that comes from the tube. You know the black one, because it dries super quick and it's really cold out of it. I love the cold sensation but yeah. It dries super quick and it's really easy to apply compared to the black one. Black one doesn't dry, really good, so yeah, i'm gon na start and to poke the holes right where my ears are kind of like fit my ears for the hole and i'm gon na do the same exact thing to the other side. I just find it easier to do that so that i can place the glue right on the ear side. Yes guys, it doesn't really matter if your wig cap isn't perfect, but you do want to make sure that it looks probably like as good as your install when you actually come to install the wig, because a good wig cap results in a good install. So this is why i like to make my wig caps really nice. Now, i'm just going to go ahead and blow dry, my hair. This doesn't take so long. It'S not too technical. It'S just pretty easy, just blow dry, the hair, nice and easy okay. Now this is the foundation part, i'm going to start using the foundation, and you want to make sure that you get the perfect one that matches your skin tone. Uh, usually just use the foundation that you use for your makeup. You can use any. I really like the liquid foundation. I don't really like using the powder type liquid foundation is easier to blend in with the wig cap, and it does blend in with your skin tone quite accurately, and i'm just using the brush to kind of blend it in nothing. Too special, nothing too technical and now we're going to move on to cutting the wig cap, i'm using a razor because it's easier than using scissors scissors are too big and they get in the way. Then i just can't see what i'm doing when i do. Your scissors razors, on the other hand, are quite small easier to use. You know you can see where you're cutting - and this is just me attempting to cut the wig cap - it's pretty easy, not to technical. Hopefully it gets easier guys. I promise you especially if you're a beginner. This is the perfect video for you, because it's pretty slow step to step and you get the close-up. So you get to see how close it is and how you should get it done, and once you get the hang of it, your lace is starting to start to look perfect me. Let'S take this over okay we're getting closer and closer to finishing our install, because we have the ghostbus glue, which is gon na help a lot. This is the most important glue. Honestly, you can get it off of amazon, the best glue ever and they last for pretty long, i'm not sure where the price is but they're up at amazon, not sponsored by the way. But yes, i like to use the ghostbund glue because it's pretty good comes in handy when it comes to gluing your hair down and it's white. So you cannot see it like when you glue your hair, you cannot see no glue gon na be no little flakes. Coming out of anything perfect glue and i'm gon na place it right below my wig cap just a little bit over it as well. So i can just like lay the wicket down. You know and we're just gon na blow dry with a blow dryer. It doesn't take that long and you should stop blow drying it when you stop seeing the white stuff and i'm going in for my second layer and as you can see, i like putting little bits just on like underneath my wig cap and this time we're going To go closer to the forehead, because that's exactly where we're going to place the lace off the wig and then that's exactly where it's going to tell us where we're going to cut. And if you guys, don't really know where you might want to experiment by putting it on your wig and then kind of like spot, where you want to cut off the little lace. And then you can just kind of like mark it down with the glue. And then that's exactly how you know where you want to put your glue so yeah. That'S exactly how i used to do it, but now that you know i've done installs quite a lot. So i know where to put where what apple of where my glue has to go and how far down i want it on my forehead now that i've done it's time for with the wig, oh i'm so excited i can just already tell this is gon na Turn out perfect, you already know we already did plug the wig and now i'm just gon na kind of like place it right in the middle, exactly where i want it and right above where the glue is so remember, the glue isn't dry, it felt perfect and I'M just gon na use the headband to just lay it down, because you don't want it to move anywhere guys, i'm actually in love with this lace. It looks like out of already like cut off the lace, but i actually just didn't. The lace is really good and remember. It is hd lace, hd lace. It'S amazing blend it with your skin looks like there is no lace, lace, wear lace! Wear so now we're just going to get the hair out of the way you can use a clip or a pen whatever can help hair bend anything and we're going to use a razor to cut off the lace. So, like i said, if you do wear a headband to lay it down, it kind of the glue kind of like sticks onto the lace. So when you do actually cut the lace, you know exactly where to go, because the if the lace doesn't move, then you don't you don't cut it off. Okay, only the excess lace only cut off the excess lace. Unless you want to cut off a little bit more, it's okay, just lift it up a little bit and i'm just applying a little bit of a bit of the glue and the got to be free spray just to lay down just a little bit more. Just just a little bit more, not too much just a little bit, you don't want to go overboard because um. What i do tend to find is that the free spray does get a little bit flaky if you go overboard and just tie the hair and i'll be back so now it's time for the wax stick. This is like glue. Stick to me. You know it reminds me of glue, sticks, it's built like a glue. Stick, it's stored like a glue stick and it works like a glue. Stick the way you use. It is like a glue stick and the the result is like a glue stick and i just use it because it helps lay the hair back, and this is another of my favorite spray. It'S the heat, protectant spray, because we're going to be using a lot of heat, you don't want to damage the hair, especially because it's curly, curly hair does not need to be damaged at all. This right here is the hot comb. I'M pretty sure you guys know what a hot comb is, but it's a hot home. So i'm gon na use that just to comb the hair back and i i actually love how combs like i don't know what i would have done without hog combs, because if you use a regular comb, yes, it works, but it doesn't like. I don't know, iron. The hair back, you know that's the little special something that hot combs do, and this is exactly what i'm gon na do to the front of my hair. I don't know why i look really aggressive doing this, like i look really aggressive doing this, but i'm gon na do the same. That exact procedure to the other side of my hair and i'll, see you guys in a minute. Okay, now that i'm done it's time to remove the headband, oh that little sensation after you do that it's just amazing. It just feels crazy good, because it's so tight on my head. It'S really tight. I just have to like when i remove it, it's so good, but yeah. Just me just appreciating how nice the hair looks, and yes, the two sides of i'm just gon na pop it back in sorry guys kind of forgot to say that pop it back in not because i'm gon na tie my hair just to kind of like move. My hair back because the hair is already like um glued in and dry, but i just had to tight because i couldn't find my hair band, my other headband, so you know the type of headbands that kind of move the hair back. That'S what i'm trying to say yeah, that but other than that i'm gon na trim the baby hairs. So if you guys were wondering what i was gon na do with the hairs that i did stick out, they're supposed to be used for the edges, i'm about to do and, of course it's my favorite part of the hair install i feel like. I say that too much, i think i said it once, but i'm gon na say it again. I love doing those edges if the baby hairs need to be slayed, guess what they're gon na get slayed and i like to use any foam guys just use any foam. The olive oil foam works really well. The cantu phone works really well any foam. Just to do my edges, i don't use gel because i don't want it to look crusty or like too oily or like stiff. You know when it dries. It looks stiff when you use like foam, it doesn't look stiff. It kind of looks alive, it looks like it's just. Naturally, there it looks more natural, so yes, we're just gon na wet the hair a little bit, not so much. I don't want to like damp the hair, i'm just gon na wet it to a reasonable amount. At the little bit of muse, so when i say foam i meant muse like foam, i call it foam but yeah. Oh, my meals is the same thing and i just love mute so much because it just gives that extra volume to the curls look. Look how much and i love the way they just feel this. Just me vibing with my hair. I don't really brush it or comb it, because it's just going to ruin. It just use your fingers because they do not play with the pattern of the curl. If you use a comb or a brush, it's it's better to use a comb, but do not brush it. Do not brush it. It'S going to be so perfect. It'S gon na go crazy like everywhere, but your fingers are the safest to use. You know we got hands so we're gon na use, hands and i'm just gon na add a little bit of the curling custard. That'S optional. It is optional to use the curling cluster, but do you don't have to use it and you know just comb the hair. Do not brush it! I'M telling you guys, please do not brush the hair you're going to lose the pattern you're going to mess it up, just comb it just a little bit, not too much it's going to look perfect! Look at it! Just just look just look at the hair, i'm so so happy with the results. I love it. It'S just me playing about with the hair a little bit, i'm just gon na fix it to the right angle. Um. I kind of wanted to see if it looked good if i flicked it back a little bit more headed to the side a little bit more. But here's me vibing okay, guys july hair did that and if you want a piece of that, then go ahead and click in the description box, where i will provide you with every single detail and information to this beautiful wig and thank you guys so much for Watching be sure to like comment, share and subscribe and imma wreck this hair peace.

Comments
Elaine's Tv: Beautiful install as always
serenesky04: So pretty!