Perm Rod Set On Full Lace Wig April Lace Wig
- Posted on 06 June, 2017
- Full Lace Wig
- By Anonymous
Italian yaki curling process~
Very easy and beautiful~
SKU: BW0080
Check it on: www.aprillacewigs.com/?ref=27059
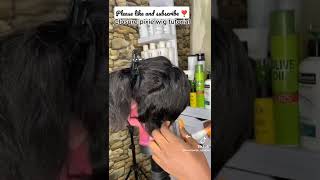
Hi everyone, so this video is about doing a perm rod set on a full lace. Wig. The only products I'm going to be using are a couple Clips, some combs, a lot of bodies of foaming, wrap, mousse and ecostyler crystal gel. I started by splitting the wig in half and it really helps to put the wig on a mannequin and then clamp it to a table. So I started at the bottom and work my way up, because that's how I do my normal term. Rod sets, and the only reason I decided to do on the wig is because I can't stand help from Rod said, will only last two days doing on a wig. I can take the wig off every night and hang it up and then the per curls would be perfect the next day and that's really what I was going for after I put the product in the hair. I took a fine-tooth comb and comb the product through to make sure it was as smooth as possible focusing some on the end later I learned it's easier to just use eco styler gel to smooth the ends to the perm rod. Sorry, if you can hear my dog barking the background anyway, I started at the root and then I twisted and twirled it around the perm rod to kind of get a springy girl than less of a Shirley Temple curl. Here, I'm just putting some foaming wrap mousse on the ends, but it actually works a lot better with eco styler gel on the ends. So I picked that up. If you could see it's kind of flipped off the end there and I used all orange perm rods. I want to say I counted almost 50 ending 48 or 50 perm rods on this wig and the wig is 16 inches. If you want information about this wig, I got it in April lace, wigs calm. I will have a link in the description box and also a link to a video where I wore the hair in its straighter blown out style. But here is a closer look at me: putting a perm rods in the hair. You start at the root and then you twirl and twist and get to the end, take a little bit of eco styler, to slick it on to the perm rod and then secure the end with the rubber banded side. Afterwards, I'm going to put the wig on a this is a little stand that you put your paper towels on. I just put a towel on that and then I stuck it underneath my hooded dryer and put it on medium heat and left it there for like 2 hours, 2 or 3 hours, and I ended up doing this at night. So it actually sat overnight. The next day I actually brought'add the front part of my hair, so it would lend a little bit better, just take a little stocking cap and put it over my braids. Yes, I some learned how to cornrow my hair, not very pretty, which is why I didn't show you. I took out the rods off-camera and then I plopped that onto my head. I was actually getting ready for work, so it was in a little bit of a rush, but I think it blended really well. If the color of this wig matches the color of my hair almost perfectly, I just lined up the parts that I made and fluffed it a little bit tried to blend in my my leave out with the rest of the wig. Just did some more fluffing with my hands to kind of give it a life, make it look effortless and not too too perfect. The curls actually started to fall over the days and then, by the end of the week they were more like giant waves than big spiral. Curls. I was ok with that, but for the first day it was very tight afro and I thought it was super cute and then I took some got to be glued spiking gel and I put that right underneath where the part is that way, it would, you know, Masks of the little line between the lace and my scalp, let me know what you guys think of this style. If you want me to do more styles with my wig, let me know until next time. Thank you guys so much for watching. Thank you for liking. This video and sharing it with your friends and subscribe. Please thanks so much guys, bye,
Comments
Magdaline 1ONLY: Beautiful!