Build A Free Hair Website On Shopify | 2021 Debut Theme Tutorial
- Posted on 05 February, 2021
- Full Lace Wig
- By Anonymous
In this video, I show you how to edit the "Debut" theme on Shopify in 2021. I lost the last clip but to create the 2nd banner you see in this tutorial, I just created another section by clicking "Add section" and then added another image overlay with text. If you would like a specific video showing this, I can.
The Canva files I've used and shared in this video will be available on my website.
The direct link to The Files to Upload on Shopify: https://glamhairgraphics.vipmembervaul...
Find Me Outside of YouTube:
▶ My Website: https://shopglamhairgraphics.com **You can go through glamhairgraphics.com as well**
▶ Find me on IG: https://www.instagram.com/glamhairgrap...
▶ Find me on Pinterest: https://www.pinterest.com/glamhairgrap...
▶▶▶ About Me:
Hi there! I create content here on Youtube for Hair companies, creative entrepreneurs and content creators. It's my hope that my content helps you create your own content (if you choose). My business, Glam Hair Graphics LLC was created to provide digital resources for hair companies. If you want to create beautiful graphics for your hair brand, make sure to subscribe to my channel to stay up to date. When I'm not designing websites and graphics for hair companies and posting on YouTube, I'm changing the world as a teacher. I've been teaching for 6 years and LOVE teaching just as much as I LOVE designing.
Follow my journey on multiple streams of income and learn how to brand your hair company the right way from the start.
#brandyourhair #hairwebsites #glamhairgraphics #freegamefriday
▶▶▶▶Website questions? Business Inquiries, Want me to design a site for you?
---- Send Me An Email at: [email protected]
▶▶▶This Channel is for:
how to brand your hair business, starting a hair business, build a hair brand, design a website, hair brand tips, start a hair boutique, canva tutorials, start a hair company, tech tutorials for your hair business, DIY hair brand tips, DIY hair business, hair extension companies, hair extension brand, hair extension websites, glamhairgraphics, hair banners and hair design
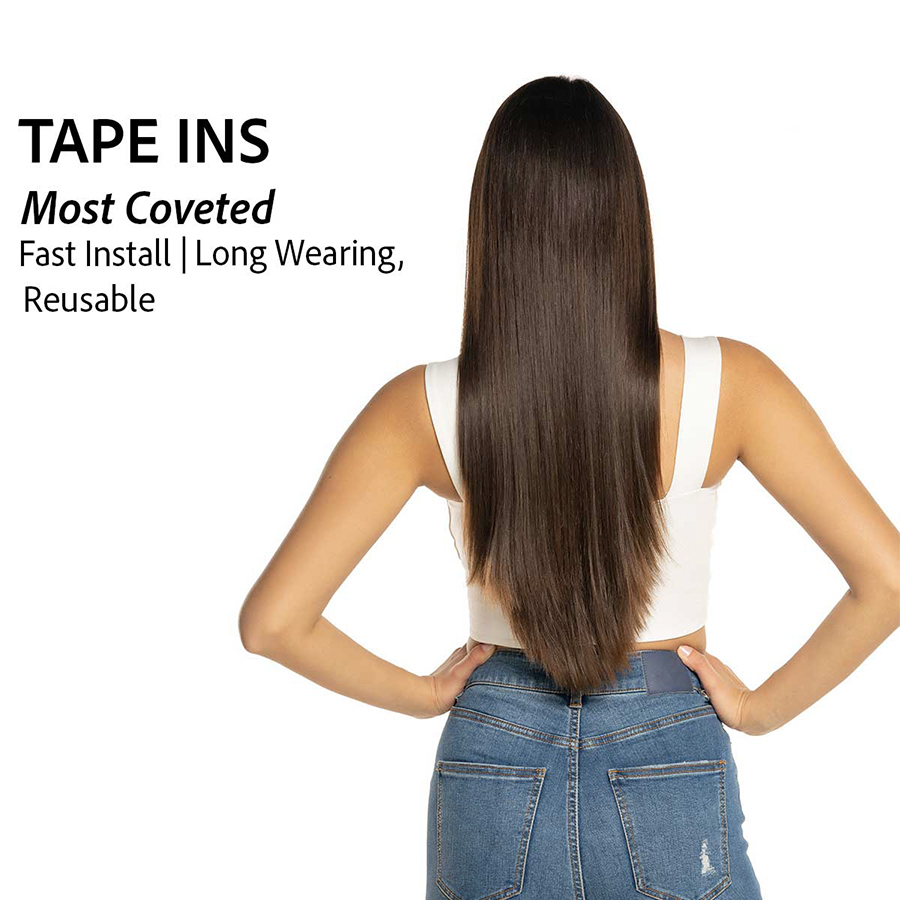
The first thing you're going to need to do is make sure that you are under the free themes. Shopify has a few free themes that you can use, i'm just going to use the debut theme, because personally i hate this theme the most. However, i find that a lot of people typically use this theme and for good reason. I think there are a lot of positives about the debut theme and that's why i'm going to work with this version, but just know it's not my first choice, but after this video and after uploading uh the banners i actually liked it so anyways. The first thing that i did was upload my logo, and i just did that by clicking the header tab at the top under home page and that's how i was able to get it so once you have customized or once you have uploaded this theme onto your Account and then you press customize. This is what it's going to look like, or the actual layout of this thing. The next thing that i'm gon na work on is the banner image, the slideshow image, which is the second tab from the home page. So there's the header and then we have the second tab. I did use canva to create this. So if you don't know how canva works, i do have a video that i'll link just so you can get a good review of canva, but i don't really go into canva in this video, i'm just showing you that this is how i was able to do It you will have access to this file in the shop category files that i showed later on in this video. It will be located under freebies on my website. So if you want to use this and do this as i'm going over this video, then by all means do so, but once you upload the image from canva to your shopify banner, this is what it looks like. These are the settings that i have it under. So what i'm gon na do is create the section height of extra large. This is just a personal preference. I prefer it this way. There are some ways to get around it. Looking at mobile view, which is what i'm typically the most concerned about. I felt like this image looked better as extra large on mobile and desktop, so this that's why i created that section height. The next thing i want to do is edit the title and the text, so i just put shop wavy hair and then i think i put shop wavy, hair extensions, just something generic. Just you see the process of me typing it all in the next thing that i do is add a button. You can create the button, but it won't actually show as a button until you link it to a specific page. So i just found a random page that i created as part of this theme, and i linked the button to that. So this is what it's going to look like so far. I am hovering between desktop and full screen, as well as mobile. So everything that i do, i always go back to full screen just so i can see what it looks like and then a little bit later you'll see me go through mobile, so i can see what it looks like on a smaller device, but as far as The banner image - this is what it looks like it looks great in my opinion. Next thing i want to do is look at it on mobile, and this is what it looks like. So you see part of the image, but you still see the message: if you want more of this image more of the model to be shown, that's wearing the white, then you would just move the model on canva more to the left. If you want less of the model to be shown, then you'll just move her to the right. So, just keep that in mind also, you might want to change the text because it does clash with her white shirt in the white text after i have completed my banner image, i'm actually going to add a section. I want to create a section that isn't already up here, but to do that, all i need to do is click add section and then what i'm going to add is a gallery. So a gallery consists of three images, so i'm just going to click that tab and drag it underneath my slides, so my slideshow image. So this is technically the third tab from the home page and it will give you three sets of images. This is going to be my shop category images and again this isn't like a canva tutorial, but you will have access to this shop category image as well, so you'll be able to upload it. Just as you see me doing it once i've saved it from canva. I'M just going to find it in my file, so i can upload it to my shopify site and as soon as you upload it, it will show up under your gallery image like. I will show you many times in this video. I'M gon na go to full screen, so i can see what it looks like on a larger screen and i'll also show you what it looks like on mobile as well. You'Re gon na do this two more times using the exact same image as the first, and that is how you're gon na get your three gallery images. They look beautiful. They look perfect, as is so. You shouldn't have to change any of the other settings after adding your images. However, it is totally up to you if you want to adjust some of the settings. The next thing i want to do once i've uploaded. My three images is, i am going to add a caption. The caption is just going to allow me to title it. If you don't like the font choices that you're given you can edit the font under theme settings in shopify, but you can also edit the font in canva. So if there are a specific, if there's a specific font that you want to use, that's not available under shopify, then all you would need to do is when you go on to canva, instead of just downloading a blank shop category. What you're going to do instead is insert text on canva, and your text could say: shop straight shop body, wave shop, deep curly, like i'm doing here, instead of typing it as a caption it'll, already show up under your canva design. The only thing you would do, if you're doing it that way is make sure that you're linking the shop categories to an actual page. You want to make sure that your shop categories are usable, functional and the only way to do that is making sure that they actually link to where you want them to go. Hopefully that makes sense. I can do a little follow-up video, if you want me to. I think in one of my wix website design videos, i do use custom text through canva and i'll link that video in this video, so you can check it out if you want to see what that looks like so far, it looks great i'm going between mobile And full screen, so i can see what it looks like on both devices. If you're keeping up with me, i have my logo. I have my slideshow image and i have my shot category images. The next thing that i'm going to do is add another section. That'S not already pre-installed on this theme and i'm going to add a bit of text. So this is how you would add any text that doesn't necessarily come as part of the theme to your shopify site. I would use this text as a place to introduce my brand or talk about you know your values, what you stand for interesting facts about your company, whatever. I think this would be a great place to put it, so i do put it in between that slideshow and those shop categories just to break it up a little bit. So it's not so uh intense. Both ways, look good in my opinion, um. So it really comes down to personal preference. If you don't like that, then you don't have to add this section into it. You can just keep it to where it looked like before i made that change it's totally up to you, but since i am designing this theme - and i was just kind of into it and just seeing the options that i could do with the debut theme, this Is just what i ended up coming up with the next section is featured collection, so this is just going to be any collections that you have created for your site. So in order for this to actually work, you have to have a collection to start with. So, if you're not given any options to create a collection on your shopify site, it's because you don't have one, so you will have to go back to your products and create a collection based on what you currently have in your store. If that isn't ringing a bell - or you want me to create a dedicated video on how to create a collection from your products on your shopify store, leave me a comment in the comment section below and i'll. Do it it's pretty simple, but again i don't mind making the video so that i can help clear up any confusion that you might have so once you have connected your collection under this tab just going to erase all of the other ones or hide it um. So that little eye icon - that's kind of slashed in the middle that just allows me to hide sections that i don't want to work with. Instead of hiding it, you could also delete it. It'S just personal preference. It doesn't really matter to me, but again you don't have to do that. You can just delete it. So once i have this theme set up the way that i want i'm actually going to go to theme settings like you saw in this video to edit some things about this site. One of the things that i do edit is the text color and the button color. If you are wondering how i was able to get rid of the opacity of the slideshow image, because when you actually do insert your first banner image, it shows up as this like white overlay, i went down to the theme, settings, click colors and then, where it Had opacity, i made it all the way to zero. It might be at like 20, when you first upload um your banner image, but just to get rid of it all together. Just move that tab to zero percent. I don't know where the clip went, so i apologize, but that is how you would adjust that everywhere you see red, i just changed it to blue, so it would match the announcement bar at the top of the page. I actually like the blue, so i didn't want to change the color, but something really easy to help you if you want to put more of your brand colors if you're, using this theme that i'm sharing with you or these banners that i'm sharing with you everywhere. You see that dark blue at just replace it with your brand colors. So if black white, gray and gold and maybe pink, are within your brand colors, where you see that dark blue app, you could just change it to pink. It'Ll include more of your brand color and style. I did make the text darker. I made it black. I felt like it popped a lot better and then this overlay that i have added as dark blue is just what it looks like if i hover over the shop categories, the last shop category didn't highlight, because i didn't actually include a link. So that's what it looks like it's just a picture. It'S not functional! So make sure you link all of your shop categories and, if i didn't mention it before, if you go to page under colors, i did change it from that gray that it was originally to white. So that was just again like a stylistic choice. That was something that i wanted to do because i felt like it looked better and it popped against the black text, so that is it for colors um. This is where you can change the font of your site as well as the size. You can add your social media here so including the links to all of your social media platforms so that it is functional you can add a favicon which is basically an icon. That will show up beside your tab to help people. Remember it's you i'll, leave a link to favicons. If that's something where you're like, i don't know what that is i'll, leave a link in the description, so you can check it out, but that is about it. For this theme this was pretty quick, i'm so sorry it took so long for me to do this, but i really did not want to create any more content on youtube before addressing my shopify tutorial, because i did tell you i was going to do that um During vlogmas - and i didn't the last thing that i do go over in this tutorial - is how to get that powered by shopify off of your site. I find that a lot of people don't know how to do it. It is. It can be tedious. My first time doing it it was very tedious, but i do show a quick tutorial on how to get rid of it. You would think you would get rid of the powered by shopify by going to your footer, because it's at the bottom of your page, but it doesn't give you an option to uncheck it or get rid of it from there. What you're going to have to do is go back to your theme. So, besides your theme, you'll, see debut and then you'll see actions and customize. If you click actions and then hit edit languages, that is where you're actually going to be able to take away the powered by shopify icon. And i don't know what was going on with my clips. But that was gone. But i will link a article below that's more of a visual to show you how to get to the edit language part. If you don't know how to do that, but once you get to that you're going to click those three buttons in the right corner and once you click those three buttons in the right corner, you're gon na click, the last option, just like you see the checkout And systems i put in powered by shopify and filtered it because i did not want to scroll all the way down to find it so once i typed it in powered by shopify, it took me directly to where i needed to go to find that you'll see That powered by shopify is grayed out to get rid of that. All you need to do is press the space bar, but i would encourage you if you're a hair company or any business watching this video to instead of putting the space bar to get rid of it actually type in your credentials. So your business, but if you just want to get rid of it for right now, then all you have to do is type the little just put a space bar and it'll get rid of it. Hopefully this video was helpful for you leave me any comments below. If you need me to clarify anything, i'm happy to do so until next time, bye,

Comments
C.LiveBeauty: Thank you so much you have been so helpful!!!
Only The Andersons: Nice job! What size is your logo? I can’t get my size correct.
Triecia Denise: This was such an awesome video!!
Jacqueline Carswell: I NEED YOUR HELP PLEASE! This video was so helpful girlie!
Latrinda A.K.A Trina Goodwin Roach: Thanks for sharing !
Time For Tea: Appreciate your video thanks
Tiffany Evans: Can you do a video about adding your collection? Thank you
The Blue Ridge Sounds: Do you have a video how to add payment
Maemu Meme: Hey I need your help my online store it’s a mass also sell hair