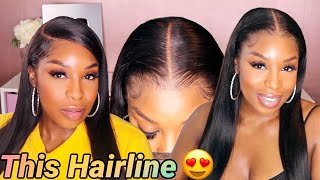
Water Dying & Installing Pink 613 Full Lace Wig
- Posted on 16 January, 2021
- Full Lace Wig
- By Anonymous
Hey, you all! Thanks for checking this video out, hope you enjoy! Don't forget to subscribe and hit that notification bell.
Wig: Subi full lace bob wig + 16 inch bundles
Color: Pink Mania + Pink Petal
♡ WHEN I AM NOT HERE ♡
☆ ----- Connect with me ----- ☆
☆彡My Website► https://isimbaa.com
☆彡My Personal Instagram► https://www.instagram.com/i.simbaa/
☆彡My Business Instagram►https://www.instagram.com/simbian.co/
☆彡☆彡My Email ► [email protected]
♡ SHOP WITH ME: @simbian.co
♡ PREVIOUS UPLOADS:
- How to dye Black Wig Red (no bleach) + Install: https://www.youtube.com/watch?v=zBFXdE...
- HIGHTLIGHT TUTORIAL ON BLACK WIG (VERY DETAILED!) : https://www.youtube.com/watch?v=SjgerY...
- What lace? How to melt your lace! Very Detailed | Asteria Hair: https://www.youtube.com/watch?v=qXUMD-...
----------------------------------
♡FAQ
+ WHAT'S YOUR NAME?
- My name is Simba
+ AGE?
- I’m 21 (Scorpio GANG!!!)
+ WHAT COLLEGE DO YOU ATTEND?
- Howard University
+ WHERE ARE YOU FROM?
Miami, Florida
+ WHAT CAMERA DO YOU USE?
- My iPhone 12 pro max
———————————————————————————————
♡ATTENTION COMPANIES:
If you are a company interested in working with me or want me to review a product, feel free to email me at:
[email protected] or [email protected]
What she's about to do, what she's about to do and she's about to show what the girls should have did keep talking matter of fact, because that's what's making her eye for that fat? What'S up you guys and welcome to my channel, i am suma j and i am going to teach you guys how to get this color today, stay tuned, stay watching all the way to the end. I also have a tutorial on how i did the install as well, so make sure you guys stay tuned. Make sure you guys subscribe like comment all that and make sure y'all turn that bell. So you don't miss anything i post because i'm on the road to 2k and i need y'all to help me get there: okay, okay! So let's get into this video, okay! So, first we're going to start with a pot of boiling water and we're using pink mania and pink petal from kiss brand in temptation under temptation collection. So what you're going to do is you're going to pour that into that boiling pot of water. Make sure you get all that water out and you're going to take a comb and stir it around because the water hot, like you, ain't gon na put your finger in the water, because it's hot but yeah squeeze with all your money, make sure you get all That pink out, because we're trying to look like a pink anyway, we're gon na take our pink towel lit and we're gon na color test. So this color was a little bit too light for me like i wanted it to be like boom in your face. So what i did was, i grabbed my wig and i took a piece of hair from my wig, a tiny, tiny strand of hair and i'm going to put that inside the pot. So i'm trying to see if the color that the paper towel was is going to be the color that my wig is going to be and sure enough. It was, and i didn't like it, it was too light for me. I needed to add some more pink up in there, so you guys see me pouring that pink up in there and we're taking that paper towel and we're gon na look at that color again and yo. This color is so cute. So now we're going to take our bundles and we're going to take our wig and we're going to dip that thing up in there. I put it all in one pot, all together, okay, so as you can see, you're going to stir that pink hair soup up and serve it to your man now i'm just wearing. But i am using my comb to distribute the color all through the hair and y'all can see. I did not like this color like um. It was light in some areas. It was dark in some areas. It was pissing me off in all areas, so yeah like it wasn't what i wanted so look at the bundles. Like i mean i could work with it, but i didn't want that color. So what i did was start it all up again. So we're going to use a smaller pot this time, because i noticed that with the bigger pot, it was way more water and less color. So i purchased the same colors again and i'm gon na do the same process over again we're pouring that color out, mixing it up and dipping the wig up in there. So, as you can see, i am literally going through the hair and i am trying to distribute that color all through the light areas of my hair. Now earlier, i couldn't really touch the wig because it was in boiling hot water, so i don't recommend doing that. This time i'm using the hot water from the faucet, so it's bearable to touch. So that's what i'm doing, i'm just trying to get all those light areas. Now i'm looking in the middle, i'm looking at the lace and looking at this edges just trying to make sure that none of that hair is too light or too blonde. As you can see, the middle is a little light, so i'm going to go ahead and dip that in there - and i really don't know how long i left it in i'm - probably going to say overnight. So, after all that again we still got some light patches, but we could work with it. We could work with it. So now i'm getting ready for the install i'm plucking that wig, so she can be hello, snatch. Okay, pluck that wig. Now i'm getting ready to put that thing on there, so you're going to take your foundation and your brush makeup brush and just put it all over the inside of that lace. Wig now i'm trying on the wig just to be sure that the color of the lace and the color of my skin are matched so now i'm going to take some of that foundation again and put that all over my wig cap. I also have in-depth tutorials of me doing my lace wig a couple times on my channel. So don't worry if your this video is not detailed enough. So i'm going to get my 99 alcohol and put it all over my forehead, so i'm doing is cleaning that area of free of any sweat dirt gunk before i apply the lace glue, so this lace glue, i'm using in this video today - is ghost bond and Ghost bond you, you, you slipping up girl, you slip it up. So what i do is i take that ghost bond and then i spread it out until it's clear and then i add another coat. So i take the middle part of my rat tail comb and i just spread that out to be a thin layer, so it can easily dry enough so that it's clear and it's ready for the next coat. Now, as i go in for the next coat, um got to be what's going on. Oh, she dripping water, okay, so yeah this probably the last time. I used guys to be not really. I'M gon na use the rest of this bottle because i paid my little twenty five dollars for this i mean whatever anyways i'm going back again and i'm putting on the second coat and i'm just gon na spread out that late glue, okay, spread out to be Thin and when it's clear you go ahead and put that lace down, so i didn't do as many coats as i would usually do just because i was literally giving this wig on for probably like three days. I literally took it off after three days: yeah, i'm sad about that, but i had to. But yes, so, basically i'm just placing that lace into my skin and i'm taking my comb to help. I adhere it. Better kinda, look like i'm being rough, but i'm not. I don't think so so then i go ahead and i apply lace glue again, so i know y'all see my edges sticking out from the cap a little bit. That was because i kept my cap on for like two days before i did. This install so just be sure not to get the lace glue on your hair. If you do don't worry, you can use alcohol to take it off, but i didn't want to go through that struggle, so i was just very precise and making sure that i did not touch my edges because i need my edges. So basically, i'm doing the same thing going in with that lace, glue and spreading it out to be a thin layer. Then, after that, i'm going to go ahead and lay that lace down. So i'm going to take my elastic band, i'm going to wrap the hair and then i'm going to tie it and i'm going to wait. I think i've waited probably 30 minutes before taking it down wow. That was fast right. So now i'm taking it down and i'm going to cut that essence lace off, because you can walk around with this flap on your face, no ma'am. No, i have no turkey so we're going to cut this lace off and we're gon na get ready to look like a bad girl. Okay, so i know y'all see like it's like a dark in that area, but don't worry i fixed it. I went on ahead with that makeup and, as you can see, i had to redo this whole side. Again, that's! Okay, that's, okay! So what i did was i pin curled or tried to my attempt to pin curl the hair i'm going to glue the back down. Probably tomorrow because i will be putting it up in a ponytail, so this is how i glue the back of my wig down i'm at um, it's amarya's shop and we are well i glued it down, but i did a horrible job and it literally lifted the Next hour, all right, you guys have made it all the way to the end. Don'T click off yet if you made it this far make sure you comment down below either this emoji or type. Try in the comment section below make sure you guys subscribe, and i hope you guys enjoyed this video. There are many more to come as long as y'all liking. It i'm loving it and i'm giving it to y'all. Okay. So, thank you guys for watching and i'll see you guys again when i come out with another video, i'm out too peace.


Comments
Carla_2fab: I love it
Lala: , I really loved this look on you
Diyaina Deluxe: But this was a lewkkk
Corey Davis: U really a scientist
Diyaina Deluxe: I’m finna attempt to dye my 613 wig mocha brown .. hope it goes good .
Itsme:
Princessjenayaa K:
Simba J:
Alyese Dior: Anybody else peep the glitch at 10:47
Simba J: Pride
VLOGGING WITH PRINCESS KEKE: How hot should the be