Best 613 Blonde Frontal Wig Install | Beautyforever Hair
- Posted on 27 June, 2022
- HD Lace Wig
- By Anonymous
●▬▬▬▬ ❤ #BeautyForeverHair ❤ ▬▬▬▬●
Get $20 Off Use Special Code : beautyytb
☛Link to the wig : https://bit.ly/3Kjbo46
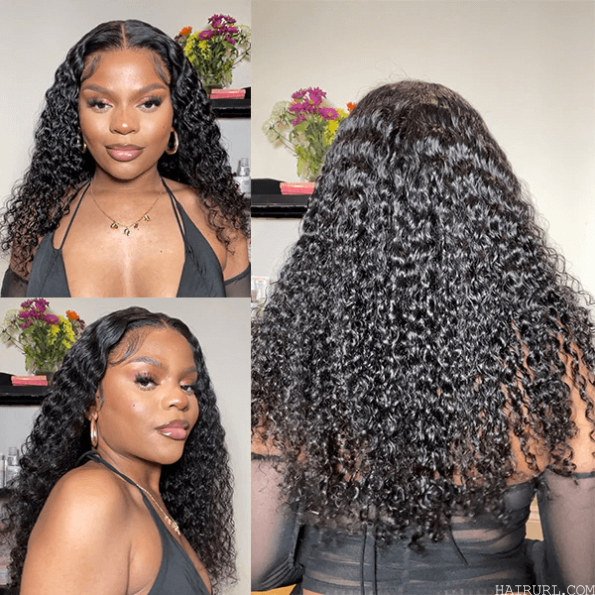
Hair Info : #613 Blonde 13*4 Lace Front Straight Wig 150% Density
https://www.beautyforever.com/ ►Hot Sale #VPartWig : https://bit.ly/3MxqUe6
New In Wig : https://bit.ly/3vfgwSL
Highlight Color Wigs : https://bit.ly/3OzcYlP
Invisible HD Lace Series : https://bit.ly/3rQdylm
Headband Wigs Available : https://bit.ly/3KbGURz
►Buy Now, Pay Later, 4 or 6 Interest-Free Payments
►Earn $10 Cash Back : https://bit.ly/3zabeGK
►Super Brand Day : https://bit.ly/3AakWue
The 3rd Friday&Saturday of Each Month EXTRA 15% OFF
Beauty Forever YouTube Channel : https://bit.ly/34a1Y8Y
Aliexpress Beauty Forever Website : http://bit.ly/3ceVkl2
Amazon Beauty Forever Hair : https://amzn.to/3p4FYHL
Instagram@beautyforeverhair : http://bit.ly/IGBeautyForever
Promotion Email : [email protected]
Customer Service Whatsapp:+8613783534924
____________________________________________
Follow my socials:
➺ Instagram: Kiannamoracia
➺ Snapchat: Kiannamorae
➺ Tiktok: Factualbrat
____________________________________________
➺ EMAIL FOR BUSINESS INQUIRES ONLY:
____________________________________________
Intro Song: Live your life by Uptown (Go support a local CT artist and click the link to listen more of this song)
https://soundcloud.app.goo.gl/WsawFGz8...
____________________________________________
FAQ:
➺Age: 17
➺Ethnicity: Jamaican
➺Fave Color: Blue + Green
Yeah yeah it gave doll, it gave you ain't mine. Let me find out hello youtube. Welcome back to another video. I know i haven't uploaded in a while, but it's okay, because your girl is back, and today we have a wonderful wig install from my company beauty, forever, hair y'all know. I love that company and i definitely am an ambassador. Their quality is always amazing. So right here, i'm just gon na unbox, the wig. This is a straight 613 wig. It is a 13x4, it is 22 inches, i'm just showing y'all. So you know it's a bust down and it is a 180 density. So right now, i'm just getting into plucking and i'm going to show you guys how i customize the hairline. Now this wig did pretty much come pre-plucked, but one thing about me: i do like the front of my hairline to look very very plugged, so i was going in a lot on the front. The sides were absolutely perfect. I don't have any complaints you could have gotten away with not plucking it, but because of the type of edges that i wanted, i did go ahead and go in some more and right here. You see me just going in trying to get that curved hairline. Look not curved i'm trying to get a widow's peak, because the type of edges that i want to do. I want my hair to look like a widow's peak now. I know i don't have a naturally widow's peak hairline, but i just like how it looks on wigs. It looks a lot cleaner with the type of edges that i want to do. So that's what i'm trying to achieve by plucking. So after i pluck i'm going in with my wax stick to make sure the hairline is sleek and fully ready to just put on my head, because today i don't plan on using glue. I am going to be using a new spray and i finally got that hot comb, so y'all can stop bullying me about it. Um i did get a new hot comb so now my wigs could look exactly how i want them to look. I don't have to worry about anything else and i did notice that i missed a spot, so i'm just going back in with my tweezers and trying to pluck that part, but other than that. The plucking wasn't really it wasn't necessary, but it actually did help the wig. If you know what i mean, i just want you guys to take a good look at that hairline. Even though i'm used to plucking wigs plucking blonde wigs is hard because you can't really see the knots and the knots are kind of my key to like know where to pluck and where not to flex, when you put it on a wig cap, everywhere, looks white And then you put it on your head, it looks different right now, i'm about to get into the install you know before every install i do show you guys the goodies that i got so first up. I got a pair of lashes. Second off. I got this cute um fluffy makeup brush. I think it's a powder brush. That is what i will be using it for and then last but not least, i got a black bonnet. Now, i'm not gon na lie, even after i did the install. This is what i've been using the past couple days because it fit my hair perfectly and now we're about to get straight into the wig. I know it looks like i'm beating the wig. It always looks like this, but all i'm doing is just patting the foundation into the lace now, because the hair is blonde, some foundation did get on the blonde parts of the wig like outside of the lace, but that is nothing that we can't fix. So i just take a huggies wipe and wipe it off, and now i'm putting it on my head to see if there's still any left put my ball cap on, because i don't know why i put it on my head without the ball cap and now we're About to get right into the install now, because i always struggle with cutting my sideburns, i saw this new technique on tiktok that i ended up using, which is to part out the hair before you cut it. So you know where you're going to cut and you see that line of lace, so you can follow it and i did end up doing that today. Y'All it worked perfectly. I'Ve never cut my sideburns any better, highly recommend you guys do this. I don't know why. I wasn't doing this before but yeah. Now we are about to cut the lace into some sections and get to using that spray that i was telling you guys about. I used hair cutting scissors because they cut everything so much cleaner than regular scissors, and now i'm just taking a cotton ball, soaking some alcohol and wiping my forehead so that i can start using this spray. The spray that i'm using is the bed head high hold hairspray. I think that's what it's called. I'M gon na put a link to it in my bio y'all. I got this from walmart for four dollars and i like it a little bit better than my got to be spray. Let me tell you why it can do so many layers without getting white or gummy. I put a good amount of layers about four layers before i like was fully satisfied with the install it did not get white, it did not get gummy. The only thing is that it sprays smoothly, but you have to be careful because you just need a little bit of pressure for it to come out, as you can see right there right now, i'm just putting my hair up with the claw clip and i am Using my edge band, it is my first time using this spray, so i wasn't sure if i needed the edge band or not the edge band definitely helps it melt better, and you see me do my little dancy dance because i'm happy now this is after i Took it off i'm going back in and i'm spraying it on my finger instead of spraying it directly on the lace and i'm pressing it into the lace to make sure that when i cut everything is fully secure. As i said before, i'm using um hair scissors, specifically instead of regular scissors because, as you can see, the lace is a lot more melted and my cuts can be more precise, like i don't have to struggle to cut the lace and i'm just cutting it off. In thin little sections i already sectioned it off, but i feel like i need to do more and going in making sure that everything is exactly how i want it. And now i'm going to start parting out some edges because, like i said, the edges are going to be one of the most important parts of this himself. Now this is what i'm talking about. When i said i want my edges to be curved, a technique that i learned is to not part your edges out straight, but to part them with the hairline. So since the hairline has a curve there you're not going to make a straight line, you're going to curve it with the hairline, so it looks much more natural y'all, i'm never leaving this tip because it made my install look so much better. Usually, i part my edges out straight and i'm like: why do they look like that? But now i know why and i'm just pinning my hair up, because after this i am going to start going in and sleeking back the other hair so that they don't get mixed up with my edges and then i'm just going to go straight in and cut These edges, i got this new product that smells like bubble gum. Now it is the same mousse that i use, but i put the fantasia liquid mousse spritz on top of it and it smells so good and it made my edges stay like i was in love and i'm cutting my edges in a downward motion because i want Them to look, i'm not really sure how to explain it. You guys will see the finished product after i'm done and then i'm taking my hot comb to make sure the front of my hairline is as sleek as possible and i'm doing the same thing here. Making sure the bottom of my edge is the longest part it technically would be cutting in a downwards motion. I'M just using a different hand. That'S why it looks different, putting the mousse on and then after that i did put some liquid spritz and i just started swooping it, because i wanted them to go right into the hairline and look as seamless as possible and after i use those lovely scissors. That is pretty much the end of my install all right. First thing we gon na do is get into the actual, like finished style install. I don't want my glasses now. I did end up um going back in. You know, straightening the hair. This is what it looks like. It is 22 inches, as i mentioned before it goes down to like i wish i could. It goes down all the way to there and you know the struggle if you wear glasses and eyelashes at the same time, look it goes all the way down there. When i say shedding has been minimal. It'S been minimal. I'M trying to find my brush right now to show y'all like all the hair that i've collected in it hold on okay. This is all the hair that's been collected in it from shedding. Now, of course, that doesn't include from plucking, but this is what the hairline is looking like, it is lovely the density. It stayed like the same density, all the way to the bottom, a 10 out of 10.. This is the best 6 13 hair. I'Ve had y'all know. That means a lot coming for me, because one thing about me: i love a good 6 13. I do. I really do i'm feeling it especially for summer. I didn't tone it. This is like fresh out the box just fresh everything. Cap construction is nice. I did have a lot of parting space. My lace is showing under the ring light, but in real life i promise you it doesn't show hold on. Let me turn the ring light down and then probably have y'all like okay, see in real life. It doesn't show, but when i turn the ring light on that it shows it dude the ring light just um amplifies everything. I don't know why, but i love it. It just was easy to cut hold on. I don't know if you'll see what i did with the edges, i did like the two swoops at the front and then you know of course, sideburns. It'S like my third day of wearing this wig, my favorite style. To do to it, i'm gon na show you guys. Is that style where you take your hair and put it up like this? Only the bad girls don't think only the bad girls know what this is. The clock did i just break it hold on okay? I just twisted my claw clip. I have no idea how, but i did right right. It'S given two thousand baddie and then you clip it. Let it fall. You know, let's just let it fall, however, but it it's not given on that side. Okay, yeah yeah. It gave doll it gave i'm just posing for the thumbnail, but yeah guys this wig definitely go copy. One, like i said, use my discount code in my bio for money. Why not say money percent for money off from your order from beauty forever? Quality is always amazing with them. This is one company that has never disappointed me when it comes to quality. Staying true to length. This is a full 22 inches. All the way down to the bottom doesn't get thin at the ends. No shedding lace gave my eyes watering so much, but yeah go copy one. I hope you guys enjoyed this video, don't forget to like comment and subscribe. Bye.


Comments
Marcus Henderson: You made it look beautiful
Kemesha Johnson-Braham: Absolutely beautiful
Tiiny Kelsey ‘: