How I Get My Hd Lace Wig Bone Straight Ft West Kiss Hair
- Posted on 15 April, 2021
- HD Lace Wig
- By Anonymous
▬▬▬▬▬▬▬▬▬♛#westkiss♛▬▬▬▬▬▬▬▬●
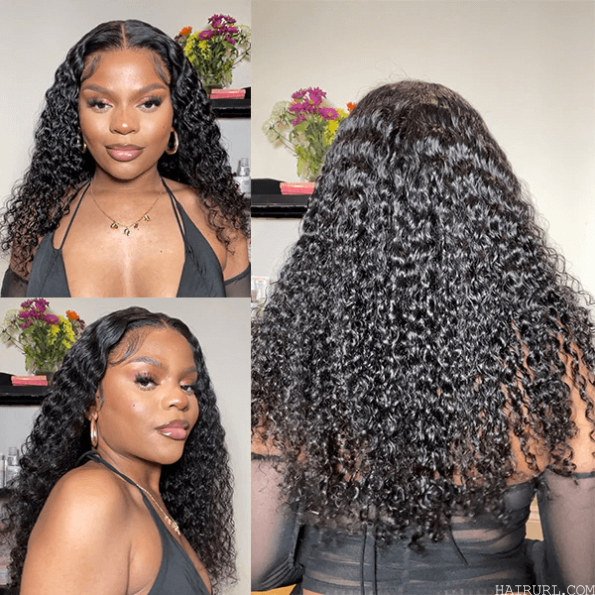
Hair details: 250% density HD Lace Straight 13*6 Lace Front Wig 30 inches (Medium cap)
Video Hair Direct Link ➤https://bit.ly/2P9ZKBM
Hot selling HD lace wigs ➤https://bit.ly/3s6sEBg
★ westkiss official hair store ➤https://bit.ly/3bZymzn
Up to 43% off Lace Wigs ➤https://bit.ly/3s6sNEO
#westkisshdlacewig #westkisswig #westkisslacewig
#WestKissHair Official Site Huge sale Big Discount
❤ Follow West Kiss hair on social media :
Instagram @westkiss_hair_store: https://bit.ly/2OlKstu
YouTube @West Kiss Hair: https://bit.ly/2Ol5U1m
Hey guys so in today's video we're going to be working with west kiss hair and i'm super excited to show you guys what i got okay. So this is how the wig comes in the box. As you can see, it's the wig and then inside you get a bunch of goodies. I got some really really really. Okay. Y'All know, i love my long lashes. There is a really cute velvet like head wrap. I guess you can like use this to lay down your edges. I love how soft it is. It'S super soft also a really large bonnet, because this is some long, hair. Okay, we got 30 inches over here, so we need her to be protected. A really cute scarf that comes with it as well. I love these scarves because i like to wear them and throw them in my bag, some wig caps, which are always always always helpful and, of course, a elastic band which i did end up sewing into the wig as well. And then all of this you can put inside of a baggie, which i love, because it helps me remember where the wig is from. So this is the wig. It is a 30 inch cap, size, medium, 250 density, straight wig and she is thick okay. So sis is thick and long and she's beautiful, she's beautiful. I love this wig. Okay, but y'all know how i feel about 1b hair so we'll get into that in a second. But i did want to show you guys the construction of the cap. So, as you can see in the center, it is like a i want to say it's five by five, i'm not mistaken and then on the sides you get a little bit of you know frontal vibe and then in the back it is some combs and then There'S the combs in the front as well to help you adjust your wig, so i'm going in with 50 volume developer to bleach the knots i wouldn't recommend using 50, but all i had was 50. So that's what i used and then i also went in with the bw2 powdered bleach mix that together and then i just literally just applied it to the front of the wig, and i let it sit for 15-20 minutes or so you definitely want to use gloves. Do not be like me, okay, but i had literally just ran out of gloves, so i had to get some on amazon and they wasn't gon na get here until that friday. So i would recommend you use gloves, but if you're not gon na be getting it, you know all over the place. You should be okay, applying it like this, but this is what i'm gon na do for like the next 30 seconds, so i'm just gon na go so after i let that sit for like 20 minutes. This is what it looks like, and i honestly prefer for it to be a little bit over bleached in air quotes because i do go in and color the hair afterwards. So it really doesn't. You know, make a big of a difference. If i were to have it perfectly bleached or not so here, i'm just showing you what it looks like after bleaching it it looks, it looks real good. I don't be knowing what i'm doing, but this looks good to me. Okay, so basically, i'm gon na take my wig head and i'm going to put a plastic bag over her to protect her because she's new, and i want to make it look good for as long as possible, because if you have one of these, you know how Rough, she gets okay, so i'm putting this really really tiny trash bag over and i'm gon na double it just in case i accidentally like pierce, one of them and the color leaks through or anything like that. Just to make sure you know this is good. Then i put the wig back on there and i pin it down with the text that i showed you on the front of the mannequin head and i'm literally just parting out all of the frontal hair. So this is me separating it. As you can see, it's the tracks in the back and then obviously the frontal in the front or the closure in the front and i'm just separating the hair and i'm going to keep the hair. That'S in the back, i'm going to braid it up to keep it out of the way and then in the front is where we're going to be super tedious because you don't want to undo your bleaching work. So here i'm taking a little spoolie. You can get a 100 pack of these honestly on amazon and i'm going to go through piece by piece with this black hair dye, and this is, i don't think this is a door, but you can literally use any semi-permanent hair dye that you have or the Actual hair color that you plan to use you know on the back of the wig, but here i'm literally just putting it on very, very tediously only on the roots, i'm not going all the way down the hair, because i'm just going to watercolor it anyway. So there's no need to go all the way down, plus that would take for freaking ever so yeah, i'm just going to do this to the entire front, and then i will show you guys what i do after yes, yes, okay, so this is the wig. After it's air dried for a couple of days or so - and these are the products that i'll be using to get the hair bone straight - okay, so i'm using bio silk. I didn't end up using these garnier fructis serums because i didn't need to, but you definitely could use any type of oil or serum that you want. But bio silk is the goat. Okay, you don't need anything else if you use bile silk. So that's what i used on the hair. I just applied a little bit on each section of hair that i straightened and then you'll see how silky okay. This is silky, okay, silky straight and that's all you need bio silk. I got mine on amazon because i wanted a big bottle and i couldn't find it in person in my area, so i just got it on amazon, i'll link it down below and after going through the entire wig, once you get to the top. You just want to continuously sleek the hair down with the bio silk and with a hot comb. I got this one from amazon as well some years ago, honestly i'll try to link it below or i'll just link one below in general, and this straightener. I also got from amazon, which will be linked below as well, so i'm just literally going through the front making sure it is laid okay, because i don't really want to have to do too much work when i actually apply the wig. So that is what i'm doing here so once i'm done it's super straight, but i'm still going to go in with a wax stick, and this is from the brand caracara which i will link down below as well, and i also got on amazon, and this just Gets rid of any flyaways or any stragglies? You know all that stuff that don't need to be there, and this is what it looks like. I didn't do any plucking or anything like that because y'all, i don't know what i'd be doing, i'm trying to get better at wigs, which is why you guys are seeing more hair videos on my channel, so yeah we're gon na get there we're gon na get There, so this is what it looks like. She looks really good in black and sleek and oh, she looked good okay, she looked good, so this is how deep the part is. That'S what i was trying to show you here and then here i just want to show you how straight it is there there's two little hairs that just don't want me to be great. I see them sticking up, but all you have to do is go back in with some of the care care wax stick or some mousse or some water. Honestly, if you don't have on any of those but yeah. This is what the wig looks like after i applied it super straight okay, super straight. I did not put this down with any glue or anything. I just used some hairspray and tied it down with an elastic band, and this is what i got so this is the hair she's beautiful, she's straight okay, 30 inches of lusciousness 250 density on straight hair is everything. Okay, it is everything it's so thick and full, and this hair from west kiss hair is just bomb. Okay, so i'll have all the links down below for you to check it out, and i will see you all in my next video bye. So actually i just had to throw in some videos of what i look like: okay through the rest of the day, because this had to take some videos because she was feeling herself okay with this straight hair. Okay, but yeah. That'S all i wanted to say so i'll see y'all in my next video bye,


Comments
A Jay: Hi so you water colored the whole wig black? Thanks! Love your videos!
Fátimas Flair: It’s the lash wand for me! ✨ Thank you for all the love on my video
Aleisha Daisy: This wig looks soo bombbb wow ! Can you give an update and let us know if it holds a curl please?
Eric Legette: Hi Beautiful Browniee love this Fascinating hair installation and reviews you absolutely demonstrate so Flyaf and Stunning Beautiful and loved each step you have slayed for us so Dopeaf and loved everything ❤and enjoyed the channel and have a great rest of your day Beautiful ❤and much love and have a wonderful rest of your day sweetie ❤and be safe and Blessings and keep slaying so Phenomenal ❤and God Bless and stay safe my dear ❤❤
Beane: Soooo pretty!
Bailey White: very beautiful
NekaWeka: Omg girlfriend, please tell me what’s on your lips in the thumbnail?? It’s soooo fire and absolutely beautiful on you!!! I want to try!! You body everything!!
Idalis Chavis: You look so beautiful
Dani Hern: Prettyyyyy❤️
Dahrendie: Soo beautiful!
反正什么都可以 🌈: ❤❤❤❤❤❤
Shida S: Do u mind linking the flat iron. Cause I'm looking for something like that. Yes that bio silk iz it. U can usually get it frm tj max, marshalls or burlington. I luv thick hair 2 but I would deff need a bannng. Lml
Bonnie The Beauty: Looks nice
Val F: Plastic bag can be an emergency glove
Caroline Green: ❤
Alisa Smith: Thanks for your nice sharing! You are so charming
chang bella: ❤❤❤❤❤❤
Autumn Jeannette: Hey Bronnie <3 who did your intro
Chiemezuo Ubochi: So I’m buying a wig tomorrow and was gonna go for 180 density. Is that good enough or is 200-250 better? The length is gonna be 18 inches
Alberto Nascimento: Bronnie i Love you
Yves Rotty Jean Jacques: Here from Haïti