Plucking And Flatiron Curl Tutorial + Install | Indepth Ft Mslynn Hair
- Posted on 30 August, 2022
- HD Lace Wig
- By Anonymous
Using Special Code To Get 8% OFF, Code: mslynn8
●▬▬▬▬▬ ❤ #Mslynn hair ❤ ▬▬▬▬▬●
The same wig in the video:https://bit.ly/3pMey8I
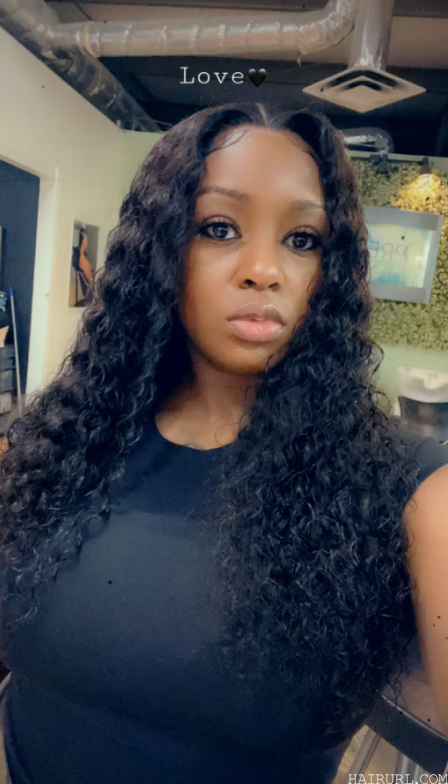
Hair Info: 22 inches Body wave Natural Hair 13x4 Lace Wig
https://mslynnhair.com/ Mslynn TOP.1 selling wig:https://bit.ly/3pJkOhF
Mslynn Best price 360 lace wig:https://bit.ly/3TiHO4v
Mslynn Affordable 13x4,13x6 Lace wigs:https://bit.ly/3wx6TyY
Mslynn Undetectable HD Lace wigs:https://bit.ly/3AoiQYW
Mslynn Balayage Highlights,4 /27 ,Ginger wigs:https://bit.ly/3cqCw6A
Mslynn Human hair bundles & Hair Extensions: https://bit.ly/3AqMNrl
Mslynn Hot selling Lace closure wig :https://bit.ly/3Tkl44g
Mslynn 20inches lace clousre only $99 !:https://bit.ly/3QKVvrj
Instagram @mslynn hair: https://www.instagram.com/mslynn_mall/...
YouTube @mslynn hair: https://www.youtube.com/c/MslynnHair
Facebook @mslynn hair: https://www.facebook.com/Mslynnhair
Tiktok @mslynn hair: https://www.tiktok.com/@mslynnhair
Inquire Now: WhatsApp number: +8618039917601
#Mslynnhair#mslynn#13x4lacewig#bodywave
________________________________________________________________________________
STAY TUNED FOR NEW UPLOADS EVERY TUESDAY AND THURSDAY
Follow my socials:
Ig: Russhana.love
Sc: shanna193
For any business inquires feel free to email me at [email protected]
Hey guys, it's your girl, shauna love and i'm back at it again with yet another video. This video is sponsored by miss lin here. So don't forget to check out the description box to see where you can purchase this exact same wig that i'm using in this video we're going to get straight into the plug-in. This is going to be an in-depth, plug-in tutorial, so stay tuned. I'M also going to show you guys how i do my flat iron curls, so the first thing you guys see me doing is, of course, going ahead and plucking the very front of the hairline. I would usually do this while the hair is wet. However, it dried. I didn't have a spray bottle, but i do kind of like how it came out now. I'M plucking the hair when it dries. So i think i might adapt this new method as opposed to plucking, while the hair is wet. So after i feel like the front is plucked enough, i'm going to go ahead and part right behind that very front of the hairline and then begin to pluck behind it, and this is something i do gradually until i feel like i've plucked enough and to do This all you have to do is just basically um comb, all the hair back and if it looks natural you're done plucking. If it doesn't, you continue plucking and going backwards. It is also very vital that you invest in good tweezers, because a good tweezer will actually pull the hair out from the root. But if you have a cheap tweezer, it will just pull the hair out and not the roots. So you would just have knots, but no here, if you get what i'm saying so right now, as you guys can see, i'm going ahead and combing all the hair back see if it's natural, i feel like it was natural enough. So i started moving on to the other side. Also one thing that's very important to do is if you know how you're gon na style your hair, let's say for a side part like me, i will pre-part the side part before i start plugging, because sometimes, if you don't do this, you will begin to pluck Into the part, so that when you install the wig - and you make the part it's going to be bald, so just always try to pre-part your hair so that when you're plucking you know where to pluck and where not to plug. I don't want this video to be extremely long, so i'm going to speed up the rest of the plucking process. However, the process still remains the same. So now the wig is plucked enough to my like i'm going to just go ahead and start um hot combing. The hair backwards just to tame any flyaways and get it laid properly. I'M also not using any product at this moment, because i noticed that when i use too much wax stick or product, it gives me a very hard hairline and i don't like that anymore. So i'm trying to use less product when it comes to laying down the wig and the next clip you guys are going to see me using um a wax stick. Um, honestly speaking, i don't recommend this brand because i it just doesn't give me what i wanted to give, but it got the job done since i didn't have my other usual wax stick so for these flat iron curls, i'm going to try to explain it as Best as i can it's not something i can explain verbally, i feel like you will learn better if you just watch what i'm doing, but i'm taking this flat iron and i'm gon na just begin to like twist it the opposite direction of the side of the Hair that it's on, and i will just begin to pull the hair down in the flat iron and as i'm pulling down, i'm continuously curling to create that curl effect. Honestly speaking before, i learned how to do flat iron curls, it didn't matter which video i watched. I didn't pick anything off my video. I just kind of thought like okay, if i twist this it's gon na curl and that's basically all it is so i don't even know if i curl right, but i know it gets the job done and once i finish curling it i'm going to take a Duct clip and secure it, and this creates the curl effect. It enhances the curl because it holds the heat in. I realized that when i don't pin my curls up after i finish, the curl the curls are going to drop before i get to finish the whole head. So i like to just use these duct clip because it secures the curl a lot and sometimes i would have to add two to the curl, because if i use a lot of hair, the duct clip is going to start slipping off and for this style. Specifically. I was um doing bigger sections, but if you wanted to be more curly and voluminous, obviously you'll use smaller sections. So so so, okay, so in terms of sides, opposite directions which side to curl. If you want that, look where it's like a swoop effect in your face, you're gon na curl away from the face, so you see how i'm curling backwards from the face. That'S how you're going to get that effect of where the curls like dropping in front of your face and, as i said before, you're going to just want to continuously pull the hair down as you're pulling down your curl. At the same time. And when i get towards the end, i'm going to just curl it right back up one more time to secure it and let some heat flow onto the hair, then i'm gon na take it off hold it for like two seconds. If even that long and then apply the the clip right away, so do do do so. Do now that onto the other side, you're going to curl the opposite direction, and that will be also away from the face. So you're always curling backwards from the face and you might have to alternate the way you hold the flat iron um, based on what side you're doing based on your comfortability, because you can see, i hold the flat iron different based on whatever side. I'M doing so. This is just something you'll pick up on your own. It'S based on how you feel and your comfortability and you know so, okay, so i'm coming here with my ball cap on the reason i'm talking you guys can't hear what i'm saying, because this is a part of another video. So if you guys want to see my video, you guys can tune into that video as well, but this is the dedicated video. So that's why you see my lips moving but you're, not here what i'm saying, because i'm doing like two separate videos so right now you guys can see the curls are done. I have some flat iron um. You know i have some foundation on the lace. Previously, i'm now cutting out my ear tabs and to do so you're going to cut up diagonally where your ears are and just carve around your ear. I don't know i feel like it's just kind of like you know where your ear is. You should know where to cut right now, i've added more foundation because i felt like it wasn't blended enough how it should be, and this what you guys see me doing right now is go ahead and put some rubber alcohol on my forehead to get rid of Any makeup and dirt oil anything that's on my forehead that will affect the longevity of the install for glue, i'm using ghost ghostbun. As per usual. I usually add three layers of glue for a long hold and before you add your next layer of glue, you want to always make sure that you are letting the first layer completely dry. Do so, as you guys can see. I went ahead and started um placing on the lace and now i'm taking my blow dryer and just letting the glue dry, some more to cl to cut the lace off. I'M using my scissors and i'm going to begin to cut off in a zigzag motion to melt the lace, some more i'm going to take the black, even spray and spray that onto my fingers and then dab it onto the hairline. After doing so, i'm gon na go ahead and secure with my elastic band. Now it's time to do these baby hairs and to do my baby hairs, i'm going to be using gorilla snot. So so so this is the finished. Look. Thank you guys so much for watching, don't forget to check out my description box, so you can purchase this wig and i will see you guys in my next video don't forget to like comment and subscribe.
Comments
♡Antonio♡: Omg that's why I still have knots after I pluck thank you ❤️
jude khan: Masterpieces keep em coming