It'S Giving Scalp! | 5X5 Hd Closure Wig Install + Plucking Tutorial | Ft. Nadula Hair
- Posted on 26 August, 2022
- HD Lace Wig
- By Anonymous
●▬▬▬▬▬▬▬▬▬ ◆ #NadulaHair ◆▬▬▬▬▬▬▬▬●
★ $20 OFF for $199 Code: Nadula20
★ $10 OFF for $99 Code: YTBGIFT
❤All the hair can be paid in 4 installments
——————————————————————
☛Video Hair Direct link: https://st.nadula.com/bpk6v
Hair Info: 5*5 Invisible HD Lace 250% Density Body Wave Wig 28inch
https://www.nadula.com/ ➤ Top Sale wigs: https://st.nadula.com/bpk70
New Protective Style V-Part Wig: https://bit.ly/3p5yOkS
Nadula HOT Selling Affordable Lace Frontal Wigs: https://st.nadula.com/bpk71
New Arrival Fashionable Wigs: https://st.nadula.com/bpk72
Top-selling bundles with closure& frontal: https://st.nadula.com/bpk74
Perfect install tutorial of Kinky Curly Vpart wig: https://bit.ly/3QldiF1
Nadula Customer Service Email: [email protected]
Aliexpress Nadula Hair Website: https://bit.ly/33oOx83
Aliexpress Nadula Hot Sale Wig: http://bit.ly/3068Mlt
Amazon Nadula Hair: https://amzn.to/38ttXlC
#Nadula #Nadulahair #Nadulawig
☛Youtube: https://www.youtube.com/c/NadulaHair
☛Tiktok: https://www.tiktok.com/@nadula.com
☛Instagram: https://www.instagram.com/nadulahair/
☛Facebook: https://www.facebook.com/groups/nadula...
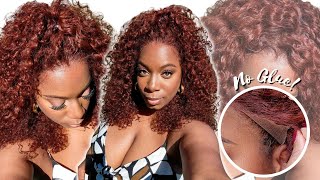
Hey guys and welcome back to my channel so for today's video i have this bomb install and it's a 5x5 wig install. I just wanted to make it look like a frontal, but it is a 5x5 hd lace, closure, wig from nadula hair and their hd closure. Wigs are actually really really good. I always tell my clients to get it from there. If it's a closure, specifically don't quote me on their other wigs, but for closure, hd, lace, wigs they are the plug, because they're really um affordable. I bet you get really good quality and this one um. I will put the details in the description down below, but if i'm not mistaken, it's a 5x5 hd in 24, inches and body wave, so so nice. It was really really easy to install. I wanted it to look like my own hair type of vibe, so not really too perfect of an install um and no baby hairs as well just to just to switch it up a little bit, and i really do like how this turned out. It was easy to work with and everything and if you guys want to purchase this wig, i will put the link in the description down below. So enough of me talking, let's just get right into the video, so i just took off, like my other wig and i'm just letting my forehead breathe a little bit um. I literally did some messy like four four or six like really big and flat um cornrows. When i installed my last wig, so it's still really flat and i'm gon na use the same um like foundation. First, they did send me um like a gown. So why not wear it? Let'S try it out and see. This is what it looks like. So it's medulla, it's kind of cute can't lie a little silk situation, so i'll put that on i'm gon na try to like show you guys what it looks like not bad! Oh, is there no string? Okay? Maybe i should have added this first alrighty here. It is kind of, let me get my wig on first of all, all right. So as for the wig here it is, it is 20. I want to see 26 or 24 inches one of them. I totally forget, but it is in the description um. This is how it's looking body wave. I love the texture that it comes in um. The only thing is when you wash it, it doesn't really turn like this, so i try to preserve it for as long as i can, i'm probably just going to style like the very top of it. But i love the texture anyways and it is um a 5x5 hd lace here it is and i did reach the knots i didn't pluck it yet because i wanted to do it on my head and also show you guys how i pluck so yeah. It'S hd lace and that's pretty much it i'm just gon na first put on a wig cap and then we'll go from there. So i'm gon na try to film as much of this process as i can taking. Some got to be um glued. I'M just going to push my edges back in the front. The nice thing about closure wigs is that it doesn't take too long to do and a lot of your hair isn't really touching any of the glue or any of the other products. All i have to worry about is just this part and my forehead goes pretty back in the front, but in the sides it comes closer, so i don't have to worry about these. Just push it back. You can literally see my wig timeline, oh my gosh, so i've already cleaned the area off with some alcohol and for the wig cap. I'M actually not gon na glue it. I'M just gon na put it on like regular. I'M gon na leave these side burns out because they don't need to be in i'm gon na try to make it look as natural as possible. So i might have to take out some of my hair from the sides just like that. Just covering the hair in the front, it feels a little too tight. I might cut some from the sides. I don't want to get a headache yeah much better and then i'm going to take a darker foundation shade and just darken up the wig cap, especially this light band right here. We want that to blend our skin, just like that, and then we darken this, but not really needed, literally like that, because that's all it's gon na be showing and if it blends in, for the most part, you're good to go. Okay, so now i've hot combed, the hair back. So there's nothing in our way and let me cut this off: let's put this on perfect, the color matched perfectly inside uh. For the most part, i see some, you don't want to see anything alright. So i just tested out um, like i checked out the wig cap and at first it was a bit too light, but now it matches perfectly and if you can't see separation, then you are good to go now for the clicking. I'M not sure if i want to pluck that much because i want it to look like just coming right out of my head and probably won't do any baby hairs. If i do add any baby hairs, they might be really really light. So this is not too bad, not that bad, but i might pluck it just a little bit. So let's do that. I hope you guys can see, but this is just the area that we have to pluck and what i'm literally gon na do is just take a layer out like this and then just plug backwards and don't stay in the same spot. Just keep moving oh and have like something right under um i just have a towel. A lighter colored towel will always work better and once i'm satisfied i'll stop looks pretty good to me like this i'll, just touch it up. This side is already better than this right here. If you guys can see and yeah you just keep going like that. So if i wanted to plug more, i can just take out another layer here and then pluck back and just like that you have a hairline and once i think that it's all good, i'm just going to hot coat it one more time to make sure it's Exactly how i like it, and that way you can also see the lines that's good to go. So, let's just go back to where we were now time to check again yeah and that's much better. It looks plugged to me i might bring it lower yeah, something like that because yeah, i might just do the no baby hair thing and i think, making the hairline lower looks better when you do no baby hairs. So all right. So this looks pretty good to me. I'M just going to make some marks exactly where i want the wig to start, i think, and to make this look a bit more realistic, i'm going to bring um i'm going to bring it down on the sides more. So it's like a c shape. It looks good and i didn't put any foundation on the lace just because it's hd lace and not really needed, and sometimes it kind of looks better. When you don't put any um foundation on it, i can always tint it after so that's fine! Oh, did i just get rid of my workout oops, so i'm just gon na put about two to three layers of some bolt hold active and then glue everything back down all right, so the glue has cleared up and i'm gon na line up the dots in A second and i'm also pressing pretty hard. While i do this, i'm just going to press it in to make sure it is all stuck all right now i'll be using their melting band, that they sent me as well. Pretty cute kind of matches - and i'm gon na - have this melted for about about five minutes and then we'll cut the lace and i'm just going to go ahead and cut the lace with some scissors. If i can see well, okay, not too bad, not too bad clean this off, just the dots all right, looking pretty good so far, this is like not even there's no melting spray on this or anything, and it's looking really good. So i'm just gon na go close up in the mirror and see if i need to cut anything else and then i'll be right back, it's looking pretty good and i don't even think i need to tint anything. So that was a great move. Um, i'm just going to put some melting spray like dealer melting. I don't want to put too much like that and we melt one more time and i really think i'm gon na keep it as a no baby hair. Look because it's looking pretty good again. I'M thinking of doing this side, i i'm gon na do like an off side like not all the way in the middle, not all the way to the side kind of like right here. So let's get to doing that. Starting from this side, i'm just gon na start hot combing and using some wax just to make sure it's flat. Okay, i'm gon na take this off just so. I can see exactly where i want to hot comb. It whoa. Looking pretty good, can't lie. This is kind of where i wanted the off like part, but not all the way like this, like this yeah, it's so nice. How deep the part is it makes it look more realistic and i'm just going to push it down, so it covers up the little side yeah. What'S that actually really cute? Okay, they haven't even really styled it, but now i'm like do. I have to style it because, let me just brush it out before i talk, i'm actually really feeling how natural this is. Looking like, not perfect um, which is so nice and all i see is i see a little bit of like a difference in color. So i'm just gon na, like i didn't, put any product, but this is what i use to apply my foundation shade, so i'm just gon na lightly tap around the edges and that's pretty much it. I am also thinking of adding a little bit of edges here, because i don't know what this little thread is. It'S from the wig might have to take this little bit right here, like really really small, because i didn't even want baby hairs on this and i'm just going to gel it not even loosen the smallest. Ah, maybe i should have done that. Okay, i'll go like that, whatever yeah, that's fine and the part, maybe i'll, make it a little thicker, yeah, better, much better. Okay, now for styling! So far, it's pretty good, but just gon na touch up the front pieces in bigger sections, and this is my hot tools: wait hot shot tools, um curling iron and it i believe it's a one in one and a quarter inch barrel believe so. Okay, that one looks good it blends in with the waves and take this section right here as well. That works. I love right and i'm trying to think if i want to add anything else, because the point was to make this look really natural and i think i've accomplished that yeah, i'm feeling this and my hair is right here. My natural hair, like the little pieces i took out right there, so it still looks pretty natural, and i think this is the final look just add some mousse. I love it. I need to do this more often it's so easy and perfect for, like an everyday type of look, looks like just my hair, like i grew with these inches, and i really didn't, and you see how you have to bring the hairline a little lower when you're Doing no baby hair so then it kind of looks looks normal, but if i were to do it from the back, it would have made my forehead look even bigger anyways. I love this so cute all right, so that is it for this install. I hope you guys enjoyed and if you did give me a thumbs up and comment below what other type of video you would like to see or if you have any questions, um yeah, if you guys haven't, subscribed, make sure you do subscribe. So you don't miss out on my videos and not only talking. I will see you guys in my next video


Comments
Diana Simone: Gorgeous!! I've bought hair from Nadula three times now, and every time I've had a good experience!
Евгений Лопаев: ♥️ ❤️ Alles sehr schön. Aber zuerst zusammen die Nummern 10 und 1. Eine empru.ONLINE Brünette und eine andere Blondine. Es wäre unfairr, wenn ich 4 wählen würde
human wig human wig: Hello, I am an Amazon wig seller, can we cooperate?