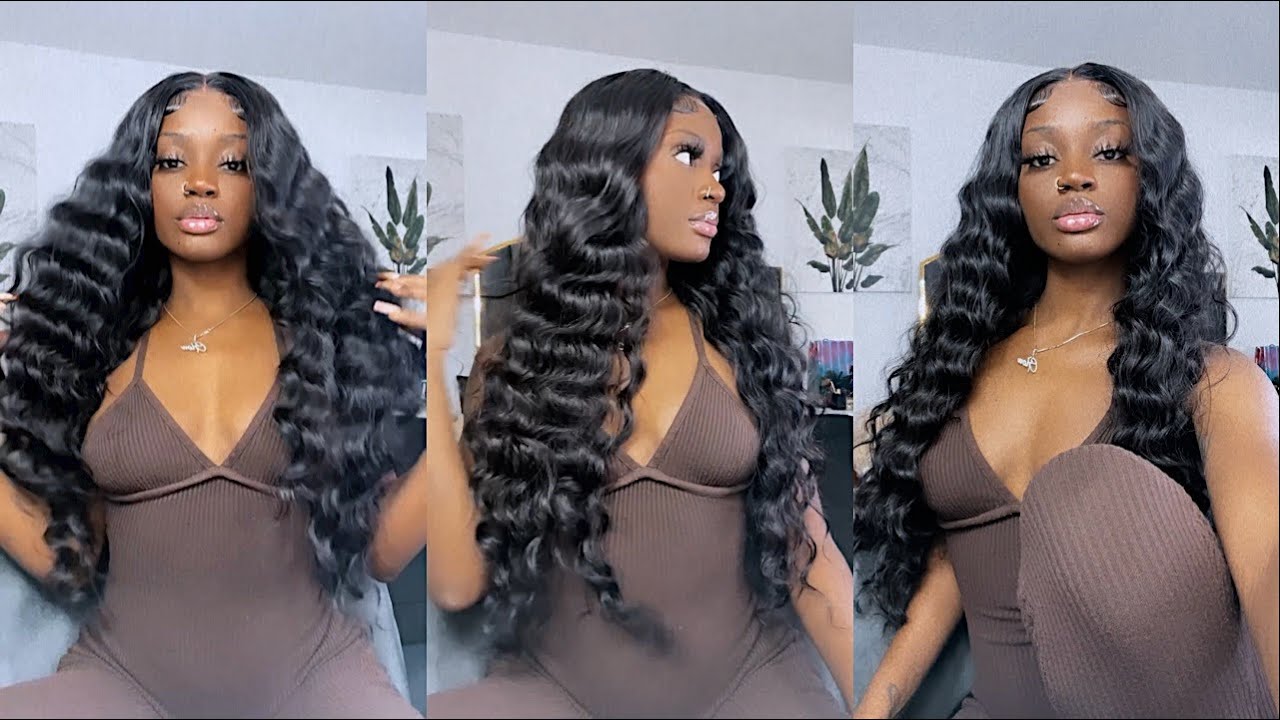
30" Lace Frontal Wig Transformation ! Highlights, Melted Lace, New Color. |Yolissa Hair
- Posted on 20 July, 2021
- HD Lace Wig
- By Anonymous
Hey Girlies,
welcome back to my channel. Its another day for another slay.
I'm going to be transforming a beautiful unit I received from Yolissa hair.
I wanted to do a custom color but because this unit is 30” I didn’t want the hassle of
putting bleach throughout the whole unit and risk damaging the hair.
So I'll be showing you my weaving technique for highlight. As well as the install process.
I hope you enjoy.
-------------
Keep Up With Me:
Instagram-Wstco
●▬▬▬▬▬▬▬▬▬♛Yolissa Hair♛▬▬▬▬▬▬▬▬●
Direct Hair Link:➤https://bit.ly/3x08Rq9
Hair Info:30inches body wave 13*6 HD lace frontal wig 250% density
❤ #yolissahair Official Website:➤https://bit.ly/3ggsWCy
HD Lace Wigs, Get $30 Off :➤https://bit.ly/3gjigmD
►Use code “yolissawig”, wig order Get 6%OFF
Top1 #yolissawaterwave Lace Wig:➤https://bit.ly/3x4h7pe
Hot Selling #lacefrontwigs :➤https://bit.ly/2RGr6km
Best #yolissa613wigs :➤https://bit.ly/3gip2Jq
Follow Yolissa Hair On Social Media
Instagram: https://www.instagram.com/yolissa_hair...
Facebook: https://www.facebook.com/yolissahair
✔Wholesale Contact +86 15803834514
Hey girlies welcome back to my channel it's another day for another sleigh. I'M going to be transforming this beautiful unit i received from ulyssa hair. I wanted to do a custom color, but because this unit is 30 inches, i didn't want the hassle of putting the bleach. All throughout this unit and risk damaging the hair, so i settled with these highlights and i'm going to be showing you the weaving technique. I use super easy and straight to the point and the products will be listed in the description box below, but everything you can purchase from sally's beauty supply. So you see me sectioning off the hair. I just want the front half of the frontal highlighted now. This is personal preference, so i'm going to take one section, leave out the second section and take a third section after i have both of those sections that i took out, i'm going to rubber band them together, and these are the two pieces i'm going to be Putting the bleach on you're going to see me repeat this a few times, because i only wanted subtle highlights in the front alright, so i'm going to be getting my mixture together by the way i, like pancake consistency with my mixtures. I don't want it too runny, because i don't want it to bleed all over the hair and if it is too runny, then you start wasting your bleach mix, because you know it's just going all over the place and it's not actually getting onto the hair. I add a little bit of purple shampoo to everything that i do, because i want to cancel out all those brassy undertones as much as possible and if i'm very anal i'll go and get a box dye and get like light ash blonde and light ash blonde. Will also cancel out those tones as well all right, i want to give you guys a quick tip, so when you are at the top of where you want to stop your highlights just make sure your brush is vertical instead of horizontal, because you don't want any Harsh highlights in your head: it's not cute and just to make sure that's like perfectly blended, just take a very fine tooth comb and comb downwards and then close that foil up. Let it sit for maybe like 20 minutes 30. If you have that time and then just do the rest of your sections and make sure all the sections are sitting at the same amount of time, because you don't want certain pieces to be, you know darker or lighter. Unless that's the look that you're going for and i've done, that a couple of times in my life, so yeah you know to each is long girl is all right. Boo things, let's get into the final results. I was so pleased with how subtle these highlights came out. I didn't want them too chunky or too crazy. So you all already know the install process is my favorite part alcohol around the perimeter of my forehead and then i'm going to go in with the got to be glue, hairspray and, of course, i added that foundation powder. So my hairline could look like this. When i pop the wig on so i'm going to do my little cool to hot method, so the hair is secure on my or so the lace is secure on my forehead and then i'm going to add the slits remove my ear tabs. This day i was using a razor that literally couldn't even cut the damn lace so um. Obviously you want your razor dull. You don't really want to work with a fresh razor, because you can definitely cut yourself, but my razors are always pretty dull. You all be scared for me, so a little pro tip if you do have any ashiness from that hairspray, just remove it with alcohol and then just blow it back down. So it doesn't lift on you. But alcohol is not going to really do too much damage to all of your hard work, so just use a little cotton pad and remove that and then add some oil if need be, but y'all are going to see all of that in a second. So here is the fun part, my removal, this is so satisfying to me. I love watching myself. Do this, when i'm editing, sometimes i'd be like trying to speed it up, but i know y'all be wanting to see it um, but, as you can see, when i say the razor was though it was dull girl. I didn't want to get it too close to the hairline um, so i started like kind of like a little bit far away for this section, and then i go back in and just remove any extra, because that's how dull these damn um this damn razor was Girl, so yeah just don't try to use a two-dollar of a razor, because it's just gon na give you a hard time so another thing: if you can't really get too close and personal with that razor, because you're too scared that's gon na cut you it's not Doing what it needs to do? Take your shears and get into there and do like very tiny slits! Don'T go too crazy because you don't want that hairline effect. So i like to go in and dab a little bit of that got to be glue on a flat razor and then the back of the razor. And then i like to press it into the lace. So it can melt re-melt that lace that can be kind of lifting after, like pulling at your lace, so you can remove it and then just hit some certain spots that you feel like you know you need a little extra hold and then i like to take Any serum, any heating, protective spray - and i like to touch those spots all over again just so, we can get rid of that ash around the hairline but make sure you go in and remove any extra hairspray first before you do this step, because you just don't Want any buildup around this area, so i like to do this to ensure that we're getting rid of any ashy hairspray. Look. We don't want that. It'S not cute and it's not professional. You know what i'm saying so. I'M gon na take the same fantasia spray that i used to remove that look with i'm gon na put it throughout the hair and we're gon na press this bad boy out with the baby bliss flat iron. This video was recorded, maybe, like i want to say a month or two ago y'all, so i've had this hair for a very long time. I do not play when it comes to these 30 inch units because they can be given quality one second and then the next second, it can go into shambles, so we don't have time for that. Y'All know i'm really not about giving you guys false hope when it comes to these hair companies, this hair is holding up really really good. I give you guys proof at the end of the video showing you guys. Eventually, i went in and dyed the highlights green. I used adore emerald green and that's basically how i got those green highlights, but when i say this hair is so fire and i feel like that emerald green made the hair pop even more. I did the watercolor method with the hair. I didn't actually put the dye directly onto the corn. You know what i don't think i did watercolor. I think i definitely did apply the dye with the brush instead of doing the watercolor, because i wanted the green to be very dark and not so like light, you know um. So basically, that's what i did so sorry about that, but i feel like it made. The hair pop way more and it made the hair look very shiny and silky you're going to see that. But i give this hair a 10 out of 10 for how long it is for the quality for the construction of the unit. You'Ve seen it for yourself, like it installed like a dream, and you didn't have a lot of flyaways. The hair was very flowy and great density. The hairline was beautiful. I did have to go in and pre-pluck it a little bit more and i also bleached the knots, but you know i'm so used to doing that and i'm very you know particular with my wigs and how i want them to look. So i like to be able to go in and customize them anyway, so yeah, that's pretty much! All that i did in this video. You guys just press this hair out. It pressed like a dream when i say a dream: a dream and if you want to um, get the best outcome with your straightening, with your straightening with your straight hair. Just use a fine tooth comb, while you're straightening your hair and that's usually how you get it to be very, very sleek but yeah you guys, i'm going to just add a little bit of foaming mousse. This is from marc anthony's. You can pick it up from walgreens and i'm just going to be pressing the hair out cutting a few strands away that are pretty stubborn, adding that harsh ass black hair spray that i would never add in my hair. Ever again, i have a new technique that i actually had got from arrogant, hair. I'M going to be showing you guys that in the future, it's very subtle, it's the root touch up, paint, stick or whatever stick it is, but you can get that from walgreens too. So that's pretty much it blue things. I hope you guys enjoy this video. I'M gon na show you guys the emerald color towards the end, but this hair y'all so flawless as you can see, don't mind this crazy, ass outfit that i put on at the end of this video with the white all white. I don't know what i was thinking. I threw away that damn blazer as soon as i finished this video i just wanted y'all to see the quality of the hair and i wanted to wear white, and that was the only thing that i could find in my closet that i wanted to put on Because it was loose, but anyway i will list all of this hair information in the description box below check it out. I try to give you guys a little mini tutorial and then my camera had died, so i was like it all. I had time for was the outro, so look at this, it's flawless, it's beautiful! I love you guys and i will see you guys in my next video don't forget to like comment subscribe and turn on your post notification bell. So you're notified when i upload another video bye y'all. Now i cannot


Comments
Syriah: Loving how feline & Celine she looks in the straight black!!! I’m not feeling the bleached highlighting. It looks blotchy.
Boulevardfox: Love how you slayed this wig !
Yolissa Hair: OMG~ You realy did a good job! Love the look!
Whitney R.: Really beautiful hair you can tell that the quality is nice
Yazi Carter: the highlight looks sooo good
Kimberly Kyles: Tatyana loving this unit an Beat Look . Peace and blessings
Brianna Nicole: The green just hit different i love it on you
onegorgeousmelanin: I just subscribed to your channel the hair is so pretty .
Dee Luther: Great Video as always Super Pretty thumbnail tho U Definitely slay this look Beyond Beautiful you are Ur Makeup always on Point Have a MarvelouS Productive Week Be Bless N Stay safe Always
Pamela Gordon: Beautiful highlight color wig❤❤❤
Polished_Icon: I love blazer tho look & hair
Q Xo: Please update us on the hair ♥️
Dej *: Where is that nude top from? I love it!
Sally Barrie: Love this video what is the name of the song you used for the background?
Junior Chaves o Picasso de Yahushua: Your so pretty
Yasmine Jones: Babyyyyy that green?!! Yes!
Latoria: Nice Tati
Heartbeats Awaking: I love the it
Brianna Hubbard: Bae❤️