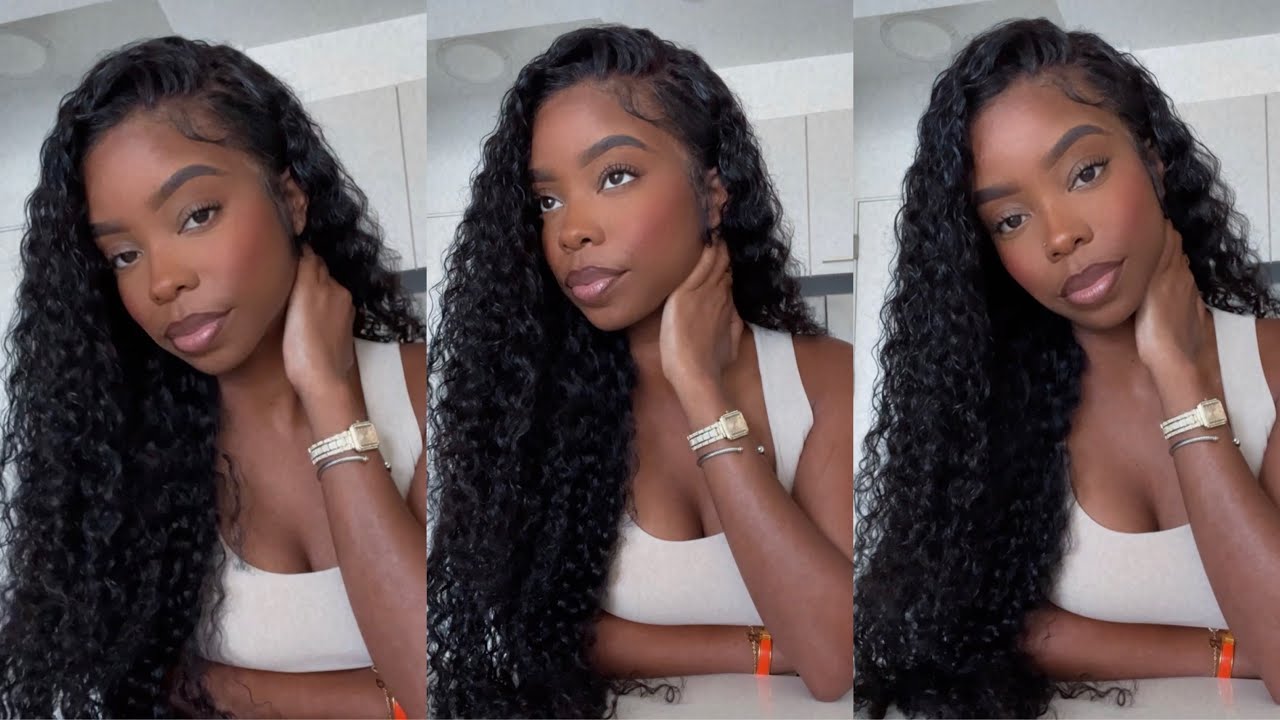
How To Install Hd Lace Without Buckling / How To Bleach Knots/ Top Knot Bun Frontal Ponytail
- Posted on 16 August, 2021
- HD Lace Wig
- By Anonymous
Hair ig https://www.instagram.com/
hairbynbbeauty_/
Lipgloss ig https://www.instagram.com/nellyb.beaut...
Beat https://youtu.be/e6nXweiNaeI
What is up you guys welcome back to the channel, so in today's video i'm going to show you guys how i bleach my knot and also this new technique, um. How that i learned like how to install a hd lace, you guys, so i already did this exact same hairstyle on my channel i'll link it in the description bar down below. So this video is not really so much about the hairstyle. It'S more of how to install this hd lace with this new technique with hd lace. It'S not really like every other lace like a transparent lace or a medium brown. Hd lace is like super duper, really really really really thin thin thin lace. So sometimes when you pull the lace too - and this doesn't happen with any other laces - just hd lace, as far as i know so, sometimes because the lace is so thin when you pull it down to install it, it can cause the lace to buckle up at The front sometimes i'll, put a picture on the screen to kind of show you guys what i'm talking about. If you do hair or you do your own hairs, you'll know exactly what i'm talking about, because this has happened to me before, and i learned that when you install it this way, then i'm about to show you um that that problem doesn't happen. And now, if that problem does happen, sometimes it's not even a big deal. You really just have to tie it down, really really tight and apply a lot a lot of pressure and then, by the next day it should like look fine. I don't think i have anything else to say you guys man, this style is so so so freaking cute, i got some orange little chopsticks, but yeah hey guys, don't forget to like comment subscribe as you guys in this one. Hopefully this video is helpful for y'all. Okay, all right, you guys, so i'm starting off by showing you guys how i bleach my knots and you guys see these knots on the hd frontal. It'S super super super small and fine, and you always want to make sure you have small knots on either your closure or your frontal it. It just has a more natural look and it's just way easier to bleach. So now i'm going to take my wax stick. Just a little bit and i'm just getting all the hairs out the way - and this is going to help me so that i don't accidentally bleach any hair and then i'm going to take my hot comb and also move all the hair, all the flyaways. All that good stuff out the way so now i'm taking this a 30 developer and a l'oreal, quick blue bleach - and i used three scoops of this and i really didn't - need three scoops. This was a whole lot. I couldn't use one and a half, or even two scoops for this frontal, but yeah. So now you want to make sure the consistency is a nice thick consistency. You do not want it to be too runny, or it will bleach through your lace when you're going to bleach your knots. So now this consistency is a little bit too thick um. You guys see it's not really gliding across how it should so. I went back in and i added more developer. You guys can see right here and i'm just going to mix it around and then you guys are gon na see how it just glides across. But it's better to have it too thick at first and go back in and correct. It then it'd be too runny and then it bleeds through your lace and then you have a whole mess. So you guys see how it's just gliding across and another thing just make sure it's sitting right on top of the knot. Do not push it down. This is why it's good to use a popsicle stick or a butter knife, a plastic butter knife, something flat. Don'T use a brush unless you're a professional, then you can go ahead and use a brush, but i wouldn't suggest i don't even use a brush because sometimes when you use a brush, it can apply more pressure than you need to and it will go through. The lace and then you will see that you ended up bleaching the hair on accident. You just want your mixture to sit right on top of the knots. You don't want it to go through mmm. So once i'm done, i laid on the foil for about 20 minutes and the foil, just kind of um speeds up the process and then i'm going to go ahead and wash it all out. So here's how it's looking you guys bleached to perfection, but i don't know if you guys can see there's a little bit of raspiness. So what i'm gon na do to cancel out this raspiness is take this purple, shampoo, the shimmer lights and i'm going to use a lot. I always use a lot of this, rub it all throughout the lace and then i'm going to leave it on for about 20 to 25 minutes, and then i'm going to wash it out and then you guys are gon na see. There'S literally no, it works like magic, there's, no little orange raspiness anymore, once i'm finished, washing that out, i'm gon na go ahead and pluck my frontal. Now i'm not going to go too much into detail of how i pluck. I will do that in a separate video, because i still have to go ahead and install, and this video is already long enough. So, like i said, i will show that in a separate video. So now i'm going to take my wax stick and my hot comb and i'm just going to section the hair and then hot comb it all back. So i'm basically just styling the hair molding, the hair. How i want it to lay for the install - and i do this with every install, whether it's a frontal ponytail, a closure, wig or a frontal wig install - i always always always style the hair before i put it on it. Just it makes the process so much easier because once it's installed, i don't have to go back in with the hot comb or do all that because i already did that before. So you guys will kind of see what i'm talking about later on and here is the results you guys the plucking is a1. It'S super nice super sleek and at this point i cannot wait to install this. So my natural hair is sleeked into a ponytail and i did my ball cap method. You guys already know so now, i'm just positioning the frontal, how i want it making sure it's laying how i want it to lay and then i'm going to take a elastic band and i'm just going to tie it at the back to secure the frontal. Just to make sure that it doesn't move so here's how the back looks for now, but trust the process y'all just the process, all right. So now i'm just flipping the frontal back and i'm going to take my bold hold skin, protect and spray it all across the hairline. So once i let the skin protect dry for about 30 seconds, i go in with the bold hold active adhesive and i just apply small dots and then i'm going to take a popsicle, stick and smooth it out. So you want to make sure you're applying really really really thin thin thin layers and then i'm going to let it air dry. So this is how it looks once it's air, dried, clear, make sure it's dry clear. Then i go back in again with a second layer, and i repeat this step now: the reason why i let it air dry instead of blow drying the glue is because i want it to still be tacky. I don't want it to be completely dry, so i just be patient. Let it air dry it just it dries within like couple of seconds anyways. So there's no rush frontal. You should never never rush the process. Take your time and the job will get done so again, i'm making sure i smooth it out dry clear. This is how it looks once it's clear. You know it's ready to go. Okay, now here is where i'm showing you guys this new new new technique of how to apply the hd lace without getting the wrinkles, sometimes that people get. So what i'm doing is i'm cutting the lace and i'm cutting it in little sections. So i think i ended up cutting it in like four or five different sections, so the key to this is doing it in sections. So i cut that little part off and i'm going to pull it down over the adhesive and then i'm going to use the back of my tail comb and push it push the lace into the glue. You guys can see me doing that right here and you do it this way. You guys promise you you will get a flawless flawless finish, those wrinkles that you get with the age delay. Sometimes you will not have that problem anymore. So just working in small small small sections gets the job done. So again, i'm going to cut this little section right here of the lace, i'm really just working in small small sections. That'S the key to a flawless hd install i'm going to apply my adhesive smooth. It out again, you want to make sure you're applying thin layers once that's air dried, clear, go ahead and apply a second layer. Let that dry clear. As soon as it's clear. You know it's ready to go. I'M gon na take that flap and pull it down, and then i'm gon na use the back of my tail comb and push the lace into the glue you guys just installed was everything like it was so nice and easy um and then i'm just gon na Keep repeating the same steps, and so you guys just sit back and watch so once you apply your free spray, i'm going to take this big wig bad and i'm going to tie it really really tight and leave it on for about 20 minutes or so then. Take it off, and this is really going to melt this lace all right all right. So it's been 20 minutes, i'm gon na take it off and then now i'm going to part out the air flaps and i'm just going to cut off the extra lace that i don't need. So i went ahead and parted out my baby hairs where i want it to be, and then i'm going to tie it down really tight once again, because i really just want to train my baby hairs to lay forward. So, while that's doing that, i'm going to cut the cap underneath off and then just slick the hair all up, so you guys remember at the beginning of this video i hot comb, this frontal. This is why i did that. Do you guys see how easily it is for me to just slick this hair into a ponytail without having to worry, and now i don't have to go back in with the hot comb or anything like that, because i already did that from the beginning. All i do is just put it into a ponytail, and it's literally like so easy. This step saves so much so once i'm finished curling my baby ears, i'm going to take this mousse, and this is the latte body and i'm just gon na put the mousse on the back of this edge brush and i'm just swooping my baby hairs. How i want it so now i'm going to use this pre-stretched braiding hair. It comes with three pieces, but i'm just going to use one and it already comes split in half so you're going to leave it exactly how it comes. I'M going to tie this elastic band around my hair, then all i'm doing now is taking out um this little section right here, because i'm going to use that to wrap around the bun after so now. All you do to do the top knot. Bun is just literally just twist the hair around and you just keep twisting down. If that makes sense - and that's pretty much it you guys so now, i'm just topping it off with this black and gold chopsticks, but i decided to change it to this orange one and yeah you guys this style is my favorite style super cute. If this video was helpful for you, comment, share, subscribe and i'll see you guys in my next video, the
Comments
Tyrone Buie: That’s weird the bulking happend with HD lace. I’ve never had this happened with HD lace, it’s happened with other laces though. But thank you for this tutorial it was very helpful.
Wisdom Works’ Truth: Thank you for sharing this information! It definitely helped me. I couldn’t even upload one of my videos because my lace was very buckled! ♀️…
GoldieBCarter: Where’d you buy the frontal?
Chanice Favors: I was wondering why my lace was doing that lol
Venus Walker: Will this ponytail last in the heat let’s say on a vacation or cruise? Would you recommend this style for that?
Lit Tabby: I wanna try this
Dariyonna Carter: Love Love Love!!!
KittycatunlockboxGroup: I Thankyou cause I only experience this with HD lace
merryverrycherry: Beautiful !! But how do you do apply to prevent buckling after the lace has been cut ?
TheRealNiqqque:
Senn_hair_style: what's the name of the thing you put on the orange and black bun
Salome Figaro: U ate this up sis
capi rolle: U doing too much smacking