Beautiful Start-To-Finish 5X5 Closure Wig Install |Plucking, Bleaching & Style Ft. Celie Hair
- Posted on 15 October, 2022
- HD Lace Wig
- By Anonymous
●▬▬▬▬▬▬▬▬▬ #CelieHair# ▬▬▬▬▬▬▬▬▬●
Hair info: 5×5 Body Wave Glueless Wigs 180% Density 22inch
Direct Link ➤https://bit.ly/3RBSg4Y
Buy Now Pay Later With 4 Interest-Free Payments
Coupon code: "wig10" save extra 15% OFF
Celie Official Store:https://www.celiehair.com/
HD Lace Wig ➤https://bit.ly/3NUMsDf
Colored Wig ➤https://bit.ly/3JstGzI
Glueless Wig ➤https://bit.ly/3O1OAJb
●▬▬▬▬▬▬▬▬▬ ★Contact Us ★▬▬▬▬▬▬▬▬▬●
Whatsapp/imessage:+86 17537405382
Order Service Email: [email protected]
Follow US Get Newest Hairstyle Trend
Instagram:https://www.instagram.com/celiehair/
Facebook:https://www.facebook.com/celiehair
Youtube:https://www.youtube.com/@celiehair
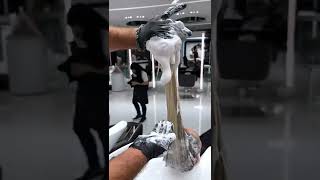
You guys want to hear all about this gorgeous hair from Sealy hair. Then just keep watching for sponsoring today's video. I will send over a 22 inch, bodyweight 5x5 lace front wig, and it is 180 density, as you guys can see. I got a whole bunch of goodies elastic band lashes, hair clips comb along with a wig cap, a headband Edge, Edge control brush and a bonnet, so they got your girls set period. Of course, the beautiful body wave unit you guys, can see all the luster and beautifulness straight out of the package, so I went ahead and put my fingers through it. Just to you know, check the shedding I didn't get any shedding. I honestly didn't really get shedding throughout this entire process. Besides the hair that I plucked and as you guys can see, it does come with the elastic band. We'Re gon na go in and bleach the knots with our bw2 bleaching powder in our 30 volume developer. So I went ahead and got it to the consistency that I wanted and we're going to go ahead and bleach. Those knots - and I did leave this bleach on for about an hour. I did over bleach a little bit, but honestly I like doing that because it gives a little bit more of a natural look. So I am going to spray the hairline and we're going to begin to pluck the method I used was just like the method that Eric and Tay use on Instagram. Obviously, I'm not arrogante, but I did kind of just watch his um hairline tutorial and I feel like it definitely has helped me - do better hair lines when it comes to my frontals. So that's what I'm doing, I'm just plucking it thinning out the hairline. You guys can kind of see I'm just kind of like pulling back hair and then skipping a space and pulling back hair and just getting it thin to make it look natural. You guys can see the hairline turned out beautiful, I'm so happy. This hair was not double knotted, so it wasn't hard to bleach or pluck so we're gon na go ahead and put this baby on our head and hot coming back, so we can get ready to install after we hot come. I am gon na go in and cut the lace in half because I have been loving to install my wigs this way, it's just much easier, so I am going to be using this got to be sprayed today, it's in the blue and purple bottle. I actually feel like I like this one better than the yellow one. Just the original got to be glue spray, so definitely recommend you guys check this out. So, as you can see, I just sprayed one coat of that got to be sprayed and I'm going to blow dry after we blow dry. I am going to tie the hair down for about 10 to 15 minutes and then we're going to cut off that excess lace. With my Razor my imagination and you never know, once the lace is cut off, you can clearly see that there is a white cast. So we're gon na go with one more layer of that got to be spray and we're going to just spray the hairline just so that it is melted and we are going to go ahead and move into our baby hairs and get in this wig. To lay down flat we're gon na hide, coming back, do a side part and just get it ready to. You know, be flawless, you don't know foreign don't know my name is we got some baby hairs done our part all done and stuff like that. Of course, we want to make sure our wig is laid snatched laid down flat. We want it flat, we don't want no Humpty Dumpty, so we're gon na go ahead and hot comb the hair down as flat as we can possibly get it and you know, make sure we pull the um hairline back. You know how to come. The hairline back. So that it just looks Flawless, you can see the plucking that we did now. I did not have the black spray, so I said you know what we about to make this work and I use a rack tail comb and I use my mascara and baby just wait. Just wait boom. Just like that baby. There we go. We don't need that spray, so I went ahead and tied my hairline down just to make sure it gets real melty to the skin, and I am going to now go in with my wine curlers. These are my prism wand, colors from um Amazon and I'm just going to wind curl. My hair on 410 degrees get some beautiful, bombshell curls in there. I love how this hair took to the heat. It wasn't steaming. It just took very well to the Heat and I'm just so happy with how the curls turned out on this hair. They came out really full and voluminous, so yeah we're gon na go ahead and just finish curling and you guys can see. The Finish. Look thing. Stormy make sure no craziness, I'm feeling like after I finish, curling I'm gon na use my fingers and we're just gon na finger comb right through this unit and, as you guys can see, we have these beautiful, gorgeous full of volume curls from Sealy hair. I definitely recommend you guys check them out in the description box down below, because this hair is Bomb y'all see it period, but I hope you guys enjoyed this video make sure you guys like comment, subscribe and I'll see you in the next one peace. That'S the way


Comments
Mellonee Edgeston: Beautiful ❤️ it looks so natural looking!
Kiara Danielle: turned out so nice beautiful ❤
Tye Taylor.: Beautiful!♥️
TK: Yess love it
Tameka Davis: Super cute
krishna25nimavat (IG @Krishna25Nimavat): ✨❤️✨