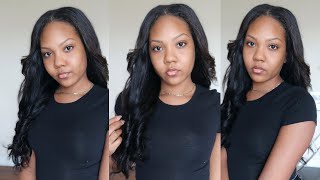
New Trending Style Two Swoops , Claw Cip Look Super Full Hd Curly Lace Wig | Asteria Hair
- Posted on 05 November, 2022
- HD Lace Wig
- By Anonymous
Use code "on20" to get $20 OFF!
Direct Hair Link➤https://bit.ly/3DpRWRO
Hair Info: HD 13*4 lace front curly wig 26inch 250% density
❤#AsteriaHair Official Website➤https://bit.ly/3sI3ivx
Top1 #asteriawaterwave Lace Wig➤https://bit.ly/3SOEoFd
▬▬▬ BRAND AMBASSADOR ▬▬▬
Join our FB group: Asteria Hair Promo Codes & Freebies
Inbox "Asteria Hair" page to get your promo code for an extra $$ off
Group Link➤https://bit.ly/3AKYVoN
#asteriahdlacewig #asteriaclosurewig
Wholesale or promotion? Contact Asteria Hair:
WhatsApp: +86 15238065852 Email: [email protected]
Instagram @Asteria__hair https://bit.ly/3Lobbxq
YouTube @Asteria Hair https://bit.ly/3m5EBoA
Welcome to My Channel
Be sure to SUBSCRIBE & TURN ON YOUR ALERTS
HAIR CHANNEL @iambeautifulhustlertv
——————————————————
MY PERSONAL YOUTUBE CHANNEL : @Life with ShaeTV
https://www.youtube.com/channel/UCB9xX...
——————————————————
Follow My Socials:
PERSONAL
@iambeautifulhustler
BUSINESS
Instagram:_Beautifulhustler
@thebhslay
@girlsniteoutapparel
Twitter:_Beautifulhustl
YouTube :IAmBeautifulHustlerTV
✨For Sponsorships ,Reviews,& Questions
Email:[email protected]
786-571-1313
To Purchase Hair & Products Www.ibhslays.com
Allow 3-14 Business Days For All Orders
#miamihairstylist,#miamihair,
#browardhair,#browardhairstylist, #Atlanta #atlantahair,#atlantahairstylist #reels, #explore #trending #tiktok #viral #miamimakeup #miamimua #miaminails
Thank you, Millie got millions, hey Beauties and Welcome Back Time beautiful hustle TV. Today we are back with another video, and today is Harris response is response, and so what I was trying to say is today's video is sponsored by uh stereo, hair, okay, and they sent me over this HD lace. 26 inch. 13X4 250 density, curly, wig y'all. This wig is raw as hell and it's so full and I absolutely love it full parting Space, HD, lace, pre-plugged and super super super super, full and y'all know. We love us a good, thick and full wig. So today I'm going to be doing this style that I've been singing trending and also my baby. Jordan has also did the style. So I was like you know what let me go ahead and get a style a little try. You know what I'm saying so today I'll be doing the style that you see in the thumbnail and awesome beginning of this video with my whole Tick Tock trend, so we're gon na get started and just jump straight into this video y'all know. I already beat my own face period: y'all been getting real good at this vegan face and y'all see me, but nevertheless I went ahead and dyed this weird jet black y'all. So this is what it looks like y'all know I'll. Do the water dot method to make it real, quick and simple? So this is what the wig looks like just putting it straight on my head and I did go in a little more and you know, do some plucking and I had already like pre-parted my wig down the middle, because I knew the style that I was going To do so, the first thing I'm going to do you guys is just cut the extra lace off the side of the wig and then I'm going to jump right into adding my layers, foreign guess. What I'm telling you right now head over to the website, purchase your glue. Mommy still have it in stock, okay, but nevertheless I went in with three layers today of the laceman adhesive, and I want that once that last layer turns clear, we're gon na go ahead and begin to tack down the wig foreign foreign first and then I work My way to the sides, and once I get it where I want it, I'm just going to take my fingertips and push that lace right on down and then once I finish applying that lace on both sides, I'm gon na comb - it in you know applying pressure With my tail comb and then I'm gon na go in with the blow dryer on the heat setting and blow dry it a little bit before we secure it down with the nut, though foreign foreign of the hairline, and if we have any pieces that are still Lifting on the hairline or does not get glued down the first go around we're just going to go ahead and Tuck that down now before we get into the styling foreign foreign just want to cut as close as you can or you need to, and then just You know anything, you don't need just remove it, but if you feel like you want to keep some of those areas, that's not tied down, then you go ahead and just glue them down, and I just take you know a little bottle of dance break. Okay, so um I'm just going to go ahead and take that adhesive. On the back of my hand, I do like a little dot at a time, because y'all know the glue dries fast, so I just do a DOT at a time and work. My way on, you know, underneath those cracks using my rat tail comb to just really slide under there, foreign foreign. So after I finish tacking down one side of the wig, I'm just going to take the blow dry and just blow dry it down really good. And then I'm going to repeat the same exact steps to the other side, apply the glue, push it down and then blow dry. Then we're going to go ahead and get to pulling down the baby hair sections, and you know all the little uh pieces I'm going to be leaving out to curl um. Once I do this style and then we're going to also part out our sections for the two swoops foreign foreign and I'm just going to be doing two simple baby hairs on each side. But I'm also going to, like I mentioned before, pull out the little pieces that I'll be pulling out to curl um with the curling irons. I'M not the curling iron, but y'all need a little Edge, curler or whatever so um pull down the baby hairs first and then we're gon na go behind the baby hairs and then pull out the sections for the curls foreign foreign I'm doing now. It is very important that you do go in with the wax stick and apply it, because you want this area here to be nice and smooth that will pull down our sections for the two swoop sides um, it would be. You know, I'm saying nice sleeping neat. Okay, so I'm just gon na part about half of that parting space of the wig, because it's about like a regular, a 13x4. So I'm part of that like about two inches or like an inch and a half, and I'm just separating that um from the front part I'm going to part the front part off and then I'm going to hot comb, the rest of it going straight back. Foreign foreign to the other side, pull down the section to match the other side, um hot comb, the rest of it going backwards and then plaiting the section out the way, foreign foreign. So I went ahead and sectioned everything all. As you see, I have my first two sections. I have my section in the back and I have this section that I'm going to do for the ponytail um. I just kind of added some of the rest of the two inches frontal space and some of the hair from the back as well to make the um the Little ponytail uh clip thing a little Fuller, but um here is what I'm actually going to put down Those pieces now that I have everything sectioned up, I'm just going in and pulling down those extra two pieces, um of which I will be curling um for the little drop curls in the front foreign foreign work and it's now time to add more foundation and using The evening spray to spray the hairline and tie it down for our second step melting process. So I'm just going in with my fingertips a little bit and then I'm going to just spray it as gentle and as neatly as possible. That way, it's not all over. My face and just comb and smooth that back and then tie it down again with that melt belt and let that sit for a few minutes and now I'm just going to comb out the hair. After removing the Melt belt, we're going to cut those baby hairs. Curl them pretty quickly and then I'm going to curl up um the little curl pieces and then we're going to do the swoop so because this is a lot of repetition just for both sides. I'M just going to show you one side in detail and the other side. I did off camera just on this. Video don't be super long, um and repetitive, so cut the baby, girls, curl them and then using the been holding spray, I'm going to go ahead and scoop them, and I also use some of my glueless and baby hair gel um, the lace, milk. You know glueless adhesive, I mean not glueless adhesive, but the lace melt, gel okay for the baby hairs or for your glueless installs to uh soap, the baby hairs and mold them into place, and then I'm going to go in with my same curler that I use For my edges to curl those little drop down thing pieces, and then we were getting to how I swooped and secured um the swoop in the front foreign foreign foreign pieces, and I kind of like one curled it around the thing. First, I like curled it regular, and then I want curled it. I don't know a little combination of both whatever I'm just. I just wanted to make sure that it was just pretty and nice and curled and then I'm going to raising them shorter after curling highly recommend that you curl it first and cut it afterwards, because if you cut it first and then you curly you're gon na, Have some little tiny little hairs? Okay and that's not gon na look we're going for we're not going for roach antennas or uh. You know you get what I'm trying to say. Okay, we just wanted to be curl pretty and you know, but you need to curl up all this long and then you cut it short to your desired. Look that way when you do recurl it once it drops. You already know where it's going to stop foreign, but you don't have to go in too too much, because once you really just lay that thing down and you spray it it's going to just do what it has to do so. Um, I'm just hot coming. Just like the root part, the rest of it will be pulled tight and stretched out and secure um at the back of the wig. So I'm just going to neatly just hop comb and smooth it down, and then I would just prep it and just clip it behind me until I do the other side and once again just going in with that even spray and using that as our Slicker and Just smoothly just comb, everything and Slick it down, okay and you can blow dry it a little bit, give it nice and secure, but that's what we're going to use to smooth it down and then I'm just going to pin it behind me in the middle of The center of the back of my head under the wig and then I'm going to do the other side off camera and the same way we do the swoop um. When you do like the when we do the side part swoop, look we're going to secure it. That same way by rubber band in those two sides together, foreign foreign, both sides looking good so far, looking good, but now we're going to take those two sides and we're just going to take over there and secure them yeah. So you got to work in. Let'S do a quick, little wrap, wrap and secure that real tight behind the wig okay y'all know it'd, be real hard to try to rub a big curly hair, because my other hair just get all in a way, but once you get it, you get it. Okay - and it just go on in that holding spray just to make sure everything is super. Sleek and neat just apply it, and it also gives it a little shine. Naturally, okay, but now we're gon na go ahead and do um. You know remove the other sections. Y'All know I did two sections like I said for the back of the hair and then for the top ponytail, so we're gon na go ahead and work on that top ponytail. First um I have the uh little. You know the claw clip that we'll be using to pin the hair up, but those are the two sections. So I'm gon na go ahead and just do the um ponytail first, so I'm just adding a little holding spray. You don't got ta make it super bone spread or anything like that, because it's supposed to be like a cute messy look but kind of neat at the same time. So I'm just gon na rubber band that piece together and I'm gon na show you how I did mine, because I ended up not actually using a little um clip that I showed you guys I just kind of like how can I describe okay so once I Do the ponytail I'm going to pull the ponytail forward and pull it down to where it gives off that claw clip effect by like making a little ball and then I'm going to rubber band the ball forward, and that way it would make the hair drop backwards. I know it kind of sound weird when I'm explaining it, but let me show y'all exactly what I mean. Okay, so y'all see how I did the ponytail hair right and you know when you do a pony set. The hair just goes, you know, falls down regularly. Oh yeah, let me let the back down, so I can get out of a little bit out on push my braids under my cap because I don't suck my legs down when I do it on myself, but I do sew it on other people, but okay. So now that I had to the ponytail right, let me flip the hair around okay. So yes, so you see what I mean, I'm going to pull the hair forward, push it back, so it creates that little ball and then we're going to rubber band that little ball and we're I'm kind of the same way. I would use the claw clip to like push the hair forward and secure it, I'm doing that with the rubber band. So I push the hair forward and then I secured it with a rubber band and now I'm going to fluff it out and you know wet it down and all that suck it uh stretch and it doesn't have to be super neat like I said, but because It'S like a neat and messy look at the same time, but this is what I did um. This is how it looks so now we're just going to go in with some water, not super super soaking wet, so it's like all calmed down. I really love the full look, especially with this style, so we're just going to add enough water to just give the curls a little definition and then we're going to rub our fingers still with fluff it out, fluff it out, fluff it out and once we're done With that y'all know we're going to go ahead and conceal and black spray the part, then I will give you guys the final look, foreign foreign look and boom voila y'all get into it absolutely love! This look super pretty. Thank you guys for watching here's the Real Time, video, video, no edit, no nothing just raw and then the flash gave y'all a quick little 360. Yes, come on spin around give it to that grass yeah super full super. Pretty! Okay! Yes, come on I'll steal, your hair y'all did your damn thing with this wig, absolutely love! It check out the description, details below don't forget to thumbs up comment and share this video. Thank you.

Comments
Kemo Bennett: Gurl, u be killing this hair game....don't feel discouraged that your underrated, God and time will tell.
DollFaceDeluxe: Hair GAME on LOCK every. single. time. It is a SERIOUSLY a whole blessing to watch you work.
Asmaa vlog 아스마 브이로그: When I stumbled upon this video, I was very happy because I really, really liked the content of this video. Great editing, interesting plot and beautiful lighting. In general, I want to say that I didn't waste my time. Thank you for your Great content. I look forward to your new wonderful videos in the future. ♥️♥️
Rashaid: One thing about the hustler , she gone hit everytime ❤
Sam Willis: Shae you took this style up a notch wit dat beat. You definitely giving F A C E
Queen_Lexx👑: Sis don't never miss on this hair shit
♡Antonio♡: Looooooove fluffy hair on you ❣️
Kimberly Smith: Slick sexy and pawpin is all I’m gonna say is come Queen of Slay always comes through
Sammy Da Goat: Fourth Comment Lovely Hair Thumbnail Always On Point
Fairweathered Friend: Giving coming to America vibes
Shaletha Quenton: Absolutely beautiful .
Quiesha Denise: Where did you get your contacts love?