Techniques |Step By Step Wig Install W/ Stylesbyreerachelle
- Posted on 03 March, 2021
- HD Lace Wig
- By Anonymous
#wiginstall #boldhold #meltdown #thereerachellecollection
Welcome to my channel
Instagram: thestylesbyreerachelle
Wig:www.thestylesbyreerachelle.com
“Stacy unit with custom color
Products:
Got 2 b spray/gel
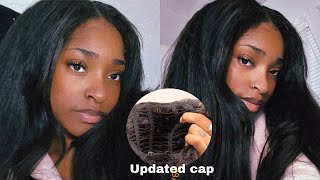
Wig cap
Maybe line concealer
Bold hold /extreme hold
Edge brush
SUBSCRIBE SUBSCRIBE SUBSCRIBE
GOOD VIBES ONLY
THIS CHANNEL IS TO SPREAD LOVE AND KNOWLEDGE TO ALL MY BOSS BABES !!
Click the bell so you can be the first to know when videos are available!!!
Stylesbyreerachelle units are custom made with %100 virgin hair all caps size are 21.5-22.5 ,for measurements above those measurements please contact through email for proper sizing when ordering.
-For business inquires vendors ,sponsors and more please contact: [email protected]
intro (0.22)
Outro 17:40)
Hey y'all, it's styles by rachelle here here with another hair tutorial today, my client came in with a handful of hair and we are about to slay this hair okay, so the style that we're doing today is basically a wig install, i'm going to start off parting. Her down the middle she's doing the middle part, so my client has a widow's peak and what i'm going to do is just basically start off with tiny braids in the front so that her foundation could be flat. I tell y'all every video that the foundation must be flat, so in order for it to be flat, you must braid down those first braids i'll say like the first three braids needs to be it's flattest, okay, so that we can have that flat. Top no lumps no bumps, so i'm going to continue this braiding method, y'all, i'm just going to go ahead and just braid her hair down to the ear. Okay, just keep on doing it. Do not get tired. You can do it, you can do it y'all! It'S easy, i'm gon na make it look easy for y'all, so y'all can know that it's easy. So i like doing this braiding method, because it's just one of my purposes versus the ones the straight backs, the straight back braids. I don't know i'm not like a fan of those, because it's like when you have to sew down the wig when it doesn't have clips. This is way much easier versus on the side. You don't have nothing to sew it down. So i like doing this method of breaking down to the ear, we're finishing up on the braiding pattern and we're just going to pull up that last braid and connect it next. Step that i like to use is basically using the oil this oil today, i'm using is the wild growth. I know you know about the wild growth. If you don't know now, you know i love me so wow girl, it's good to always put some type of oil in your client's hair, while they're having this protective style versus just popping on a wig, i mean, don't you want your hair to grow right so Put on some wild growth on your client's hair, okay, the next step that i'm doing right now, which is basically just tacking up the braid. This is the easy part just tacking it up. I like going into a upper motion. I know a lot of other styles. Probably do a downward motion, but upper is better for more control so that you don't poke the client versus going down. So i'm going to tie it at the end and i'm going to cut it. Okay, so y'all know in my previous videos that i use stocking caps, but today i'm just going to use a wig cap, i'm switching it up on y'all, i'm switching it up. I love using the stocking caps, but today we're just going to do the wig cap. I'M using a got to be just to pull back the hairs, those extra free hairs that might be in the way they need to be pushed back so that it can be protected and the client does not have any issues with their baby hairs getting pulled out. So it got to be is what i'm, using i'm using the edge brush to push those back and we're going to apply the stocking cap y'all tie that stocking cap? Yes, yes, yes, make sure it is not too tight on the client's head make sure it is on there right after the stocking cap is put on the head. We'Re gon na apply another layer on top of the stocking cap, okay, so yeah. This is. This is what we're doing we're putting another layer, okay and then we're just gon na sew down the sides. So let's talk about this wig cap because i know a lot of people, they don't slow it down and me i like sewing now, because i don't want to hear my client saying. Oh my wig cap coming up, i like extra security. So what i'm doing on this part is just being basically sewing down the side so that the wig cap, when i cut the front it, doesn't have no problem with coming up. I'M gon na blow dry it that size make sure that is blow-dried and adhesive to her front of her skin. We gon na make sure that okay, so this cap can stay on so now we're getting on to the part of just cutting off that cap. We'Re going to cut off the excess cap that we do not need just cut it cut it cut it cut it cut. It make sure that front is cut straight. It could have a little ridge because in this video it is going to be ridgy, but i'm just going to tell you this. It does not have to be perfect if you over think it then you're going to overdo it. It'S so easy, just just watch what i'm doing um of how imperfect it's gon na be when i cut it, it doesn't have to be cut straight and how it's gon na end y'all, like don't overthink it. I promise you got this girl. So, let's get to the point of just cutting off the excess, because you wash your yarn cause it's about to go down all right, all right! Let'S get to the next step. The next step will be adding that concealer onto the base of the scalp and also onto the stocking cap. So what i like to do, i'm about to give y'all some one of my tricks. I guess i'll give y'all my trick. I guess i'll give it to you, so basically what i do is, i put it on my hand, the concealer on my hand, and i mix it with the got to be spray, and i just plop pat it onto the cap you're, going to do this method And dry it as many times as you need to do it so that the cap can be the desirable color that you need it to be. After that, you can start to apply the bow hold. That'S the adhesive that i'm using today, i like using boho because it really holds down the wig like i never hear much from my clients, and that is always a good thing. You don't hear much, they be like oh girl, my wig is still on girl. Yes, yes, yes, okay, i'll, see you in another. What two weeks bed and that's the way it should be right. You should always make sure that your clients is getting their. You know last and durable hairstyle with the money that they're paying for the service. So, let's talk about applying the adhesive i like to use up to four coats, so my coats are basically those dots that i'm going to apply. This is my second coat and i'm just going to smear it into a circular s motion you know circular is really a method with applying this adhesive y'all it's. I know a lot of people make it look easy, but it's a method to this. So we're just going to continue to add those dots and each layer. You have to make sure that it is dry. Okay, you cannot just keep on adding on there a way to cross check, to make sure that the adhesive is dry is to make sure it has that clear, glossy look before adding that next layer. Okay, that is key on to getting that perfect, melts and also using the adhesive the right way. You don't use the adhesive the right way. You will not get that milk okay. So let's pay attention to this video okay pay attention. When it comes to this meltdown and when it comes to applying the glue, so i did my cross checking and we're going to apply this wig y'all. Finally, at the good part, i like to make sure that that middle part is lined up and also the lace is lined up as well with the glue. You should always put the lace over the glue, never have too much glue and not enough lace always have enough lace it. The glue should be hiding so that when you get to the part of okay, i put the wig on a little bit too far up. You can just easily cut off that excess lace versus just having you know too much glue, and you have that gucky. Look. So the wig is applied and i'm basically gon na make sure that middle part is straight and all of what i need is done for this wig. Also, i like to spray, got to be just to add a little more adhesi to the front of the lace. I'M going to use the blow dryer and i'm going to use the comb just to pat down the front of the lace. Okay, this is key with the melt. Okay, you have to make sure that you do these extra things just to make sure that the lace is melting and doing this thing. You know what i was talking about: cutting that excess lace. This is what i'm doing cutting excess lace that might have been too much for me, so i'm just going to cut it off, i'm going to also melt it down a little bit more another way to melt down. That lace is wrapping it up, which will you'll see and later on on the video and we're going to hit the top of the wig with the straightening comb. We just gon na make sure it is flat because nobody likes a lumpy wig. Nobody likes nothing lumpy. You just kind of make sure that it's flat - this is just what i like to do just to get my process started with the styling, so the next step is going to be the baby hairs. I'M not going to apply too many baby hairs on her because her forehead shape so we're just basically going to do two baby hairs. Okay, two baby hairs is enough: when applying the baby hairs you're going to pull out the hairs that you want perform for the baby hair. So with this part you might have to pluck, you might have to do a lot just so that it can. You know be desirable for the client and also look like a real hairline. You don't want a fake, looking hairline y'all. You want it to be as realistic as possible. Just understand that this is an illusion and you have to come through when you are making this illusion. So right now i'm just going to go in with the tweezers i'm going to squeeze out just a little bit so that i could thin out the baby hairs. Because i mean i i tell y'all every video i like the natural look. I do go. You know dramatic, sometimes with the baby hairs, but the baby hairs have to be a little bit on the thin side with me, like i just like my baby hairs like that they have to be in between not too thick and not too thin. So that's what i'm going for with this look, i'm going to just basically push the hair back and i'm going to start cutting the baby hairs with my shears, so that i can form the baby hairs and get onto the styling. Oh i'm going to use my edge brush and a little bit of mousse just to form the baby hair, and i like forming it and move it into a c motion so basically starting at the base and also end it. At the end, you can grab your shears just to cut off the excess baby. Here you don't want a long baby hair to the point that the client would get home and then it'll be hard for them to do their baby hairs because you got them long pieces so make sure that you cut it and do your thing with the baby Hairs yarn so with the other baby hair, i'm just going to do the same thing. A c motion make sure that you are using your products. Well, i'm using mousse and i'm going to continue this motion. So i get the desirable baby hair that i want. For my client, all right so after we are done with that, we're just going to basically tie up the baby hairs and also tie down that lace so that it can get its milk on while i style her hair. I love doing this because you have to put their hair up and preserve it. You never know what the decline is, sweat and they're doing what so, while you are styling, you should always wrap the hair up. Okay. So, let's get to the next step. The next step is just basically separating that hair and we're gon na use some shears and we're gon na cut these hairs. Even okay, i, like a little layer. Look so i'm not gon na do too much with the layers. I'M just basically go in and cut do my thing and we're going to add some curls to this style so that it can be a proper slate okay, because the color is it's the color, it's the everything for me. So, let's get into it today, i'm going to be using my baby bliss pro titanium flat irons for the curls. I know i'm not using curlers. Today, i'm going to use the flat iron y'all know: y'all can get the same method with flat irons. Did you know that, oh okay, now you know so basically what i'm going to do is just basically keep on curling. I, like the cross check after cross checking, is basically styling that front continue the curl pattern, i'm going to do a youtube video on curls. Just on curls, because i had to speed up the process y'all because i really wanted to show you on the wig install in this video. So i'm going to give y'all another video just make sure to try like and subscribe okay. So now that i am done with the curls, i'm going to add some finishing touches touching onto my client's hair. Okay, the oil that i just used was argan oil. It can be purchased at target or the beauty supply okay. So the next step is just taking off the headband so that we can continue on to styling, because we are almost done y'all we're going to do a proper comb through we're going to do a comb through and we're also going to do a cross check. One of the cross checks include grabbing those shears cutting what excess hair needs to be cut so that the curls can be formed in a way that it needs to be formed. So we're going to grab the person comb we're going to make sure the front of the hair is flat as possible, so we're just going to go over the front. This is what all stylists need to do when it comes to this part, you have to make sure that the style comes out to your desirable look. So what i like to do is just basically re-curl do any re-curling or do any cutting. That needs to be done so that the style can be how the client likes it and how you like it. So this is the finishing product of my wig install this wig can be purchased on www.thestylesbyrashell.com. As you can see, my client loves her hair. Do not forget to like and subscribe to my channel for more videos on how to's inspiration, motivation and also wig tutorials, see you love. You bye. You

Comments
Toni Patrice: Gorgeous❤️
faith khathi: Is this a 5*5 closure or 4*4 closure?
Soraya Baudin: She’s so sleepy