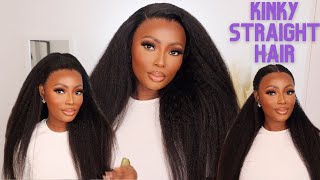
*Start To Finish * 90S Inspired Tiktok Claw Clip Tutorial Ft Unice Kinky Straight Hair
- Posted on 01 January, 2023
- HD Lace Wig
- By Anonymous
Hello my beautiful subscribers (and non subs) ☺️
Wig sales page - @CAwigss
Personal instagram- @holaa_caro
EMAIL- [email protected]
“Super long standby”wigs with free 48 hours Fast shipping
●▬▬▬▬▬▬▬▬▬♛#UNicehair♛ ▬▬▬▬▬▬▬▬▬●
I'm using lace frontal kinky straight wig 24 inches: https://bit.ly/3GfwrWN
https://www.unice.com/ ➤RICH 50% OFF lace Wig: https://bit.ly/3jlDgwA
☛☛☛ NEW flash Sale $99 get lace frontal Wig: https://bit.ly/3FEljkt
Get Extra 10% Off+ Free Robe Use The Special Code: Nicelace
Afterpay & klarna & Quadpay & Sezzle, PAY 4 Equal payment Within 6 weeks!
Natural 4c hair trending kinky lace frontal wig: https://bit.ly/3Waa3Uc
Affordable & Popular Glueless V-part Hairstyles: https://bit.ly/3WsA2Ww
Download “UNice” App (Extra 5$ OFF) ➤ https://link.unice.com/appdownload-you...
GET FREE HAIR With Friends Help on ”UNice” App➤ https://link.unice.com/bargain-ytb
Aliexpress TOP UNice Hair store➤ https://s.click.aliexpress.com/e/_pvse...
Amazon UNice Hair Store ➤ https://amzn.to/3afUszy
[email protected]: https://www.tiktok.com/@unicehairoffic...?
Instagram @unicehair: https://www.instagram.com/unicehair/
UNice YouTube Channel: https://www.youtube.com/c/UniceHair
Facebook @UNiceMall: https://business.facebook.com/UNiceMal...
Facebook UNice Fans Club Free Wig Giveaway: https://st.unice.com/afcc9
#unicehdlace #unice #kinkystraight
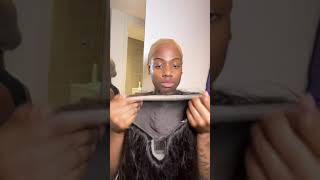
Hello, everyone welcome or welcome back to my Channel. It'S Your Girl, Caroline, that's me and let's get into the hair like come on. This has to be one of my favorite looks of this year. So far, so in today's video I'm going to show you how I achieved this look. Take you through the Journey of the install from out of the box to my scalp, but this is not going to be one of my typical super long and lengthy videos. I wanted to do something a little bit different shorten it down for you, but still give you some information here and there. This is more of a Express class. I would say you know I don't want to beat you down to death with consistent three hour, long videos unless y'all like that, if you do it, I got y'all now without said, if you're interested in how I changed this look, I want a number one and Giveaway, let's get into today's video, so the hair I'm working with today is from Unis Hair Company. This is their kinky straight wig. This is part of their newer, HD hairline. I believe so it's more like plucked out and definitely was plugged out. This is a 13 by 4, transparent lace, wig, and they sent me 24 inches of this kinky straight hair. Here is how she's, looking straight out of the box, Kinky, Curly, kinky, curly, hair or kinky straight hair in general, is always super full like. I believe this is just regular density and it's super duper full. That'S one thing I like about the kinky textures: only thing is sometimes it can be a little bit hard to tame, but I really love these textures because they're so natural and mimic my natural texture really well now. The first thing I had to do for customization was bleach. The knots I'm just using my blonde Brilliance Express bleaching powder with 20 volume developer. Since this is, you know an Express class, I'm not going to go too in depth on the whole process, but as far as tips and tricks for bleaching, I always say the consistency is the most important part. So I always pour the developer in slowly because you don't want it to get too runny, because when it's too runny it's going to start to bleed into your knots so pour it in slowly. I usually just keep mixing it until I get a spreadable creamy texture that it's not dry and draggy, something like I don't know, buttercream frosting or like a yogurt. Once I get my desired nice creamy texture, that's not runny! I'M using a little wooden popsicle stick to go ahead and bleach the knot. You can use anything to apply the bleach, just nothing metal, because metal does oxidize the bleach which is going to cause it to react faster or not in react at all and another tip, and I always say with bleach: you want to get a good amount of Pressure to push it to cover up those knots, but not too much where it's in the hairline, but enough for it to actually like cover up the knots like not just sit at the bottom of the lace. Once I have completely covered up the lace with the Bleach, I put some foil under to let it process faster, and I let this sit. This wig in particular is sat for about 45 minutes. Before I had to wash it out. I always say every wig is different, so set a timer, don't just leave it and forget about it. Set a 15 minute. Timer keep checking it. You want the knots to go from black or whatever dark color. It is to a blonde brown color and you can always tell your knots to bleach when you flip the wig under and it's like orange Under. That'S how you know: you've bleached the knots anyways. So now I'm just going ahead and shampooing out the knots, and I am using this neutralizing shampoo. This is like a standard neutralized shampoo that you get in your relaxer hair kit that turns the foam turns pink when they're still bleach a relaxer in it. So I just keep washing the lace and the hair through to the foam turns white to make sure I've washed everything out to tone my knots this time. I want to try something different I've always used blue and orange. I mean blue and purple shampoo to cancel the yellow undertones. So this time I was kind of trying to save time. So I was like What, if I mix the blue and the purple shampoo together, so it canceled out both orange and the orange tones. At the same time, instead of doing it, the way where I used to um shampoo use each shampoo at a time, so I just poured a little bit of both into my mixing bowl stir it together, and I put that over the lace like I would like You know the bleach, and actually this really worked. The knots were completely toned. I did not have any orange or yellow undertones after this. I let this sit on my lace for about. Let it sit for about a good 10 minutes and I feel, like I'm, definitely going to be doing this again now, I'm just trying to make sure I'm washing all of that pigment out of the lace, and here I'm trying to show you. I know it's showing up on camera, but the knots they they bleached really well and it toned very nicely so definitely do try mixing your purple and blue shampoo. If you have them, I got these from Amazon. They come in a two pack, the same brand I'll link it down below, but I'm just trying to make sure I'm properly washing the pigmented shampoos out of the lace because they don't wash them out properly. You can't stain your lace with like a blue purpley tint. Once I was done washing the lace off camera, I did go ahead and let the hair sit in some conditioner for a minute. I think I kind of let the bleach stay on the lace for a little bit too long, because I, the hair, was shedding just a little bit in the front. But that's because it really. I was going to bleach these knots. So that's kind of the downside of bleaching or not sometimes it can cause shedding, but I think the conditioner really did help it, because after that the hair was back to normal after I bleached the knots I did go ahead and pluck the wig. The wig itself was slightly pre-plucked in the front like the baby, hairs and stuff. It had a very natural hairline in the front, but it was a little bit dense in the back. So most my plucking was focused towards the back of the hair. Unless you guys know - or if you don't know, I do like to pluck upon something white, so I'm using just that white tissue paper that comes with your wig to pluck on top of and then before I can even start plucking. Of course you got to press that hairline out I'm using my hot comb on 500 degrees, Fahrenheit, so she's, really nice and hot, and just you know, pressing everything back, so you can really see those roots standing up and it's just a whole lot easier to know. Pluck your wig, when you have the hair pressed back once I have my hairline pressed back as you can see, I can really see those knots and I can have a good look at the hairline, I'm using my very crusty, but very sharp and useful Revlon Diamond Series slant tip tweezers: these are one of my favorite tweezers, actually, the only tweezers I use to pluck my wig and, like I said it's not a very super in-depth detailed videos, but if you're looking for a detailed, slow down, walk through tutorial on how I pluck For my beginners out, there do go ahead and check those out and I'll link them below, but because I can't leave y'all hanging, here's a little Express version of pluckings, basically some tips. So I always like I say, pluck behind the hairline. As you can see, I parted out the front of the hairline first. So that way, I start plucking behind that, especially with this wig, because it came pre-plugged when you plug in the front. I noticed especially for me, I start to get lots of bald spots, so I mainly Focus my work on the back to thin it out and when it comes to plucking, I try to try to think of I'm creating little gaps in between the hair. So I basically I plug this. I plug a line skip a line pluck a line skip a line. This way, you're like creating little gaps in between here, I'm creating really thick wide gaps for this wig. I wanted this wig to be very plugged. I wanted to look very natural, so my gaps are going to be bigger, but if you don't want a very plucked look, then don't make very wide gaps and another thing do not pluck in the same space like it might look like I'm plugging the same area, But I'm not I'm probably just taking my tweezer further back into the hair. I never pluck in the same area like I pluck, skip, pluck, Skip and pluck around randomly because when you plug in the same place, you're gon na make a bald spot you're, trying to thin out the hairline, not create bald spots. Once I am done working my way down for this half of the hair, I pull all the hair back to the front and, depending on how plugged I'm going for, I do other, sometimes I'll do no plucking at all in the front, because I want it to Be less plucked like I always that's, my other tip less is more when it comes to plucking on your mannequin, like you, don't have to pluck all the way for it to be perfect right now you can pluck more post install but, like I was saying for This look, I wanted to go for a very plucked look, so I did go ahead and pluck the front to really get it to look like scalp, but at the same time, when I pluck in the front I try to make sure the gaps are not as Wide as they are in the back, so I make them a little thinner, and even here, I'm not really plucking directly in the front of the hairline, it's kind of more in the back. You literally look at where my tweezers are pulling and last tip is make sure you always pull the hair from the root you're pulling out the knot. You want to make sure you're not leaving any hair behind like get into this hairline. It was definitely giving pluck. I feel like because of kinky curly I mean why did I mean kinky straight hair? I really wanted it to be as natural like my scalp as possible. I don't know about y'all, but my hair, it's a little thin in the front, so I want her to match me, but that was it for plucking. For this side, like I said y'all, if you're a little bit confused, you wanted more slow down like I promise you, it's so slow down that you might even get annoyed slow down tutorial. I have them and I'll link them down below where I'll explain how I work my magic, but now, let's get to the rest of the styling, once I was done plucking. It was time for me to go ahead and press out the hairline, because I know for this look I needed it to be super flat, and this was a kinky straight wig. So the texture - you know it's gon na need some pressing out for it to be really really flat and, like I always say for you to get a flat Wing, you have to take your time and go in section by section and press it out here to Help me press my hair out. I'M using the caracare wax stick. Normally. I don't use this wax every section of the hair because it can get it greasy. But since this texture is more coarse, I'm okay with using it on every section, so it can really. You know help press the hair out since it's very dense. The hair can take this wax. Essentially, I was giving this wig a whole silk press, so I would go in with some wax on the ends and then I'd go in with the hog comb on 500 degrees, Fahrenheit press, the roots straight and then going in section the frontal section of the hair. I'Ve been using my flat iron on 450 degree as well. Everything I'm using is really hot, because I want to get this hair as straight as I can, and as flat as I can, and I'm just going really nice and slow, and this was good enough to get the hair nice and straight. The main thing I wanted to note when it comes to getting a good press for pressing out the wig, nice and flat when I'm putting the wax, I'm being very intentional, and I'm putting it mainly on those knots. You know it's not about getting the hair per se to be flat, it's about getting the hair from the roots, so I put the wax right on those knots and my hot comb, I'm trying to show y'all right here that I really make sure I Glide it Over and I am pressing down those roots, not just the hair, that's how you get the wig to be like actually very flat. So I just wanted to take a moment to show you guys that foreign, after I'd press out all the hair in the front for the frontal I went ahead and started straightening the hair. I really had to do this on the mannequin, because it's the only way I can make sure I'm getting the roots of the hair, because I really wanted to get this wig to be as flat as possible, given that it's kinky straight hair. So I did use the hot comb on the roots of the hair and I also used a little bit of that wax on certain parts of the hair, not everywhere, because I don't want it to be super greasy, but just some places to kind of really help. Give that pressed suppressed effect after pressing the hair out. I gave the ends a nice little chop and trim just to really clean them up, because hair always just looks a lot healthier and Fuller, and it just looks more cleaner when you have your ends cut. So I always cut the ends off, because I knew what hairstyle I was going for. I decided to just start styling it on the mannequin, because it's gon na be a lot easier. So I have the hair sectioned out for the two side parts and the hair pressed to the back. So it's the next day right and I was trying. I was trying to finish the install in the style, but I was having the hardest time getting a good grip on the ponytail. I don't know I suck at getting good ponytail grips, so I was like no I'm just gon na take this wig off and continue styling it on the mannequin head, like I was doing before styling on the mannequin head honestly. This is so much easier because I can see everything like if you're someone like me, who's just super perfectionist, whatever missing pieces, so yeah right now, I'm just trying to like get the ponytail together like the ponytail. Don'T have to be that perfect? It'S just! I wasn't getting it tight enough, it was looking lumpy and I didn't want a lumpy ponytail. Okay, now, let's get into installing it here is a reinstall tutorial that you didn't know you wanted, but you need it. I did tint the lace yesterday, so I'm not gon na do that right now, but I always tip my lace. Wigs with my Maybelline Fit Me Foundation in the shame, shade of warm coconut - and I just put that under the lace. So the lace is an exact match of my skin tone boy. I need to get my hair done so soon. All right, let me be careful. I forgot. I have a ponytail situation going on see now. Why does this look ridiculous? How am I gon na? Do all that hold on I'm trying to cut off all this random ass extra lace? So reinstalls are very straightforward. I just you know, lift the lace. I have all these little. My braids are so crusty I'm trying to like push back my real hair, because I don't want it to come out and I just spray it under the lace always make sure you're Distributing that product around and I try to get and once I've done that I Put it back down for the sides? Sometimes I got ta like spray on top as well like in between you're gon na try to spray mainly on the lace, not the hair, just to help you know getting all that extra residue and build up until you're going to get crunchy once I've spread it Now my blow dryer I like to blow dryer and like whatever flat comb, I can find some flat thing, just push it all down and lock it in okay, same thing on this side, sometimes I'll spray. On top. I can't lift the lace like right here, so I will spray on top and just make sure I'm using my fingers to spread that product around before I fix my baby hairs. I'M just gon na put this elastic band on everything, just to give the lace a minute to sit and simmer all right now, while the lace is sitting and simmering, I'm going to take this opportunity to just sort out these two, the back ponytail pieces right here And to do that, but I got a trusty old got to be got to be - is a great hairspray for styling your hair, not for laying your lace like it's a great spray for styling all right. So, let's press these out, oh without burning myself, I'm over here messing up my beloved ponytail, and I want this to be as flat as I can get her put it back to the gosh. If he's gon na hold her real nice and flat, I'm using this like hard brush brush to just brush everything down like so brush it real nice and flat, it's the name of the game, and then it goes behind my ear. That'S this piece same thing for this side spray her down, so it got to be her a good little brush down nice and flat. I feel like that's why I don't braid. I can't braid hair. Like other hair, you know like other hair, that's not part of the section you're working on gets intermixed in the part that you are working on and you start losing everything. That'S my thing because I'm trying to okay hold on. Let me just take a moment to section out the hair. That'S not part of this. Hairstyle is really not that hard, but it's like forever elastic bands and then we're gon na tie. These two shoddies to the back time is tight, as I can get them to be, because the tighter it is, the flatter it's going to be a ring cool all right. That looks pretty flat. If you ask me per per and now let's fix the baby hairs. Oh okay, okay and now I'm just counting out these baby hairs that are all hard and crunchy from the spray, and I just gently comb them out to help loosen them up. You know have mercy I'll use my little flat iron, my mini iron, from Amazon to just re-curl them up a little bit, oh they're. So short, I want to burn my forehead. That was a weak ass. Curls beauty is painting for real okay other one. I'M just doing a little weak curls. These are not my best curves. I just have burned my forehead so many times recently that I I'm not gon na risk it until like the baby hairs, you already know Miss Eco Styler she's, the one and we're just gon na scoop them back up, come on guys get in the club. Okay, a little introverted one right here. I just like adding a little inverted baby, hair Swirls and I feel like inverted baby hairs - are just a lot more easier to do than standard of regular big hairs. I don't know why you know what that's good enough in there come back to them these days. I don't like to stress myself over my baby hairs. I just get them done and we'll figure out the rest okay. So I went ahead and did my makeup because you know I just feel like the makeup finishes: new look, oh, I don't know if I like it with it hanging short like this, like I made it shorter or I want it long, but let me show you How I did it basically so like I was showing out earlier, my camera died and was trying to explain everything. I literally just Twisted the hair in a bun. If you want it longer, I'm gon na do less of a Twist right. So I twisted like a little bun and then I'm using one of these little banana style Clips thingy and I just clip it right on top like right up here, just clip it, and this is how it looks if you want more of a longer. I think I want it longer and I just flip it back like so, and you got ta like play around with it. Like I was oh see, I ain't clipping right. She wasn't secure just nothing to try to show y'all what I did. Oh my gosh, so you know I messed up the look, okay and then yeah. So this is how it looks if it's longer it's not neat, though I have to like. I don't know like a long or short um. I think I, like it shorter yeah shorter, has more like a little attitude to it. So to make this shorter, take the clip out, and then we just twist it one more time around like so and make it the little clippy clip it under and then flip. It out yeah, I think I, like it shorter. It'S like more spiky this way, and now I'm gon na, like tease it to make it like, have that spiky look on purpose, I'm just gon na back comb it at the roots right here around with it. Until it's falling in the shape that I want to fall, I'm just like trying to fluff it out, give her some sass and then using that got to be to like spray it in places. So it can stay, stay sticking up a certain way, but just like a light, mist centered in The View, it's not in the middle okay and now to make the part Pop I'm gon na put it's a little Razzle Dazzle. My stomach hurts I'm gon na go ahead and put a dab of concealer, some concealer in the middle just to make the part pop yeah y'all see that and then let's blend that out, putting mascara over or part two just to make it more straight. Okay, here we are with the finished, look and I'm into it like I like it, a lot like it's definitely giving exactly what I wanted to give like. I don't know that's why I've been like wearing ahead of wear silver today, so I can give it a grunge Vibe, because the hair is getting like grunge pop, like it's like rock star to me. So I was like okay, I'm gon na wear like my rockstar clothes, which means just wearing silver, honestly, I'm a little silver, earrings and stuff. In my shirt, which is like super cool, I don't know, I got it from AliExpress, but yeah. Oh, this is so cute. It'S fun as far as the hair, all that Silk pressing I did. The hair is already like poofing back up this thing about kinky, straight hair, like I like this day and it's kinky texture like it's already poofing up honestly, it's just fine! I like it like this. This works, I feel about the look y'all like it. Y'All dig it. Yes, No, Maybe So now with us that we've made it to the end of another lovely install. So it's having a you guys to do make sure you like comment and subscribe and editing Caroline here. I'M currently editing this video, I'm about to post it on the New Year's and I just realized. This is my last video of 2022. I wanted to say Happy New Years to everyone, if you're watching this on New Year's shout out to us shout out to you, you made it to the end of the year. I don't know this year has kind of I felt like I've, gotten really closer to you guys and gotten to just put myself out there more and also hear a lot from y'all, and I just I don't know. I just feel something close with us, and I'm just really happy that I have that makes me just feel like I'm not doing this for no reason. I also wanted to take a moment to like just also mention the last giveaway, because I haven't did the giveaway for this video so for a chance to win this exact wig, but a brand new version of it. So yeah so comment a goal you have for next year, like I wanted to get a fatter ass, you do that, oh and then also comment a type of content or just video suggestions, something that you'd like me to do in the future. So I can kind of you know, give me some ideas of what to do for the next year. I'Ll just pick at random, I'm gon na use like a random comment, section generator thingy, I'm gon na pick the comment section from now. So, from December 31st, all the way to January second Monday, to give y'all give y'all a chance and I'll just pick up random, and of course you know rules are you have to become. You have to be following me subscribe to me because you know this is for my girls. If you're not following me, then you know I'm not one of my girls like why'd, I get back to you. You know what I'm saying anyways. Let me stop rambling because it's come a whole thing, but Happy New Years to all of you shout out to you, I'm proud of you, I'm proud of me. We did it and, if you're spending New Years alone, don't worry because Sunrise like this New Year's, I'm chilling at home like really on my bed, I'm editing I'm about to make me a mood board. I'M manifesting greatness into my life next year, like next year. This year is my year. I already claimed it it's my year and it's going to be your year too. It'S gon na be the best year you had the best year. I have even if it's probably not, let's be delusional, be delusional and say it's gon na be so I'm praying and wishing the best 2023 into all of us, and it's me as well, and you know yeah so with that said, Peace Out Girl Scouts and goodbye

Comments
💰 Make $750 Per Day: "In my experience, there is only one motivation, and that is desire. No reasons or principle contain it or stand against it." --Jane Smiley
Curlss: Happy new year Caroline!❤ Love this style with this texture I’m going to try this with the kinky straight unit I have. Tfs!
Bibi Onthebeat: Hi Caro, loved this install! For this new year, I want to take actions and become the best version of myself, and in order to do that, I need to overcome my anxiety and analysis paralysis. I love your content, especially videos where you were being vulnerable and talking about life. It was very relatable and made me feel understood. So I would love to continue seeing you being that open in this year and more of the behind the scenes on how you create your content, and steps and advices for people who want to become wigs content creators and don't have a following (reaching out to brands, fixing a contract, making the content, etc). Happy new year Caro, wishing you blessings upon blessings!♥️
Nina Negedu: This look is one of my faves from you. Absolutely gorgeous
MARY ODE: I love this claw clip hairstyle!! And happy new yearrr
Justice Marie: My first YouTube video I’ve watching for 2023❤ i love how you go from the box to on the scalp for every video❤
Curlss: My goal for this year is to increase my income and productivity in my career. I want to own my own home in the next couple years. I would love to see a wig look book series ☺️ wigs and styles you can wear to work, school, date night, etc. Thank you for all the work you do in giving us these amazing videos. I found and subscribed to your channel when you started opening up about mental health and self love. So glad I stayed, your vulnerability really resonated with me and inspired me ❤
renaeè: I really love this look! I’d love to see you doing some hair dying videos like bleaching highlights of fun colours, I know you’ve said it’s not something you’re experienced in but I think watching you learn to do stuff with hair actually helps me to also learn! Love your videos always so detailed and I definitely want to rock that look! Hope you have an amazing 2023!!!
Malikah Green: Heyy Caroline babe, happy New Year!! Thissss hair I think more videos on how to how bring balding wigs back to life (how to cut balding lace & repluck the hairline) would be FIRE My goal this year is to invest more into ME! More time alone, more sleep more self care days , etc — it’s ME for ME all 2023
Yaloncé: this is such a cute style!! In 2023 I would like to go back and finish nursing school it has really been a long time coming and it’s time to finish what I started! I would like to see more make up tutorials pls ❤
Whitney R.: Happy new year Caroline ❤️ !! I love this hairstyle !! My Goal this year is to live more in the moment and to enjoy the little things and blessings more !! I would like to see you do maybe a video with one wig but 4 diffrent styles ☺️☺️
c h i d i .: In the new year I would like to invest more into my own self care. I like long form content, so keep doing these wig customization videos! Also trying to recreate celebrity wigs/popular hairstyles sounds nice
NeickhaSuPRA: I love this look
Chinyere Ohuoba: Idea: do a start to finish hair AND makeup. that would be cute!
Tori time: Girl I searched high and low for a tutorial like this! Indeed the best girlfriend
c h i d i .: I tried this hairstyle on my wig the other day and it did not turn out right, so I love that you just posted this!
ritababy12: Yessssssssss girl you lookkk gooodtttt. I love this look on u ❤
missghana27: One of goals this year is to stop procrastinating so much. I would like to see more vlogs because I get to see more of your personality through them.
ritababy12: I need this FULL MAKEUP TUTORIAL TOO PLEASE. Happy new year!!!!
Michelle Nelson: Love this Happy New Year Caroline ☺️
Princess Stackz: I want to just find peace in 2023. I hope to see more closure wigs with content cause that’s my fav. Vlogs would be great to watch as well
Tori time: I'd really love to see your skin routine and makeup tutorial
Ty Nicole: Happy New yearrr!! my goal for 2023 is to work on my anxiety and learn to have more confidence love your content learned so much!!!
Ablackmansdream Fashion: Congrats on the growth with your viewers
Michele Mensah: happy new year sis, wishing you the best! a goal of mine is to get more out of my comfort zone. and maybe for a content idea could be doing more vlogs or “a day in your life” video!
MARY ODE: My goal for next year is to be more consistent and intentional in all areas of my life! I’m super excited for this year!! And for my content idea I know you said you didn’t in your last video but maybe some colouring and dying hair like skunk stripes or ombré and it would be so cool if you could do like a premiere when u upload a video so that we could live react/ comment cos I always wanna leave comments but they’re literally responses to what u say rather than comments but yeahh can’t wait to see more content from you this year!!
luvv sanii: can we get a make up tutorial pleaseeee? and happy new year’s
Chim: Happy new year love! I want to post more on my channel for 2023. I would love to see more makeup videos.
Brooklyn Gabriel: A goal I have is to do more self care also a ideo idea would be how you prep your natural hair for wigs
Tori time: My main goal this year is to redo my kids room it's long overdue and they don't have a window my kids are my everything
Chinyere Ohuoba: cuteeeee happy new year! a goal for this year is to be more confident in God and myself.
Meka: I want to start putting content out next year and I’d really like to see grwm videos or videos of skin care routines (skin is flawless) happy new year
sothatschy: Happy new year Caroline ❤
Jayla: Hi Caroline, my New Year’s resolution is to stop smoking weed. I would love for you to do more colored units like 613
Sandra Abohwo: Happy new year to you love so for this year I want to start a business on my own
Zeruhiah Parker-McLean: Is unice the brand you said before you can’t use above 20 for bleaching or was it just what you had on hand?
Princess Stackz: Happy new year !!
Tori time: Happy new year babe!!!
Meka: Hiiii caro babyyy I’m late but I love it
Jayy_m: You just gained a subby ❤
Samkeliso: Make up routine please
Brooklyn Gabriel: Heyy
Alyz: serendipity in the background☹️
Frankela Blizzard: First
Hi :3: First