Straight Install Ft: Wig Dealer
- Posted on 13 September, 2022
- HD Lace Wig
- By Anonymous
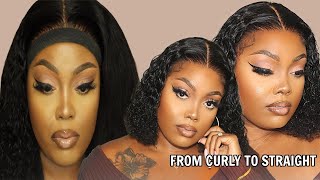
Hey guys here’s a long awaited lace frontal install I havent installed a wig in a while sio here is a quick beginner friendly install for you all ✨
Link to this wig: https://shopwigdealer.com/collections/...
Be sure to check out my small sponsorship with Coco & Eden... I love al of the products I received from them and I wear them everyday... here is the link to their site https://cocoandeden.com use chandlernicole at checkout for 20% off your order
♡ F O L L O W M Y S O C I A L S ♡
Instagram: nevaehamaryia
Snapchat: Chandlernicolem
✉️Business Inquries: [email protected]
♡ LINKS TO MY LATEST VIDEOS ♡
VLOG: Mini Target Haul | Trying New Food Spots | Hanging Out In LA https://m.youtube.com/watch?v=QmsMYyzo...
VLOG: Coco & Eden Sponsor | I Got Tape-In's | Mom's Bday and Mothers Day https://m.youtube.com/watch?v=V4N5DL3O...
Travel VLOG: Very LowKey Hawaii Trip | Oahu Waikiki Honolulu Hawaii https://m.youtube.com/watch?v=BBbDwBcZ...
♡ F A Q ♡
◦ AGE: 27
◦ RACE/Height: Black ~ 5’5
◦ CAMERA: Canon G7X MARK II
#lifestyle #Vlog
Hey trips that you planned for the next whole week, that's too long, fun, so cheap and you flex sodium. It'S like so deep. You got it girl, you got it! Hey everybody! Welcome! Back to my channel, i'm shanna, nicole! If you're new here, the box always comes with a time message, it says thank you for your purchase. I can't wait to hear your feedback. Please share your pics and thoughts via all social uh platforms and be sure to tag at the wig dealer exo excel with builder. So, unlike um, you, nice, hair or those other places with cheaper priced wigs, they do not include all the goodies all the goodies. It'S just nicely packed with this little baggie to stir your wig in when you're, not using it and basically just a wig. This is going to be their 24 inch. I believe it's a 24 26, most likely 24 inch just straight black lace, frontal. I, like lace, frontals as opposed to full lace. Wigs because with the lace, frontal um, when the wig or the frontal is old and dingy and messed up, you can just replace the frontal and keep the hair from the bundles as opposed to tossing the whole wig away, because with a full elise wig. Once it's patchy holy missing hair and things like that, the whole wig is just trash cannot be reused. Okay, so here is what the wig is. Looking like on my head, i love it um, as you can already tell it's like pre-colored on the root already. Don'T have to do too much there, um, no plucking really needed really. Just the lace needs to be cut and that's about it. It'S uh pretty beginner friendly. If you're new at wigs and you're, you want a good quality. Wig, that's going to last you and not tangle and matte. Then this is a really good um, a good starter wig for you. So, basically, right now at this point, i'm just um playing around with the wig making sure it's laying on my head, where i wanted to lay out for when i secure the look down. I don't want it to be too close to my eyebrows or too far down my forehead and i'm just making sure my wig cap is on and not lifting up. I don't like to do all of the glue that got to be glue and all of that cutting and all the extra stuff. I see a lot of girls. Do i hate doing that? It'S a wig! I just want it to be easy, smooth and just throw on and take off. I can promise you my wigs that i install are so simple, like literally i do hardly anything to them and they come out. I think i like how they come out. I get a lot of compliments on them, so you know if you want something simple, just one two step tutorial, then here you go. This is not advanced at all. I don't like doing the extras because yeah i have no time for that. So here we're just gon na cut the lace, starting at the ear part. The little you know make little slits, so you can cut around your ear, so you're able to wear the hair behind your ear and things like that without too much delay sewing or any lace showing at all and then from there we're just going to cut the Lace off of off of the head, you want to be careful, though, when cutting this part, because you don't want to cut it too much that you start like making holes in the lace or cutting too much hair off that you know it looks weird on the Side, i've done that before and just look weird on the side, because i took too much hair off and not just the lace so yeah at this point, it's very important to take your time and make sure you're cutting that slit right where your ear is. So you don't have any problems with the wig and it doesn't fit too tight because you cut too much of the lace in the hair off. You want it to fit. You snug, but not too snug where it feels like you know you have a headache or something so here before i actually cut the lace. I'M gon na put down the glue. I put down three coats of this glue. Um you want to let it air dry. You want to make sure it's sticky, but not like all the way super dry. The wig won't stick, i'm using glue from the wig dealer. I purchased this glue separately. You could purchase um a kit for like 40 bucks, it's a wig beginner kit for beginners. It comes with the glue, a comb and clips, and things like that um so yeah, i'm just here. You just want to smooth out the glue and make sure that it air dries. I tend to think i put too much glue but to each its own like it works for me um, but you want to let that air dry and then eventually you're, going to end up placing your lace of where you want your your wig to start. On top of that and then cutting off the excess lace, i found this to be a more efficient way to make sure like the hair is laid where you want it to be laid at and instead of cutting off the lace first and then oops you cut Too much lace or oops, you got to cut more lace like this. Just works better. It saves you a lot of time. Trust the me is is so here i'm just going through and pressing down on the lace, because i i found out where i wanted it to lay it's perfect for me. So i'm just going to press it down and then take the comb, the rat tail comb and then just comb and press it in at the same time. Just so i can get that extra extra lay um and i can see how it's sticking and then i'm going through with the hot comb. These are the electric hot combs that you plug in these are not stove top popcorns. I don't know how that will do on lace. I don't know if that's gon na melt it because you know those get hot, but at this point i'm gon na do the same thing that i did with the comb. I'M gon na. Take this and press through or hot comb through the uh, the part where i applied the wig at so it just again provides another reinforcement, so the wig can stay in place. I won't have any problems and also it flattens it out and makes it just gives it a more natural look. It lays it down really smoothly. So at this point, i'm taking a razor and cutting this is the eyebrow razor. I'M cutting the lace here with this. Just to try to give it like a more natural look like jagged edge. Look instead of a straight blunt cut with scissors, because again the goal is to try to make your lace look like natural. We all know it's a wig yeah. I know we're on wigs. Whatever blah blah blah, but you know we still want it to look good. You know so i'm gon na take that i i find this pretty hard to use. I hate using the razor um, but i notice when i use the scissors like. Sometimes you just can't help but to make straight cuts so using the razor is good um. Sometimes i use a razor and the scissors together, just because i have a hard time with this razor. You want to be careful that you don't cut too much lace or that you don't cut a hole in the lace um and have the lace to start ripping that that would be terrifying. So, as you can see here like, i still have an excess amount of lace on my forehead because again, like i'm just very cautious with that razor. So i go through with the scissors and try to touch it up as much as i can um, and with this point i try to like move my hand or my wrist at an angle. Because again, i don't want to straight blunt cut with the scissors across my forehead, like that's weird, so at this point, we're just combing through the wig making sure there's no tangles. I want to see like if it's shedding all crazy or what's going on with the wig um, what is looking right and, as you can see, the wig is looking pretty good, even though you can still see my lace in the front there. I got to fix that um. It'S still, it's looking really good, like i run my fingers through it easily. I'M making sure that my wig is not lifting from me just simply running my fingers through. That'S something you want to test, because if the wig is limp is lifting from you simply running your fingers to your hair, then you need to like reapply that that's going to be a problem, so i'm not really into baby hairs. Um. I hate the exaggerated baby hair so much, but i'm going to take just a little bit of hair out just to make little eee beauty sections of little swoops um just to cover my lace because, as you can see, my lace is still very visible. Um and if you're like me, i don't wear makeup so blending. My lace with my like skin is on a daily basis is just like. You know a little bit more complicated, it's easier when you wear makeup, because you can just cover that up, but um yeah. So so yeah i um bought a little cheap little palette. It'S not even a palette, it's just a little one of them. Little sucker blushes, with the mirror on it, um one that matches my skin tone, i'm just gon na. Take it and just pat it across my um, my lace to try to blend it a little bit more with my skin tone. Um again, like i was saying, if you like, actually wear makeup like beat your face type of makeup, this is the easier process. But for me i don't wear makeup like ever um, i just my natural skin tone, so i want to try to get this to match as much as possible to satisfy with how much i uh brush it up. I go through and try to start making little swoops like around, where i patted the makeup in so that it just like blends like, as you can see the makeup there um on the side blends a little bit with the part that was already pre-tinted and colored. So here i'm using this spray is from the wig dealer. It'S called the melt spray um best spray. Ever i promise you way better than got to be got to be jailed, got to be spray way better than any of that stuff like it's not flaky. It doesn't leave a residue and it really holds it. You honestly don't need glue or anything. You can just use this spray, and this spray will like lay your wig for like two to three days. Trust me, i've done it several times and it works amazing. So here we go with my little wax: stick, i'm just going to take it and put it down again on like the edges and the top of the hair, just like, like you know, with a real tar and then go through with the hot comb again again To get this as flat as possible, um something you want to do, you can use either the wax sticks or the mousse. I i love using mousse or hair foam, whatever you want to call it um i like that better, it really does lay it down without leaving it all shiny. I mean well a nice shine, but like not as shiny as a wax stick. Would it looks like a lot of product to me? You also look at that, like i feel like that. Looks good um, that's the first side and i'm just taking my phone and looking at it with my phone to see how it looks on my phone camera because you know you're taking pictures, snapchat, instagram, whatever and videos. You know you can see your you can see. The lace differently it hits differently than it does on the camera you record with or whatever so, and then the lighting too is different. So i wanted to make sure that it was looking um reasonable and not too crazy, so again repeating the process of flat ironing. The hair and using the wax stick. I just want to make sure like it's as flat as possible. It'S as late as possible and um. It just looks good, so you can play with that as much as you want to to your liking. You don't have to follow anyone's step. Just do you know what makes you feel comfortable. What you think looks good on you when it comes to that process. So now that we got that side down, let's move on to the other side and try to get it like equal to look as like, equally identical to the other side as possible, it's not going to be perfect. It'S not going to be perfect, but you know the best we can do. I actually. I did less on this side. I feel like um, so i tried to make it look as uh as identical as i could and pretty much the same process wax sticks hot comb playing around with it making sure i like it. You know testing it out same steps. Installing the wig is actually pretty repetitive, the more you do it, the better you'll get trust me take it from me like i do not do hair, i'm, not a hair stylist. It'S just you know installing your own wigs. Just over time, you know watching different people using different techniques and different methods and morphing it into your own and um you'll, get it now that we're taking our big tooth comb and just coming through taking out any like hair. That was, you know, coming out from you know, messing around with the lays or from cutting the little baby hairs or whatever we just did we're just gon na take the comb and comb out any strands and any tangles or anything like that today, i'm taking my Amazing t3 guys t3s are just so beautiful, like amazing, to have amazing flat irons and one curls um, so yeah we're taking the t3s and we're just gon na get this as bounce straight as possible. I'M also gon na take this. I think this is l'oreal. Um a little like hair, shine or sheen, whatever don't put too much, you definitely don't want the hair to be too shiny. That makes it oily and strand strandy and just cheap. Looking at this point, i'm putting on my little gripper thing here - i got from my liquid beauty: supply store um, it's not the best. I feel like it's not super tight to lay down your hair. So if you have something better than i would use that, but i put that on just while i'm flattering my hair so like it can melt as much as it can and also at the same time like after i'm straightening one side of the hair. I'M going to go through with the hot comb again and again press it out, because i want it to be. You know again as straight as possible, so yeah i'm just going to reinforce again with that to blend it as much as i can so i didn't do too small. I didn't do too much of small sections um. I just took a nice size and just went ahead and started straightening. I know a lot of people use a comb rather straightening through, but you know this hair is already straight, so it really didn't take much for it to get straight at all. That'S something i feel like you need. If you have like more coarse hair, a body wave or something like that, that you want bone bone straight, this was already a straight wig, so it literally took nothing to get this hair straight and also using a good flat. Iron will do the job. For you, too, if you invest your money and your hot tools, you promise you'll save a lot of time. You know if you plan on doing your own wigs and your own hair, and things like that. I feel like you have to invest in these products. Um yeah there they can be a bit pricey, but having good tools will make all the difference. I promise you quality over quantity. My favorite saying so now at this point, i'm just about done with everything i'm just taking off this wig ripper and then yeah. This is this is what i got guys i loved it. It'S been a while, since i had just a black straight hairstyle, so i was pretty happy with this. She dancing for dollars. She got a thang for that gucci that thank you guys so much for watching hope. You guys enjoyed my video. Let me know if you have any questions about the hair or anything like that. I'M always happy to answer any questions and yeah i'll see you guys in the next video bye.

Comments
Marlena Williams: This is some nice hair and I like the way it’s packaged
christine moses: I love it very sleek
Marlena Williams: Nailed it
Siva Chinakurthy: Very nice and natural looking
Wendy Murphy: little personalized message in the box, touch of class