Diy Wig Construction / Longqi Hair /Cambodian Curly 22 24 24 With 20 Frontal
- Posted on 16 March, 2017
- HD Lace Wig
- By Anonymous
Hello ,everyone ,today we will show you how to make a wig by DIY using Camboidan curly 22 24 24 with 20 lace frontal
Longqi Hair store:https://goo.gl/6EpWnr
hair in review: https://goo.gl/vhZM6S
Other hair style maybe you will love :
Malaysin body with closure:https://goo.gl/P4dq4N
Brazilian Bodywave:https://goo.gl/goWpZN
Peruvian Silky straight:https://goo.gl/y2XMXm
Hair with Frontal/closure:
Peruvian Bodywave with closure:https://goo.gl/hvu2UC
Brazilian curly with frontal:https://goo.gl/IRpPNI
Malaysin body with frontal:https://goo.gl/MFdB9m
weclome to join us LQ Instragram:https://goo.gl/grJWo2
Have2have:http://bit.ly/longqihairhave
Giveaway news,don't you join us?
Video by Desi V.
Link to channel: www.youtube.com/c/desivtv
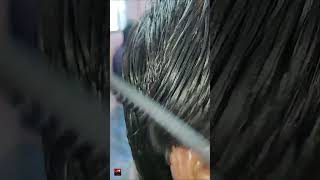
Hey everyone welcome back to my channel so today I'm gon na be using a spandex cap that I got from Sally's to start off making this wig and I love these because they're just very stretchy and really fit like anyone's head. So if you guys watched part one of this lace series, you guys will already have a customized frontal and I just placed the frontal a little bit over the cap. A couple inches before the cap is where the frontal starts, and I just held it down with some t pins on the side and at the top of the frontal, and now I'm just gon na break the hair out of the way. So I can start sewing. So you're gon na need some thread. This is just some regular sewing thread from Sally's and a curved needle totally thought I was recording when I started sewing on the frontal. But if you want sideburns, don't start directly at the edge of the frontal like do it like a few inches over. But to start you're gon na just want to take the needle through the spandex cap and through the frontal and then wrap the thread around the needle twice and cool, and that's gon na create a knot. And then, after you have the knot created, you can just continue to sew regularly by using the loop and pull method, which is literally all you see here, which is me going through the spandex cap and the frontal, and just continuing to sew like that, and I Used to make a knot like every time, I would do a stitch, but that just like took too long, and this is faster. So you're, just gon na, want to make your stitches close together and then just continue to sew and then make a knot like every once in a while for a little bit of extra security. Also make sure that you don't so through the actual band of the cap that goes around the perimeter on the outside or the width won't stretch. Oh, so, the hair that I'm using is from an LA Express company called lanky hair, and this is their Cambodian curly and it's the same hair that was in part one. But this hair is so pretty, as you guys can see, the wets are really full and the hair is really pretty. I love this curl pattern, so I'm going to double the tracks at the back, so I'm just gon na stick the needle directly through the web. Now I'm gon na connect that track to the frontal and I'm going to sew the track over top of that band of this band X cap. Once again, you don't want to so on or through the band or the wig won't stretch. Now I'm just gon na use a t pin to hold the tracks in place. While I sew now, I'm gon na go through the track again and connect it to the frontal and wrap the thread around the needle twice to create a knot which is basically gon na, be an anger for the track in the back. And then I'm going to create another knot, one more time and then I'm just gon na do the different pull method, the rest of the way and just nodding like every once in a while, like just whenever I feel like. I need some security by hey. This is what you came for: lightning strikes their attention and everybody's watching now, when I reach the end the track, I am making knots and I'm gon na go through the weft and connect it to the frontal on this side and make a knot and then I'm Just gon na flip it over and I'm actually gon na - do single wets from here, so I'm just gon na cut off that one wet and then just continue to sew, and that's because I want to make sure that I fit all three bundles onto this wig. If I doubled all the tracks, I would basically run out of space throughout the wig, so I'm just gon na single all the West from here on out and then just keep sewing all the way to the top in a u-shape. When I run out of thread, I lived a lot in this. I cut off the needle and then take the end, so I just kept sewing in a new shape until I got all the way to the top and I'm still gon na keep sewing. And then you shape until I get smaller and smaller and every time I get near the front. Oh I'm sewing through the weft and through the frontal and making a knot. So, every time I'm strolling near the frontal, I'm making sure that I'm connecting the track to it, because I don't want it to get like start coming loose or like unraveling after you wear your wig. However, many times you're gon na wear it you know so just make sure that you're connecting your tracks to a frontal anytime. You come close to the tracks, as I kept sewing in a u-shape that space became smaller and smaller and smaller, and I just kept flipping over the track and just showing so this next track that I'm gon na do I'm gon na connect the track directly to The frontal, because it's basically the closing piece, that's gon na close up the whole wave. So I'm gon na make sure that I not every single stitch, because it's gon na be connected to the frontal and I don't want it to come loose or anything. So I'm gon na go through the frontal and then around the track, and I'm gon na make a knot for every single stitch that I'm making right now and then after that is done. I'M just gon na cut the rest of the track, that's left and then you know knot it and that's the whole wig. So I hope that you guys enjoyed this video and that maybe you learn something that you can apply to your wig making technique and don't forget to thumbs up like comment subscribe and check out part one which will be linked down below and the only thing that's Left to do now after the wig is complete, is to cut the excess cap from the wig and be careful not to cut any of your stitches. And that's it you guys thanks so much for watching bye,


Comments
Desiree Victoria: Thanks for using my video. I love this hair
jimoh eniola: The hair is so gorgeous
tytiana wilson: Hey I have a quick question: the link you provided leads to 4 bundles and a closure. Is that the exact same link you used? Because I want a frontal and 4 bundles too
Alysia L: im still learning how to make a wig very helpful video
Ashley-Amanda: This is so pretty.
Tosha Jorden: OMG this hair is beautiful TFS
Dominican Kandie: beautiful hair. I love Cambodian curly. thanks for sharing
Danipoo1997: can you be able to double the wefts on a wig
Valleylondon Style: Beautiful
Dadouu_xo: Wow the hair is super beauty !!
Lahni Iree: Gorgeous
KinkyCurly K: do you measure your curly hair stretched or is it 22 in without stretching the curls?
Keira .H: Love the hair looks gorgeous Wanted
Tesha Jorden: So pretty
Jenni: 1st hair is so BEAUTIFUL
Adore x Amoura: cant wait till giveaway over hopefully i can do this