Perfect Beginner Wigundetectable 5X5 Kinky Curly Wig Ft. Luvmehair
- Posted on 11 January, 2023
- HD Lace Wig
- By Anonymous
➺Today I’m doing an install on this GORGEOUS clueless curly closure bob wig that required little to no customization❤️it came pre-bleached and preplucked, a perfect beginner-friendly unit.
____________________________________________
Hair Details
Direct link to unit in the video: https://bit.ly/3W2Xskw
Length: 14 inches
Use code Morae23 to get 23% OFF!
____________________________________________
Follow my socials:
➺ Instagram: @Kiannamorae FOLLOW MY NEW INSTAGRAM: https://instagram.com/kiannamorae?igsh...=
➺ Snapchat: Kiannamorae
➺ Tiktok: Factualbrat
____________________________________________
➺ EMAIL FOR BUSINESS INQUIRES ONLY:
____________________________________________
FAQ:
➺Age: 18
➺Ethnicity: Jamaican
_____________________________________
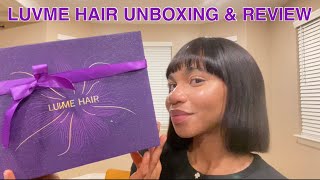
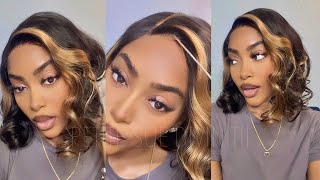
Scratch mixed in YouTube: it's your girl and I am back with another video. So today we are going to be doing an install from the company love me hair. We are doing a kinky curly bob wig. It is a 5x5 lace closure and it is a 180 percent density so right here, I'm just opening the bag and showing you guys all the goodies that I got because you know I like to do that. The first one that I got that you know I always love this because I end up losing them. I don't know how, but I got this scarf from lovely hair to tie my wig down and then next up I got this little compact mirror. I usually keep these in my purse in my bag and, last but not least, I got a purple Edge brush everything that came with it was kind of purple so yeah. This is what the scarf looks like it's perfect to just tie around your head once and now we're going to get into unboxing the wig look at how pretty that is fresh out of the package. The curls are amazing. This wig does come slightly pre-bleached and it does come pre-plugged, so you don't have to bleach the knots if you don't want to it's, not like a full like extremely bleach. It'S just slightly, but I decided not to bleach the knots for this install. I want to show you guys how to work with the wig just exactly how it is, but one thing that I am going to do is go in and pluck some more so I'm going to show you guys that right here, wig can also be made glueless. As you saw in the last clip that elastic band at the back, it tightens very very, very well it's a point where, when y'all see the install y'all don't see it like, I didn't even have to spray it down. I just sprayed it down because I wanted some extra security but yeah. The elastic band is perfect, there's Combs on all sides and then another thing is that this wig is 14 inches. It'S like the perfect, like you, know, lovely little shoulder length, um Bob wig. I feel, like I've explained my plucking technique a lot of times in my videos, but I think I need to make like an entirely new tutorial. I'M just skipping like sections as I go along as you see right here, I'm plucking and then I skip and then I skip and then I'm just combing it back because since it's a 5x5 closure it gives off that frontal effect without me having to do a Whole bunch of clothes, um Plucky, I'm sorry, I'm getting choked over my words after I brush the mousse into it. I felt pretty satisfied, so I'm just gon na go to the other side and do the exact same thing. Y'All today I finally hit 400 followers on Instagram. That'S nothing compared to the 3000 I had, but that's okay, um! My engagement is definitely pretty good for those of you that don't know Instagram deleted my account on the first day of January on New Year's yep, and so I had to start over like from scratch. I had to make a fully new account. I had to find most of the people. I knew that were following me: it was a mess, but my engagement is pretty good. I finally got to 400 followers today. If you haven't followed me yet make sure you do and yeah let's get into the install foreign deciding to do. Is I'm gon na use my Ruby, kisses cream foundation on the lace, but I'm making sure not to do too much because sometimes um, since that cream foundation does have orange undertones? It can look a little bit like way too warm on the lace and I'm just rubbing, I shouldn't say rubbing, I should say, scrubbing my hairline down. I don't know what it is about. My makeup in this video I feel like it was the lighting because I came home and I have a completely new lighting setup didn't know what I did when um I was in college. This is not like the lighting is making my makeup look ashy. So I apologize plus the lashes I'm using in this video. I don't like them either, but it's not about that it's by the way. So after I put this book on my head, you guys can definitely see that, like natural effect that I'm going for and I'm just going to cut the lace in half and then end up cutting it in sections going in zigzag lines like I'm. Not I'm not really like to focus on doing it neatly, I'm cutting it as Jagged as possible because, like I said this hairline is very very natural from when I went in and then the fact that it's a five by five it looks like my hair. Already. You guys can tell from right there see how it looks like it's already Blended onto my hair and I didn't even glue it. Yet I didn't do anything. I did absolutely nothing so after I cut that last section off I'm kind of just looking at the wig and trying to figure out where I would like to place it, making sure that everything is neat. I ended up cutting off a little bit more on that side because I feel, like the lace, was too much and then, after that, I'm just going to take some of the darker foundation and put it along the lines of the lace to make it blend. Just because sometimes the lace can have like a white cast and I want to make sure it matches my hair so after that I'm taking some mousse and I'm going to brush the hair back so that way, none of it gets glued down onto the actual lace. When I'm about to glue the lace down, I don't want the hair sticking to my lace. I want it to like flow outwards right here, I'm just taking some mousse and making sure to define the hair while I'm doing it. This isn't like the full definition that I'm doing, because I know that, usually, when you use water first and then seal it with mousse, that works a lot better. I'M just doing this so that the hair is not all over the place and in my face when I'm trying to tie the lace down after I glue it well, not after I glue it, I'm actually using a spray today, as you guys can see, I didn't Need to use a brush or nothing when I was putting that in here, so I'm just going to lift the lace back and then I am going to go in with my even spray. I decided to try this spray in y'all y'all. I don't think I'm gon na go back to got to be this. Spray is the truth. It'S been, it's been taking me a minute to try the black one, but the black and red those are top tier. So right here, I'm just putting my hair back and then I'm going to tie it down with that exact same scarf, that they sent me that satin scarf, because you don't really need a elastic band unless you have glue. So I'm just gon na tie down with that scarf after. I know that it's fully secure I'm going to wait for about maybe five minutes, because this dries pretty fast yeah. I'M gon na take five minutes and then this is how it looks after I was finished with one Edge. I forgot to film it because my camera cut off in the middle of it, but this is me parting out, my second Edge and I'm going to hot comb the front of that bag because, like I said I wanted to you, know like flow down and look Like my actual hair, so after I've separated those edges and stuff, I'm going to make sure that they're very neat, like I'm cleaning them up right here, because I don't want them to look like different from the other side. I want my edges to be twins, not sisters. So after that I cut them and I'm going to take my mousse and I'm just going to swap them. Foreign y'all might be thinking that I used a whole bunch of moves and that's why it's lifting, but I actually realized the edges, lay better in the end like at the end product when you use more mousse like it just lays down better that little side piece Is lifting, but you know don't worry about that - we're just gon na stick it back down. I promise you it's gon na stay down too. It definitely did stuck that back down and then, after that, I'm going to take some water and I'm gon na start defining the hair. So I spray it run through the hair of my fingers. I didn't use a brush this entire video. I did not use a brush not once on this hair at all and I'm taking my mousse and I'm just raking it through the hair. As I would like. You know natural curly hair and then I'm going to take some concealer to Define my part, and we are all done with this install okay, so the install is finally finished. I just need y'all to get into how gorgeous this hair looks. It'S like a layered Bob, as you can see from like the ends me all right, so we're just gon na start off by getting into the hair. First of all, look at how little customization this wig needed, like ah amazing. I actually love when wigs don't need a whole bunch of work. That means they are beginner friendly. This is definitely a beginner friendly wig, so that is a plus next, let's get into how it doesn't require a lot of Maintenance because it is a 5x5 and not a full frontal. So you're not gon na need all the maintenance with the sides and stuff see. Sides are just regular, but it does give that frontal effect because it's a 5x5, it's short and it's very tangle free. Just my fingers like, let's probably get into the curls. Oh, my goodness, let's get into the curls, and I like to just record myself on this, so you guys to see what I'm seeing look at how luxurious the curls are for one like: let's just get into it. Oh, my goodness, I'm going to show you guys! The back of the hair - it is bouncy, I'm gon na show you guys from down and up so you guys can see what my part looks like from the back. I'M gon na show you guys the front of the hair. It is amazing, So This is Love Me hairs 14 inch Kinky Curly unit. It is a five by five. Oh sure, this wig is 180 density. So it's just before this wig is a 180 density. So it's pretty full in my opinion, since it is a kinky curly unit, it can be curly. Textures are always always always very full, because the curl is a lot tighter. I love the frontal effect that it gives once again, because when the hair is like this, you can't tell that it's not a frontal hair lays down pretty well. As you can see, it held a curl. My hands are dry. I feel like wigs like these are perfect for people who have a hard time, customizing or starting off customizing. This required little to no customization. Only thing that I did personally was you know, plug it a little bit extra, because I, like my legs, very very plugged. It came slightly bleached, not even fully bleached, and this is how well the lace Blended. Let me just give you guys a close-up of it and yeah. My ring light makes it look a little bit orange, but I promise it's not like that in my life. I hope you guys enjoyed the video, don't forget to like comment and subscribe check out. Love me here right in my description box, also make sure you follow my new Instagram, as I did make a new page love. You bye,

Comments
Kemesha Johnson-Braham: ❤❤❤
Elecia Robinson: My girl ❣️