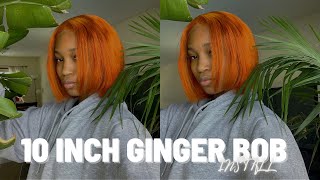
Full Wig With Lace Closure W/Diamond Dynasty Hair(Cambodian)
- Posted on 27 November, 2016
- HD Lace Wig
- By Anonymous
This video is about Full wig with lace closure
Okay, guys i'm just going to go through and show you everything that we are going to need to make this wig. So this is the hair company diamond dynasty here, and this unit is not for me. This is going to be for one of my friends. So take everything out here set this to the side and okay. So what she gave me is this: this is the closure. This is a 14 inch closure, or is this a 12 inch nope correction? This is a 12 inch closure. You guys see that okay and then she has a 14 inch bundle. A 16 inch bundle, and this is a 12 inch. Okay, so she's doing a 12 inch closure 12 inch, 14 inch and 16 inch bundles i'll show you guys the bundles in a second first. We'Re going to start working on the closure and i'm going to be bleaching the knot and just to show you guys what we are going to need. It'S going to be one of these little cups here to mix the product one of these little brushes here, okay and we're going to need some gloves, don't want to get your hands died up or burnt up, and then we have the bw2, and i have just The mini little thing of developer 40. Okay, we also have the neutralizing shampoo. We also have the shimmer light shampoo. This is really good when bleaching, because you don't want that it takes away that brassy look and then we're going to need just some foil. Okay, all right, the other things you need for your unit would be some wig clips or what combs this is the wig cap. I tend to use a lot, the one that has the adjustable straps in the back. This one also has argan oil in it, which is really good moisturizing, and then i purchased some more needle and thread. I tend to just use that big round needle up top some thread and that's pretty much it. If i leave off something, i would throw it in later: let's get started with mixing the bleach so that we can go ahead and get the notch bleached on the closure. Okay, guys, i'm back! You won't see me right now, because i look a hotness, but i got my gloves here so we're going to get the gloves on and then put my other gloves on. It feels kind of tight okay and we have the closure here. What i'm going to do is just wet it a little bit, not a lot, but you kind of just want to slick down just the baby. Here is up top because you don't want that in the front, because you don't want that to get bleached. So this clothes is really full, so we just want to slip that out the way and of course, there's one straight here. This that's going to give you problems. Okay, so - and we have the foil here and then i have my mixing bowl, so you want to mix the bw2. We won't use all of this since it's a closure, so i'm just going to tap some of that in there okay, not too much, and then we're going to eyeball this. The developer. Okay, because we want a nice thick consistency, so we're going to just pour a little bit. Okay start with a little bit. So, okay guys, i don't know if i caught that part, but what i did was i laid the closure face down so that the the bleach part is on top of the foil, and then i just set some foil on top of it and i'm going to Let that sit for about 30 to 40 minutes. Then we will come back and rinse it out with the brassy uh, with the shimmer uh shimmer, light shampoo as well as well, first with the neutralizer to stop the bleaching. Okay, we'll be back. Okay guys. I am back and i have the clothes over here and it is finished. Oh you can see some of it kind of came off there, but you can see that the lace did get bleached. So we are going to rinse this off a little brassy. So here's the mannequin head, i just positioned the closure on top and now what i'm going to do is go ahead and sew the closure down onto the wig okay. So here i am just sewing down the closure onto the wig cap. You just want to make sure it's smooth and there's no gaps or bumps or ripples throughout the closure. You want it to be laying flat on top of the wig cap. Okay, so right quick, i just flipped the unit inside out, okay and what i'm going to do is sew a track around the perimeter, not on the adjustable scrap piece, but all around the perimeter down here around back up down here down and around so that way, When the wind blows um, you won't be able to see anything. I got. I got that from pink mill, um watching her tutorials, all right, okay, so here i am showing you the bundles. The closure was 12 inches and then she also received a 12 inch bundle. A 14 inch bundle and a 16 inch bundle, and this is all cambodian here and the bundles are pretty full those they have a lot of hair per track. Okay, so pretty much here, i am i've already sewn the perimeter underneath the wig unit. So now i've turned the unit back to the original side, and now i'm just going through and just sewing the tracks back and forth. Back and forth, i haven't cut any wefts or anything like that. I just do the folded method, where we just continue to sew back and forth back and forth until we get to the top okay guys my camera cut out earlier it died, so i didn't realize it wasn't recording, but i've gotten this far here see the tracks Is coming along and do okay, so here i finished the unit and uh just kind of finger combing through it. I'Ve taken the closure out of the ponytail just kind of finger, combing it okay. So now the wig is pretty much done. I'M just fluffing it out and then i'm going to turn it inside out. So you guys can see the finished product see all of the stitching knock off some of the styrofoam. Then i'm going to go in and cut that extra piece off. Okay - and this is where i just cut off the remaining part of the wig, so that you can see the closure and it will blend more with the scalp here - i'm just showing you guys where i'm sewing the wig clips into the unit. I put one in the back and then two on the sides, one on each temple area, because i'm doing this one as a middle part, so yeah. So this is the final uh. Well not the final product, but this is the unit. And now i'm going to cut some layers in there and then curl to here for the final look? Okay, so here i am adding some oil to the hair and then i'm going in in the front and just cutting a few layers. I didn't do too much because i was waiting for my friend to come by so i could fit the unit to her head and then cut the remainder layers as we go. Okay, here i'm just going through and adding some curls as well as pin curling each curl as i go through and flat ironing the top and then adding some more curls. Okay. Here i just finished curling the unit, and now i'm just finger combing the curls as well as brushing it out. The unit does look a bit thin because we were going for a natural, everyday work. Look but once my friend got here, she decided that she wanted way more hair at it. So i went through and added the third uh, the third bundle of hair all throughout the unit, and we achieved a much fuller look and then she ended up saying that she wanted to thin it out again. So i went in with some shears and thinned it out, so this is after my friend came and i fitted the unit to her head and then this is with the added track. So it looks a little bit fuller or a lot fuller and i kind of went in cut some more layers into it, and then we ended up thinning it out just a little bit more, but this is pretty much. The final look hope you guys like it. Please comment: subscribe, leave comments, tips or anything i could do to make the video even better. Thank you guys for watching bye. You


Comments
Sam: Great video!!!