Water Wave Wig Install (13X4 Frontal) Hd Lace|Girlsglow Hair Collection
- Posted on 03 June, 2022
- HD Lace Wig
- By Anonymous
Hey guys! Dineo.J here! So in today's video I am going to be installing this 20 inch Water Wave wig!!
Thank you for watching this video, don’t forget to like ,comment, share and subscribe!!❤️
……………………………………………………………
GIRLS GLOW HAIR DETAILS:
Wig name: Girls Glow Water Wave 13x4 Lace Front Wigs Human Virgin Hair Pre Plucked Natural Hairline With HD Lace
https://www.girlsglow.com/girls-glow-h...
★Same hair in the video :https://bit.ly/38WKG4U
20inch 180density water wave 13x4 HD Lace Front Wig
★Colored Wigs Collection:
★Link For Hot Selling Water Wave 4x4 Lace Closure Wig:
★Link For Bob Water Wave 13*4 Lace Front Wig:
★Link For Water Wave Headband Wig:
★More Detailed Information, Please Feel Free to Contact GirlsGlow HAIR at:
IG: https://www.instagram.com/girlsglowhai...
Email:[email protected]
Imessage/whatsapp: +8618603990532
instagram: https://instagram.com/girlsglowhair?ig...=
Store link: https://www.girlsglow.com/
……………………………………………………………
MUSIC USED:
Background song:
•NON COPYRIGHT/ COPYRIGHT FREE VLOG MUSIC (R&B + VIBES)
(Music credits to the original artist)
....................................................................
SOCIALS:
•Instagram: _i.am.dee
https://instagram.com/_i.am.dee?utm_me...
•Twitter: call_me_dee
(@_call_me_dee) on Twitter
•TikTok: the.names.dee
https://vm.tiktok.com/ZML9gwA3b/
...................................................................
F A Q:
Race: Half Nigerian + South African
Name: Dineo Mashigo
Camera: iPhone 6s Plus ,Samsung S9 Plus
Editing software: Inshot
Curl pattern: 4c
Hair type: Low porosity, High Density
...................................................................
NB:
This video is sponsored by Girls Glow Hair Collection and all of my opinions on this product are of my own, and I would never endorse a product that I did not wholly support or believe in the quality of.
……………………………………………………………..
Business Email: [email protected]
SUBSCRIBER COUNT: 1364
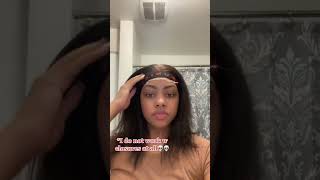
Don'T know how to deal with you don't know how to love me. Hey guys, welcome to and welcome back to my channel. So today's video is sponsored by girl's, glow, hair collection and we're going to be installing this water wave lace front wig in the wig cap. We have four combs, as well as an adjustable strap at the back of the wig which you can adjust to your liking. Okay, so starting off, i'm just going to be applying some foundation on the forefront of the wig cap. Seeing as this is a 13x4 lace front wig, so the front part is going to be showing okay. So once i'm done evenly applying the foundation along the hairline of the wig cap, i'm just gon na go in and do the exact same thing on the wig itself. As you can see, this wig does come pre-plucked, which definitely saves so much time. It comes with a natural hairline and i had to do little to no plucking for overall, but i only went in unplugged because i'm picky, like that, once i'm done applying that foundation on i'm going to sit that in with some got to be glued freezing spray And just dry it in with a hair dryer. Now i'm going to put the wig on my head and just get a grasp for like a good idea of how the hairline looks on my head, because you know i'm trying to see which method i'm gon na use. For this. I could see that the wig cap was peeking through the front, but i was trying to really get a good idea of. Like am i gon na be doing the bald cap method? Am i just gon na have a wake up underneath and not have to do too much but yeah. This is me kind of just figuring that out, and can i just take a moment to just like voice out my appreciation for this lace. The lace is amazing, as you can see, it's very much see-through it's very much giving scalp even without having to like lay it down so like. Thank you so much girls glow hair for like doing that, because you you, you really did that in a few you're gon na see me take an eyebrow pencil and put a couple of dots on the lace. I now regret doing that, because i didn't even end up using this technique that i saw so the video, but right here in this clip, that's going to come. I'M i was like yeah i'ma have to do the bald cap method, which is something i was avoiding doing, but like it's okay, it's fine! So now i'm just stretching the wig cap over my forehead and i'm going to be cutting out the ear holes so that i can apply the glue to the front of my hairline now here. Next time i will remember to use, got to be glued spray. The freezing spray, because it just it dries a lot quicker and i feel like it's not as necessary to use the ghost bond glue here. So once i've made sure i've spread that out evenly i'm going to take my hair, dryer and dry the glue i'm trying to make sure it dries clear like i'm trying to dry it all the way through before i start cutting, because we don't want the wig Cap to start writing back. That would not be fun at all um. This is where i realized. I should have used the got to be glued freezing spray instead of decos bungalow, but it's fine, it's fine! We we we we we pushed through, which is exactly what we ended up doing here and then switched to the that focused or like concentrated nozzle hoping it would make it dry a little faster, because i was here for a while. I was here for a while. Okay, i lost some clips here. I don't know what happened but, as you can see, i'm just cutting the excess wig cap from the front, making sure i'm cutting as close to that front of the glue part as i can using an eyebrow razor just because i feel like it gives. The most precise cut and the most like jagged end cut because you don't want like it to be like straight, because i don't know, i don't think that's going to blend as well. So i'm just cutting that along the glue line in the front over there, and then we can move on to the next step. Okay, so once i've gotten the majority of the front of the wig cap off, i'm just gon na go in with some really sharp scissors and just clean up those little strays, as you can see, um so that it's cleaner um and then once i'm done doing That i'm gon na go in with some got to be glued, that freezing spray and just i sprayed it on the surface and then took this flat. This is a mask applicator, but i just use that to just smear that on the edges of the wig cap, just that it's laying flat against my forehead. So once i'm done doing that, i'm just gon na go in with a wipe and clean any excess product that may be on my hairline and putting the wig on okay. So once i have the wig placed where i like it, i'm gon na go in with a lighter shade of foundation and make these like little dots of demarcation. Just so i can know where i'm gon na put the glue once i move the wig back. So once i'm done doing that, i'm just going to go in and cut my ear tabs off so that the wig can lay flat on my head and then once i'm done doing that i'm just going to go in and cut this really unnecessary piece of lace. At the back of the wig and then put the wig on and cut the front lace in three different sections, because that's how i chose to once i've taken note of where i'm going to be applying the glue. I just wipe the foundation off and then apply a thin layer of that ghost bun glue and spread it with my rat tail comb, the end of the ratio comb. Then i dried it up and applied. My second coat made sure it was spread, nice and evenly and then went on in and applied the wig and then like once. I have it where i want it. I comb it in and then i made sure to like set it in with the blow dryer. Now i'm just going to go ahead and repeat that process on the two other sections right, i'm just trying to make it to the end. You know certain things have started getting pissed off. I think we need okay, once i'm done with that whole process, i'm just going to go in and apply this elastic band on the hairline of the wig, just so that the melting process can really take place. Okay. So, while that's sitting in, i thought i'd go in and clean up my line i made that face because there was glue on the red tail cone, but i just cleaned that up and then went in and tried to fix my line a little bit. Okay. So after about 15 minutes, i then removed the elastic band, and you know everything everything was actually looking pretty well, so i feel looking pretty decent okay. So then i went back in with the ghostbum glue just to glue down those little side pieces. You know how it goes. You just put the glue spread it evenly. Try it a little bit, so it's tacky with the blow dryer. Then i comb them in place with the rat tail comb and um set them in place again with the blow dryer. I am going to tie this hair down again, actually just trying to make sure that everything is stuck before i start cutting, because once i start cutting there's no going back. First, one didn't go as well as it should have like. I said i'm not in a rush. Okay. After about six minutes, i took off the headband and everything was looking good. Everything was looking a okay if they were looking stuck so i could not go in and start cutting the lace off. So once again, i'm going to be using my eyebrow eraser, just because you know it's easy to maneuver, and i still hear this little part here. It was not stuck guys after all of that, it wasn't stuck, but it was fine. It was a quick fix. I just went in again with some glue dried that in place and then i moved on. Oh, i remember those dots that i made with the eyebrow pencil. I was trying to get those off, but there was go on top of them, so i couldn't. Instead, i just went in um on the entire front of my hairline and i went with some foundation, so i can blend the lace and my skin seamlessly that side over there was looking a little bit iffy in comparison to um our right side over here. But that's fine because i still look good okay, the lace is still giving i'm going to straighten up. My middle part make sure it's actually centered, because once we're done doing that, we're going to go in with the wax stick. The hair wax stick. We'Re gon na hot comb that line and make sure it's set, as you can see over here, um. So now it's time to define the hair i'm going in with just some plain old water and a spray bottle, and i'm just saturating the length of the hair. We'Re dealing with 20 inches of hair here, okay, so we're about to have 20 inches of some luscious curls, i'm going through and brushing through those curls. Then i'm gon na add some of this on jackie curla, curling custard and just with those two products. Just the water and just the curling custard and the curls were popping the the curls. Were there okay doing that on both sides and making sure that once i apply that curling custard that i scrunch upwards just so that the curls can really be defined, taking a big deal? Okay, so for all the no it's just girlies like me, you could just leave your hair. You could end the process over here. I also could have done that because i don't even know i don't even be knowing how to do edges, but i was like it would probably add more to the look. So i just went in and did these two funny looking swoops, but it looked nice so and i don't care if some of it doesn't look nice. I think it looks nice, so i just did these swoops on the sides on my temples. You know no skill whatsoever, i just parted out some edges cut them with the eyebrow razors, and then i put some gel just swoop them stop making a big. I just want to say, hey man. This is as good as it was gon na get with me and edges, so i mean they may not look the best, but i think they're still giving. Then i'm gon na put the satin scarf on my edges, so they can lay nicely. I put that on. For, like maybe like four four minutes, it wasn't even a lot, and while that was sitting in, i just went in and tidied up the top part which i wanted to be laying flat and then once i was done doing that, i just went in with my Blow dryer and just really like i tried to like speed up the drying process because it was around. I think it was around six here, so i was not about to sit around with some wet hair, so i just you know, blew the blow dryer on the hair, so it could dry nicely so the hair can get a little bit. You know set in time. Okay, once the time came, i just revealed my edges. Everything was laid. It was definitely giving scalp hello once again. Thank you so much to girls, glow hair for sponsoring today's video. This is the finished result. I hope you guys like it. If you did enjoy the video, don't forget to leave a thumbs up and maybe comment down below um, but with all of that said, i hope you guys have a lovely morning day evening or night depending on when you're watching this, and i will see you guys Next time, love ya, bye,


Comments
Amal Rian: The end result is just amazing
kashifa christie: Gurl u slayed tf out this wig it looks so gud OMG!!
Elaine Sampaio:
Siyamthanda Mkhwanazi: You are so beautiful , love uour content
Mphuthi Twins: Pls do more vlog content
BlackBarbie BN: Yes girl yes, slaaaayyyy