How To: Reinstall A Wig (Beginner Friendly) | Lady Capri
- Posted on 15 January, 2023
- HD Lace Wig
- By Anonymous
Hi guys,
First of all happy new year & i hope you’ve all started the year off great! I thought I’d give you guys an updated version of how to reinstall your wigs so they look freshhhh. Hope you enjoyed xxx
LINKS MENTIONED IN VIDEO⬇️
Amazon storefront : https://www.amazon.co.uk/shop/influenc...
All the products mentioned are linked in my storefront so you can shop them directly xx
WIG DETAILS⬇️
@peoniahair_ on instagram
It is a custom colour & hand made unit constructed by them
- 2x24” + 1x22 inch” + 13x6 20inch HD frontal
COLLABORATIONS / PARTNERSHIPS
Put your business name + collab/sponsorship or partnership (whatever applies) as the subject
SOCIAL MEDIAS
Instagram | @llhelenaj
Tiktok | @4LadyCapri
Thank you so much for watching!
Xoxo
*relevant tags*
#howtoreinstall #reinstall #wiginstallation #wigtutorial
#blackgirl #blackgirlmakeup #makeuptutorial #makeup #wocmakeup #wocmakeuptutorial #tutorial #howtodomakeup #beginnermakeuplook #ukblackgirl #budget #ukbaddie #ukblackgirlmakeup #weeklyvlog #vlog #vlogmas #uni #universitylife #hairstylist #wiginstall #pincurls #peoniahair #rawbundles
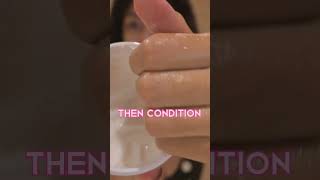
Hi guys welcome back to my channel in today's video, for you guys I have a detailed video on how to reinstall your wig, which is beginner friendly. I left out the styling because it's really late at night over here. If I started I was going to go to bed in the morning, it's not going to be styled so yeah. The hair details is the hair is from Pure new hair. It is a custom made unit with custom color. It is two bundles of 22 and one bundle of 24 with a 13 by six 24 inch. Hd frontal, please HD frontal 13x6 13x6 front tools are the best if you want, like the best wig look so yeah, like I said before, I left out the styling. So my hair is a bit poofy right now, but um. I hope this video helps any beginners anybody anyway to reinstall their wig, so yeah keep on watching so I've already. I already took my Spritz and the edge brush and I basically combed back all the straight hairs. I left out the existing edges. Now we're going to just go in and start to glue it. The glue I use for the majority of my installs is the PK's Beauty, Lounge um latex-free lace, glue, which is really good. The hold is so good. My Wiggles stay on for like a good week, so I really recommend the glue prior to putting the glue on my forehead. I made sure to cleanse the area with alcohol. The alcohol will remove any oils because you can't mix glue and oil. It'S not going to stick so you want to do three layers of this oil in just the center of your head and make sure you let it dry to clear consistency, and you want to work in thin layers that way all the glue dries and you don't Have any like white parts or the glue doesn't like dry at all, because it's too thick so, like I said, do the three layers and then you can spread out the glue with any flat surface. So I just use the back of my Edge brush because yeah that's why I had available and then now you want to go in and pull the lace down in the designated area where you've put the glue. So once you pull the lace down just basically, when you first put it on, don't stick it down just see. If it's in the right place, then, when you're sure it's in the right place, use your finger and press the lace into the glue. You want to really make sure you press the lace into the glue that way, you're going to really mesh the lace and the glue together and then for extra security. Get your rattle comb and start combing it back. So you can get the glue again meshed in with the lace, and then you want to repeat the steps for both the other sides of your head. Now that you have the middle of the foundation, it will be really easy for you to work on the side. So you do the same thing. You want to apply one layer, work in thin sections and use a flat surface to spread the glue out, get your blow dryer blow dry. All cool repeat three times then stipulation foreign that morning guys a quick tip when working with the end of the frontal towards your ears grab a piece of hair up from the very side and use that, as like a guideline to help you stick it down. It'Ll really help with the stickiness of the wig, and I'm just showing you guys here exactly where I put the glue far from my edges, so that my edges aren't compromised within the install. I will lose a few one, two edges, because I didn't do the cap method, but it's not too bad foreign perfectly normal. I prefer to actually underestimate, where I put the glue that overestimate it. So I put a little dot where the lace glue needs to go, and then I take the end of my rat tail comb in the metal part and then start to like spread it out, and then I push the lace into the glue the same way. I would, on any other part of the lace, just like now, there's less lace to work with, and you want to repeat this anywhere that you have found. There is lace that hasn't been glued down, so simply just push back the lace with your hands and then all the unglued parts will reveal themselves. I do the same exact thing: put a dot down, spread it out with the back end of the rattle comb and then press the lace into the glue, and obviously I have a Widow's Peak prior to reinstalling this wig anyway. This was a Widow's Peak wig. So I just have to make sure that I get my windows peaked down and flat, because if you don't anybody that has a Windows Peak wig will know, sometimes they get a bit funny to work with so press the lace down and work with it like that. I then grab the same Foundation that I used to tint my lace. I just grabbed a little bit of that and guys when you want to use foundation, and you want to work it on the lace with a brush. You want to make sure you really distribute the foundation well around the brush, just so that there's no parts of foundation, that's more concentrated and then, when it goes in the wig, it leaves a big splitter Foundation. I'M just using the foundation here just to basically conceal any part of the lace that haven't been concealed and then, when I'm pulling my hair back here, I'm just looking to see how well and melted this lace looks right now, anyway, we're gon na go with the Famous Fantasia Spritz is really good for, like melting the lace and also because it kind of hardens the lace it almost like molds it into place, makes it like concrete. So I put it on my finger first before applying it straight to the lace, because I find that when I apply it to the lace, sometimes the lace moves back. If I'm not quick enough with the blow dryer now, as you can see, I have pre-existing edges from the first install but they're not enough, so I'm going to take some more edges out using my Edge brush and then I'm showing you guys exactly where I, like. My edges to be, and how thick I like them, you guys can take your edges wherever you like them. How big you like them just make sure you brush your hairs behind it, just so that you don't get confused repeating the exact same thing. On the other side because, like I said, I don't have enough edges to do edges with this time, which probably could have been lost. Whilst I was washing the hair or was coming out, the hair doesn't matter I'll, just take out edges and then do the same. For The Sideburns as well and then you want to go ahead and clip the rest of your hair up just so that it doesn't disturb you, while you're gon na wash you're gon na work on melting the edges. So I take some of my Spritz and I basically comb the hairs behind the edges away from the edges, just that they don't disturb me. Whilst I go in and do my edges and also, whilst I'm melting, my edges down that, there's no hairs. Basically, in the way to disturb the process, thank you. Then you only get any wig band. The one I have here is just a random one from wigan's hair and because it's a bit thick, I'm gon na just go ahead and fold it in half, as you guys can see. Usually I just have like a black elastic band like a no-name brand, one where I couldn't find it, and I start from the side of my head and then work all the way around the middle and then the other side as well, and then tighten it in The back so that it's secure - and you want to make sure this is really tight, so that your lace gets the best smell when it comes to detangling the hair. You want to make sure that you brush from the bottom up, because I washed his hair prior and I also blow dried it. I already have heat protectant spray and a bit of argan oil in the hair just to make it smoother, but just make sure that you brush from the bottom up and I'm going to work on whatever parting you want. So I'm doing the center part. I just go from the center of my nose all the way up and work my way through the frontal. I'Ve got a 13 by six lace, so The Parting goes further back. I just prefer the way. 13X6 looks. 13X4 is also good as well but 13 by 6, because it goes all the way back and just looks so Sleek. It looks so good to help me with my parting. I take the little body, coconut and sheer oils mousse as well, which link for all of these products are going to be in my description, so make sure you check those out to get a perfect install anyway. Put that in the pot just to flatten down the hair a little bit, because, obviously, when you part your hair one side's bigger than the other, so I like to take the mousse just to flatten it down. So I can help myself when it comes to really defining that parting. I'M just showing you guys here that I'm gon na go Section by section when I'm flattening down the hairs in the middle part, so I use the VO5 matte clay extra hold um. I guess it's like a wax in a tub type thing, so I just separate the hair or the hair on the frontal section by section you're, not gon na get your wig on flat. If you do not go Section by section, don't bother trying to hot comb or flatten it down all in one make sure you go through it section by section. So I take a piece out. I put some of the matte Clay on, is my Edge bus to spread it down, and then I flatten it down, and you can see guys the lace once I took off the headband was looking absolutely phenomenal. Now we're going to work on those baby hairs. Now that I've removed the Melt band, I'm going to go through and brush some any products out of them and then take my fingers as a guide to be able to put my straightens through them, because I don't have pencil straighteners. I need to make sure that I try grab as much hair as I can to curl the edges backwards, make sure you curl them backwards so, like I said again, brush out the product that was in there from like the Spritz use your fingers as a guideline To kind of scissor them in there and then get your straighteners and then curl backwards to cut my edges, I use a razor comb and I kind of use the pre-existing edges as a guideline as to how short I want to cut them, and then I'm going To go in and swoop The Sweep using my Fantasia Spritz to hold down the edges and sweep use your fingers a guideline and keep swooping okay, guys, quick little interim. I couldn't show you how I did my edges because my camera died but um. Basically, you just follow. You know how, when I started the video you could see how I was like sweeping you just want to swoop and Carol swooping until you get something like this now to Define your part. You want to go in with any concealer, not one too light, but um, not one too dark either. I showed you guys a close-up as well of what I'm doing here. This is a concealer to Define my parting, because I didn't use a cap method, so you can't really see my parting due to the fact that I have black hair underneath, so it kind of just gets lost in there. But you want to make sure that you go in with an angled brush as well, so you can have a good, clean defined line. I don't have to bring the concealer to find out onto my foot and I use my finger to like blend out the product where I feel like it's too concentrated, and you want to repeat that all the way throughout the frontal so go all the way back. I'M outside if you're reinstalling, a black wig, you can just use black lace spray to hide any like areas that aren't a stick, but I've got already wig on right now. So I just use any red eyeshadow to basically go through and make the part really straight by defining those hairs perfect. Now, if you look at that now, if you look at that pie ink, it looks really good and perfect. So the last step for me just taking my foam and putting that onto the top of my head to make sure it's really flat and gives it a nice Sheen as well. At this point, you guys would begin your styling, but I didn't style my hair in this video, but yeah. That'S the last step, and this is how you get your install flat and melted and look this good period. Thank you guys so much for watching today's video and I really hope you enjoyed it if you did give it a thumbs up, comment down below and subscribe to my channel for more content. I know I had a bit of a late start to the year, but my January I go to UNI, I do look. My January was jam-packed with exams and then my birthday, so yeah yeah anyway guys this install was really good. It turned out really well. So if you follow the steps, hopefully your install can look just as good or even better. I will have all the links all the products that I use Down Below in the description, along with all my other links and blah blah blah so yeah. Thank you for watching bye, guys,


Comments
strawberrycake __: there’s literally nothing your not good at
Stacy: can you make a video on washing or removing glue before reinstalling ? and include separating the edges please
Aoife Ayeni: ATE