Most Natural Melted Hd Lace Front Curly Wig Install ! Bald Cap Method On West Kiss Hair
- Posted on 22 January, 2022
- HD Lace Wig
- By Anonymous
Hey fran !
In this video, I am showing you a video on how I installed this hd lace frontal wig install from West Kiss company. Bomb af
Enjoy and remember to like, comment, and subscribe!
Social Media
❤️Facebook : London Tayy
❤️Instagram Hair page :@thelondontayy
❤️Instagram Personal page: @londontayysway
❤️ Amazon Storefront : https://www.amazon.com/shop/londontayy...
❤️ Business email : [email protected]
Location: US -Columbia, SC
-------------------------------------------------
Music by Mr. Jello - Island Lifestyle - https://thmatc.co/?l=1FF772A5
------------------------------------------------
Products used:
doo gro hair moisturizer: https://amzn.to/34QmdM8
got2b spray:https://amzn.to/386S6hP
ghost bond glue:
aphogee mousse:
got2b cream:
afrohantas leave in conditioner:
---------------------
Tools used:
crochet needle: https://amzn.to/3tqSLGE
needle and thread: https://amzn.to/3p4eJwS
edge brush:https://amzn.to/2WgCypc
wide tooth comb: https://amzn.to/3qoFzAa
rat tail comb:https://amzn.to/2UHPp3h
bald cap:
------------
▬▬▬▬▬▬▬▬▬♛#westkiss♛▬▬▬▬▬▬▬▬●
Hair details:180% density curly 13x4 lace frontal wig 22inch
Video Hair Direct Link ➤https://bit.ly/3yS3B9m
Hot selling HD lace wigs ➤https://bit.ly/3plohn6
★ westkiss official hair store ➤https://bit.ly/32w4w3m
Up to 43% off Lace Wigs ➤https://bit.ly/3yUJpny
Hot curly lace wigs➤https://bit.ly/32x1xaV
#westkisshdlacewig #westkisswig #westkisslacewig
#WestKissHair Official Site Huge sale Big Discount
Join Our VIP FB Group Now (Free Giveaway )➤https://bit.ly/3lzmAA8
❤ Follow West Kiss hair on social media :
Instagram @westkiss_hair_store: https://bit.ly/2OlKstu
YouTube @West Kiss Hair: https://bit.ly/2Ol5U1m
Wholesale WhatsApp: +86 13323741050
MOST NATURAL MELTED HD LACE FRONT CURLY WIG INSTALL ! BALD CAP METHOD ON WEST KISS HAIR.00_21_55_07.Still003.png
-------------
keywords:
bald cap method,bald cap method of installing a lace wig,bald cap method with lace glue,curly wigs for black women,west kiss hair,west kiss hair review,west kiss curly wig,west kiss hd lace wig,hd lace wigs,hd lace frontal wig,hd lace wig install,hd lace frontals,hd lace frontal wig install,hd lace wigs affordable,hd curly lace wigs,hd curly lace front wig,curly hd lace frontal wig,curly hd lace wig amazon,deep curly hd lace wig,long curly hd lace wig
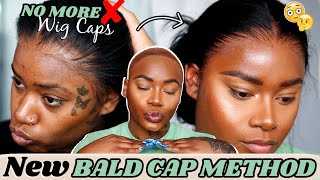
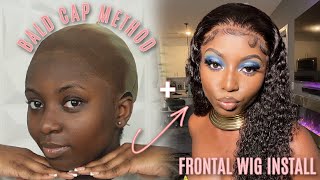
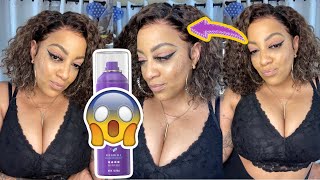
So so, hey guys, what's up welcome back to my channel! This is london tay coming to you today with another video girl in today's video. I'M going to show you guys how i do this hd lace, frontal install on myself. I am using the hair by west kiss hair and everything that i'm using will be in the description box below plus the link to this hair. Okay, so without further ado guys, let's just go ahead and get into it like look at this baby. This is definitely some ac lace. Okay, this hair is beautiful guys, one of the best wigs i've ever had the lace is super thin. It'S oh, my god. It was already kind of pre-plugged and also the curls are just gorge. Look at this. The curls are beautiful. This isn't like a deep wave or anything like that. This is like a burmese curly hair, so yeah, i'm not gon na ramble too much, but my name is lonnie tay, but my real name is taylor and if you are og subscriber, you know when i do personal videos that i do give hugs um, i'm gon Na give you guys air hug, i'm not gon na get up and give you guys air hug, but i like to give hugs to get acquainted with one another. So yeah, i'm just gon na start back revving these up with the the personal videos and the hugs, because i never really do personal videos like that so yeah. So it's going to give you guys a look. Look air hug girl, okay, we'll acquaint quiet a little bit all right, so um yeah! So if you enjoyed this video, make sure you like comment and subscribe to my channel guys, i'm halfway there to 100 000, i would love to reach out by the end of the year and the only way i can reach it is by your support. Love. You guys so much and tune in to the rest of this video, hey y'all. What'S up welcome back to my channel, this is linda tay, coming to you today with another video girl. This video today i am going to install this hd frontal hd frontal wig, install it's like some curly hair, got it from west kiss hair, okay guys, so everything that i use and everything about the hair will be in the description box below right here guys. My hair is just in two pigtails and then i um crochet them to each other at the back. So that way they can stay and yeah. So right now, i'm just going to do the ball cap method guys. I know i never do the ball cap method, but to me honestly, it does give you the best results, so i did clean my forehead with that witch hazel and then i just put this brown or nude ball cap on my hair and i cut the ear Holes out with a razor be careful with that, because it can't allow it to like run like a stocking, so just be careful about that. The glue that i'm using is the boho glue so regular. I'M sorry, not the bow hold the ghost bond. It'S the regular gold spawn guys it does not have a great hold ghost bond is not my favorite, but this is all i had and i'm only going to wear this wig for like two days guys. I just don't do wigs for a long period of time. Can'T do it can't sleep in it. I don't know how y'all do it, but um yeah. So i just put a little bit um in front of my hairline and just smooth it in and i'm going to dry it once i dry it i'm going to cut it off. I don't. I can't find my scissors yet so i'm using the razor for every single thing y'all, so i'm literally just going to cut off the extra i'm going to cut off the back as well for some reason with stocking caps, guys the back seam to stay. You know so you don't have to like sew the back down or anything like that. So yeah, i'm just going to cut the extra with that razor, alright guys. So after i'm done that, i'm just going to use that ruby kisses the darker one, the one to the right and i'm going to put that in the middle part. I'M going to put that on the edges where my forehead is, and i'm going to put that. Like if i'm going to do a side, part i'm going to put that on the sides as well, but i'm not going to put it throughout the whole entire thing. This is a cream palette. Okay and i'm just using like a kind of a dent small brush and i'm just using that to apply that color guys. So after i do that, i'm going to put the wig on my head and we're going to see what's popping honey, we're going to see what it do. So this size is a medium. So medium always works for me. So i think it's like 21 inches or 22 21 22 and like 23 inches and 23 inches like the large 22, is the medium. So this fit like a glove guys. This is my perfect, perfect fit, so i'm putting it on the front and then i'm going to use that same color and i'm going to put that where the lace is guys. So you can always tell when lace is hd lace because, like the ends of the lace, is like straggity, it's not like a straight cut lace. It'S like almost like it's. How do you explain it's like frayed at the end, you know what i'm saying: that's how you can always tell that something is hg and if you guys look at the edge of that lace, it's like frayed ends. It'S almost like it's falling apart. You know what i'm saying: that's how you know the lace is super thin and that is hd lace so, like i said, i'm just putting it all over that um lace part all right. So now that i'm done with that, i'm going to use up some more of that witch hazel and actually i'm going to use alcohol this time and i'm going to make sure that all that makeup is off my forehead and just only on that cap. Okay, now i'm going to use that go spine, i'm going to start applying my first layer. I'M only going to do two layers of glue guys, but this layer i'm going to make sure that i mush the edges of the cap into my forehead to make sure that it is all mushed in and all melted in. Okay, i'm going to do both sides. The same way, and then i'm going to kind of smooth it with the end of that razor do all right, y'all, so once i've smoothed both layers in i'm not going to wait until it gets all the way clear. I'M just going to i'm just not going to do that, but i'm going to cut this front part into three pieces. So that way, i kind of apply the wig in three different pieces, i'm going to do the middle first and then i'm going to do the edges. Um second and third. Okay, make sure that the wig is lined up and it's in the middle, where it needs to be and then you're going to kind of apply the wig. Now like i said i don't really wait till it's clear i should maybe sometimes but girl. I don't. I'M not even gon na lie. Definitely don't wait till it's clear because i feel like once you start heating it up with the blow dry. It'Ll get um clear anyway, so yeah, so i'm just applying the wig and then pressing it in and make sure it's in the right spot y'all. I was so nervous because, while i look like this, wig is too low, like oh, my god, i do not have a lot of forehead space. I have like a four finger: three and a half four fingers, not even five or anything or anything big enough for a wig to look good but um, but yeah. I know how to kind of finesse it all right finesse it but, like i said once i put it on, i was looking like oh girl, this wig about to look so wiggy. It'S gon na look real crazy, but you know i have to believe in myself. Like girl, you don't done this so many times you don't take lace classes like it's. Okay, it's going to work out, but y'all one thing about it is i hate lace fronts because it makes my eyebrows go so far up. Okay, i look like i have botox. So snatched all right, but i'm gon na use a blow dryer and i'm just gon na smooth that glue that lace into that glue and smooth it in and make sure that it's good and you know secure all right y'all after that. I'M just gon na cut the ear tabs off just cut around where the ear is and make sure that it fits exactly to your head. Okay and that's what i'm doing is folding it and cutting it all the way to the back. Until i'm running out of lace, i'm gon na do both sides the same way all right y'all. So after i do that, i'm going to pin all the hair up and then i'm going to um use an elastic band just to kind of melt that glue into it and i'm just going to let that sit while i style the hair okay. Now i'm just styling the hair with some water. I'M also using this metaphor, let me see what um what i use for the curls honestly, it made the curls really really moisturized and really really pop. It doesn't do really great for my hair, but it worked wonderful for this hair, i'm trying to find it right now. I don't know guys whenever i find it. I will link it below, but it works good good good for this hair, like i was very, very impressed. I was like yes moisture come through because you know i usually use. Oh, i found it. I usually use like whites, i'm sorry, water and mousse for curly hair, but i actually use it's called um afrohondas multi-use softening leave-in conditioner. So that's what it is and i'm gon na find it and link it below guys. It had my curls so moisturized and popping that water that mousse didn't do it. Justice like that moisture that it gave my hair. It was bomb y'all like look at these curls, like it's wonderful, all, right, y'all, so now that i've styled it, i'm just going to pin it back with that um clamp and then i'm just going to cut the extra lace off with this razor now y'all. If you're scared to do it or something in right, you got too much lace. You know yadda yadda. It doesn't really matter guys. If you have spots where you have that sticky glue - and you just didn't, do it right guys just get a q-tip and alcohol and dissolve that glue in that spot and it'll be okay, all right! So don't stress too much about this part like right here. The white is still showing from the glue, but it's okay guys because you can always fix everything like don't think it's just the only way. You can't fix it. If you cut too much lace off, you can't add lace. But if you have you know, lace left over, you can always snip some more snip somewhere to make it look more natural. So here it is close. You see it's not all the way melted the way it should be. I didn't go back and fix any spots where i didn't have the glue or anything i'm just pulling out spots where um i'm just pulling out hairs where i'm going to have my baby hairs all right um. It may not be this whole thing, but it's going to be. You know some of it, so i still want to just pull all the hair to the front just so i can get that good melt in between that hairline and the regular hair. So i'm using this even lace, adhesive spray, not a fan. It was super super sticky, but to me it just didn't really lay it the way it got to be glue spray lid. So i'm going to go back to my got to be glue spray because, like i said it just didn't, lay right and i'm using this elastic band um again guys after you spray it and you want it to melt all the way again guys. This is really going to give that real, melted, look and this girl it's going to be melted all right and i'm just going to use my hooded dryer and i'm going to sit under there for 20 minutes guys. 20 minutes is the time that i sat under that dryer, okay um after i was done with that, and i did put it on high heat um and for 20 minutes. So now that it's you see guys it's pretty melted now, after that, i'm going to just kind of cut, you know some hairs with the with the razor i'm not going to cut them too short. Now i'm going to go back into it. You know just to make sure that that's the length that i want, but yeah, i'm just going to kind of snip, snip, snip, snip and then kind of start plucking, the extra hair that i don't need mostly on the sideburns. But everything else is: okay with the plucking, i'm pretty sure, but yeah some spots that i'm missing. I'M definitely going to go back and kind of pluck with the tweezers all right y'all. So now that i'm basically done with that, i'm just going to part it down the middle. I decided to do a middle part for sure today so, like i said, i'm just parting, it down the middle and then i'm going to use an apple, jean mousse, and i'm going to use that to start molding. My edges now i like to just apply that alpha g moves, first of all to kind of get rid of that hardness that that spray can put also um. I also like to um. I also like to do that and then i like to use the got to be glue cream in the yellow bottle. I like to mix both of that together. So i'll put the alpha g mousse on to kind of loosen up the hair at the front, then i put some apple juice in the back of my hand, mix that with that got to be glue cream and i like to create my baby hairs because it Provides that flexibility, as you guys, can see in the back of my hand, it provides that flexibility, but it also provides that um hold that i want all right. So that's what i like to do. Okay, that is what i like to zoom so yeah, i'm just going to kind of keep on doing that and keep on molding that switching between the comb and the brush and just keep on doing that back and forth until i have the baby hairs the way I want them to be all right y'all. So, even though i'm out of frame right here, what i ended up doing was i'm applying some concealer to the roots, as you guys can see it made it look a lot better when it came to the parts. Okay, it made the part, look really really clean and really really more defined instead of plucking it out now. I do not recommend guys plucking hair out on the part, because it will create a lot of balding. I don't mind a little bit of body at the front, but baby you don't want to bother in the parts. Okay, especially with this hd lace, you're, going to want to kind of apply some concealer to clean everything up and don't pluck it out. So i'm going to go back with some more water, some more mousse and to find the parts that are kind of frizzy, because i had it tied behind my head and basically that is it guys. I allowed it like 30-45 minutes to kind of fully fully dry, and that is basically the result i got. I hope you guys enjoyed this tutorial hope it was helpful and guys purchase this wig. It is bomb everybody. Everybody around me basically was like what type of wig is this. Where can i get it from yeah and love? You guys so much and thank y'all for watching this video bye,

Comments
West Kiss Hair: Thank you so much for sharing West Kiss Hair! You look so pretty!
𝒥𝓊𝓈𝓈𝒽𝒶𝓎: Btw ur beautiful love the lace ❤️❤️❤️
Keisha 4x: This is so cute