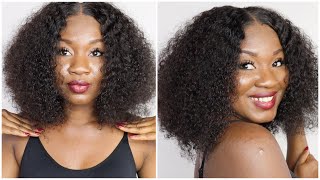
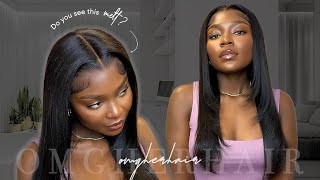
Jet Black No Baby Hair |Pressed Straight Body Wave Wig Install | Hermosa Hair
- Posted on 08 February, 2022
- HD Lace Wig
- By Anonymous
●▬▬▬▬▬▬▬▬▬▬▬▬▬♛#Hermosahair♛▬▬▬▬▬▬▬▬▬▬▬●
Direct Link ➤ https://bit.ly/3rxp0mc
Use Code "HER12" To Get 12% Off
Hair Detail: 13x4 HD Body Wave Human Hair 26inch 220%
✦#hermosahair Offical Store: https://bit.ly/3soNgGr
More Best Selling Wigs:
HD Straight Human Wig☛:https://bit.ly/3Ja2mXc
Hot HD Lace Wigs☛:https://bit.ly/3srCU8G
Hot Colored Wigs☛: https://bit.ly/3GxV11W
13*4 Lace Wigs☛: https://bit.ly/3LhV70Z
13*6 Lace Wigs☛: https://bit.ly/3rwVHAa
❥Follow our social media:
IG @hermosahairmall : https://www.instagram.com/hermosahairm...
FB @hermosahairmall : https://www.facebook.com/hermosahairma...
Email: [email protected]
Whatsapp: +86 13253731788
Welcome to IAmBeautifulHustlerTV .
Be sure to SUBSCRIBE & TURN ON YOUR ALERTS
——————————————————
MY PERSONAL YOUTUBE CHANNEL : In The Life Of A BeautifulHustler https://www.youtube.com/channel/UCB9xX...
——————————————————
Follow My Socials:
Instagram:_Beautifulhustler
@thebhslay
@iambeautifulhustler
Twitter:_Beautifulhustl
YouTube :IAmBeautifulHustlerTV
✨For Sponsorships ,Reviews,& Questions
Email:[email protected]
786-571-1313
To Purchase Hair & Products Www.ibhslays.com
Allow 3-14 Business Days For All Orders
Hey beauties and welcome back to, i am beautiful, hustler tv. Today we are back with a new video and today's video is featuring hermosa hair. They sent me over this 26 inch body, wave wig, and this packaging did come with a stocking cap and a pair of free lashes. And as i mentioned it is a body wave wig. The lace is giving like light brown lace, but it still got melted to the tee, as you can see from the thumbnail here um. But, however, this is light brown lace. It also has um some about five combs on the inside, secure your wig and also it is like a regular lace, frontal, a lace, front parting space um. As far as the construction. Now, before i actually installed this wig, i did go ahead and dye this with jet black. I did the water dye method, which i've showed you guys plenty of times on my channel and the colors that i used was royal navy and jet black. I just mixed all that, together in my sink with some hot water, and i went ahead and dipped the wig, as you can see, the lace did not turn black whatsoever and i actually let that wig sit in there for about 30 minutes. Just do not submerge your lace under the water, you know, i'm saying you could dip it in and out, but do not just like let the lace sit completely underwater. I place the wig inside the sink so that um, the lace is still. You know like sticking out of the water, but however um once i went ahead and dyed that as you can see, the wig is still wet. So i'm jumping straight into the install and i will blow dry the hair as i go now. I actually had to rush and do this install, and it took me about 45 minutes because i had to head to the airport to get to atlanta. So that's why the style is simple and straight to the point. Okay, so for starters, i went ahead and tried that wig on and the first thing i did was cut the extra lace from around the ears. That way, when i went ahead and applied my layers of glue and i tacked the wig down, it would just lay flat and perfectly onto my hairline. I did do a little bit plucking in this wig, but not too too much um it just you know. I just pretty kept it. I kept it pretty basic, you know so um the hairline did come like slightly pre-plucked, but of course you know you want to go in some more and do your own plucking. You know customize it to how you like it, and you know that way, it'll be ready for you to install and it's the glue that i'm using, of course, is the lace meat adhesive from my brand, and i am using the small little tube blue um. I love the travel size glue. I was one it's able to go with you wherever you go, so i did take this to atlanta with me and it just looks like a tiny little lip gloss and you just slide. You know you place that glue right onto that hairline and you can actually use the flat part of the glue to just really spread the glue out. But sometimes i do it with the comb and then sometimes i just spread it out with the um actual tube itself, but either way it goes. When you spread that glue out, you want to make sure it's nice and smooth and flat that way the glue can dry clear quickly and then you can go ahead and place down your lace. So after applying my two layers, i am going to go ahead and let this dry and then begin to tap down the wig. So now that the glue is clear, i'm going to go ahead and begin to tuck down my wig, and i always like to start from the center first and then work my way down to the sides. Now, when you uh place your wig down, you do want to um, use your fingertips or your comb and make sure you apply pressure and you're actually pushing that lace down into the glue, and once you have one side secured, you can go ahead and focus on Your other side and make sure you be very, very careful on what you place in it like. As you see, i lift this thing up about three times to make sure i place it directly where it needs to be and honestly guys make sure you are placing the lace to go just a few millimeters past, where you apply the glue that way, you do Not have glue behind like your hairline is not behind the glue. That makes sense. You don't want to glue down the lace. You want to actually glue down the hairline part of the wig, and once you have that secure, you can go ahead and tie the lace down with your melt band, and i did let my melt band sit for about like two to five minutes. I didn't do like the full ten minutes that i normally do, because, as i mentioned you guys, i was on a press for time. I had to make it to the airport, so i let that sit for like two to five minutes and in the meantime, what i did do was start to kind of like blow dry, the wig out. So it don't look as wet as it was before and right after removing that melt belt. I am gon na go ahead and begin to cut off the extra lace and, as you guys know, sometimes depending on what kind of lace it is. Once you cut that lace, your um hairline could look too light. But if you ever have that issue, you can always go back in with darker foundation and tap it across your hairline, which i will show you that um just in a few minutes um after this section of the video, but for right now, i'm just taking that. Glam wet stick and i applied it on the top of my wig, so i can kind of pre-prep it to lay it down flat. So right now i just took some scissors and slit um that lace and now i'm going to go ahead and razor off the extra lace. Now, usually when i do this step, i get all the way to what's glued and i just cut off everything else. That'S not already tacked down, but sometimes um. I feel like everything i plucked gets cut off so this time i didn't go all the way to what was glued. I kind of left some of the unglued part um once like still on the wig. That way, i can just go in and slide some glue under those little cracks, because i really wanted my hairline to look natural and i don't want to cut off everything that i plucked. So i did leave some of that extra lace on there, but just be mindful not to leave too too too much, because you don't want your wig to look too far down so now that i have that off. I'M just going to go ahead and begin to slide the glue under those cracks, so i can get everything tacked down and i'm just sliding about um like two to three little like layers of those little cracks right there, because you guys know. I only use two layers in total for this install, but sometimes the little cracks like that be real stubborn. So you can add, you know an extra layer if you need to it's just something about the edges. It'S all just always going to give you a hard time, but once you get it tacked down, you just want to repeat the same steps to the other side. So now that i have that tacked down, i'm just going in with the blow dryer, really quick, uh, really quickly on the heat setting and just blow drying. All of that lace and, as i mentioned before, i felt like my hairline - was giving me that halo. Look. It was too light, so i'm just taking my concealer packet and i'm going in with that darkest shade and i'm tapping that um concealer color all across my hairline. I usually just use my darker ruby, kisses level 16 palette, but at this moment i don't have any left, so i had to go with the next best uh, the next best thing with that darker shade. So now that i have that color tapped on there, i'm just gon na go ahead and kind of straighten up my middle part to perfection, because i am going to spray my hairline down um once again and well. I didn't even do it yet, but i'm going to spray my hairline down and uh with that tresemme holding spray and then, of course, i'm going to tie my lace down one more time and that's just to give it that extra security and just make sure the Lace is melted and guys. You also want to make sure that you are hot combing, um your wig down nice and flat, because you want your wig to lay as flat as possible. You don't want it to look all humped up and puffy at the top, so make sure you um one. Do you a nice small, little braid down and also that you're um laying your wig completely down where it has like no roads and no folds in the lace? You want to stretch that wig completely out that way when you go to hot combing it and everything like that. It just lays down super flat, but um. Now that i have that hot combs and i actually hot comb, my hairline backwards to make sure it's clean and neat, i'm going to take my tresemme holding spray and instead of just spraying directly all over my head, i mean i am wearing makeup. So i decided to just put the holding spray on my fingertips and just tap that um holding spray across that lace and then go in with that melt belt and tie it down once again. But i did let this one sit for about five minutes and i went and blow-dried the hair some more because i still felt like it was a little wet in between pieces. So i'm just going to go ahead and hot comb my roots and also blow dry. That some more oh now the milk belt is off, and this is what it's looking like and clearly i see i got this little stubborn ass piece over here in the corner, so i'm just going to go ahead and clip that thing on off and then push That lace in - and this is what the hairline is looking like - it's very nice, natural and clean - and that's why it's very important that you comb everything back and that you also um be very neat as far as hot combing and using um the holding spray. You know combing it back and smoothing it out before you tie that melt belt. That way, when you remove it, it's nice, clean and in place now. The next thing i'm going to do is continue to hot comb, the top of course, because i want to get it super flat. I want to get out all those you know little lumps and uh kinks out and then i'm also gon na um. What i was gon na say: i'm also gon na go in and flat iron, the hair as well, because yeah um. This is body wave. But you know when you watch body wave the wave kind of goes honestly and like i mentioned, i was on a press for time. So go ahead and doing a curl a whole curl look was not going to work out in my favor. I was going to end up missing my flight, so i'm just going in with this flat iron that i got down here from the stylus of miami and it is super super super hot and it gets the hair nice and straight i love it. It goes to 480 degrees, her name is actually the enhancer. So if you want to purchase one of these um hot flat irons - and it's just the thick one, i know i like the big plated one make sure you guys check her out. I will actually drop her instagram down in the description box as well, so you can purchase this um um flat iron, but as you can see in the back, i missed a little piece and my mama was sitting right on the couch and she wasn't even gon Na say none to me y'all just look so i didn't get to get that little piece in the bed, but don't judge me y'all. But, however, this is the finished. Look here. Um, like i said this is body wave hair, but i just kept it straight and jet black and cute threw on my little airport outfit, and i was headed on my way to atlanta. This video was very simple, but i hope you guys enjoyed it overall. Thank you guys for watching and if you are new, don't forget to click uh, don't forget to subscribe!


Comments
Misha Rokel: I love it! I'm always here for the simple
nikkistayfocused: hey sis,your installs be giving it for girls
Dawn Roy: Sis! You did the damn thing as always. Just keep doing you, and may the good lord continue to bless you.
Nikki Harrison: Another beautiful slay from the Slay Queen herself #keepgrindingsis
R K: Been waiting on this upload since you mentioned it on your live. This is every wig you install is !
smokeahontas everyday: You are a beautiful amazing woman and so talented love your products and your videos stay strong and keep going to the top I see great things in your future!
Lucas Lima: YASSS, NO BABY HAIR
Mellah77💫💫: Hey hunn.. can I have the details for your hot comb?? Beautiful by the way❤️
Chiomytata: My day one girl. Love your work always
Meme Baum: Very pretty
lneal2800: Hey! Shae boo! Thumbnail is servin everything honey!that hairline though is freaking Flawless! Looking fabulous!Yeeeeeeez! love your tips and technique!
Hermosa Hair: Thanks all of you choosing our Hermosa hair, love you~
Shawnta Coleman: Love the no baby hair looks #first
Ruxy Bratz: I love see jet black in dark skin. ✨
Tatianalily: Love it! Which hot comb is that ?
MrsQueen LadyRed: Very Beautiful & Amazing Slay I Missed You & Your Videos Shay
Sammy Da Goat: Fourth Comment The Hair Is Everything
Devin Zortman: Can you do a video on how to make wigs last for year without balding or anything
MUFASA!! 🦁: SMH I thought the lace was HD?? So they lie about lace being HD? And I just ordered from them. Damn
Gardenia King: Loved the video do you have any that you've purchased yourself and are not sponsored? Because these people just send yall the good hair and sell us the crap
DanielleRoyal: Do you think this is true HD lace?
Laila White: Did u pluck this wig or bleach the knots or was it ready to throw om
Shani Nailz: Loveeeeeeeeeeeeeeee❤️❤️❤️❤️❤️❤️what a Gyal pretty