Very Detailed Melted Wig Install | Hd Lace Body Wave Wig | Alipearlhair
- Posted on 01 July, 2022
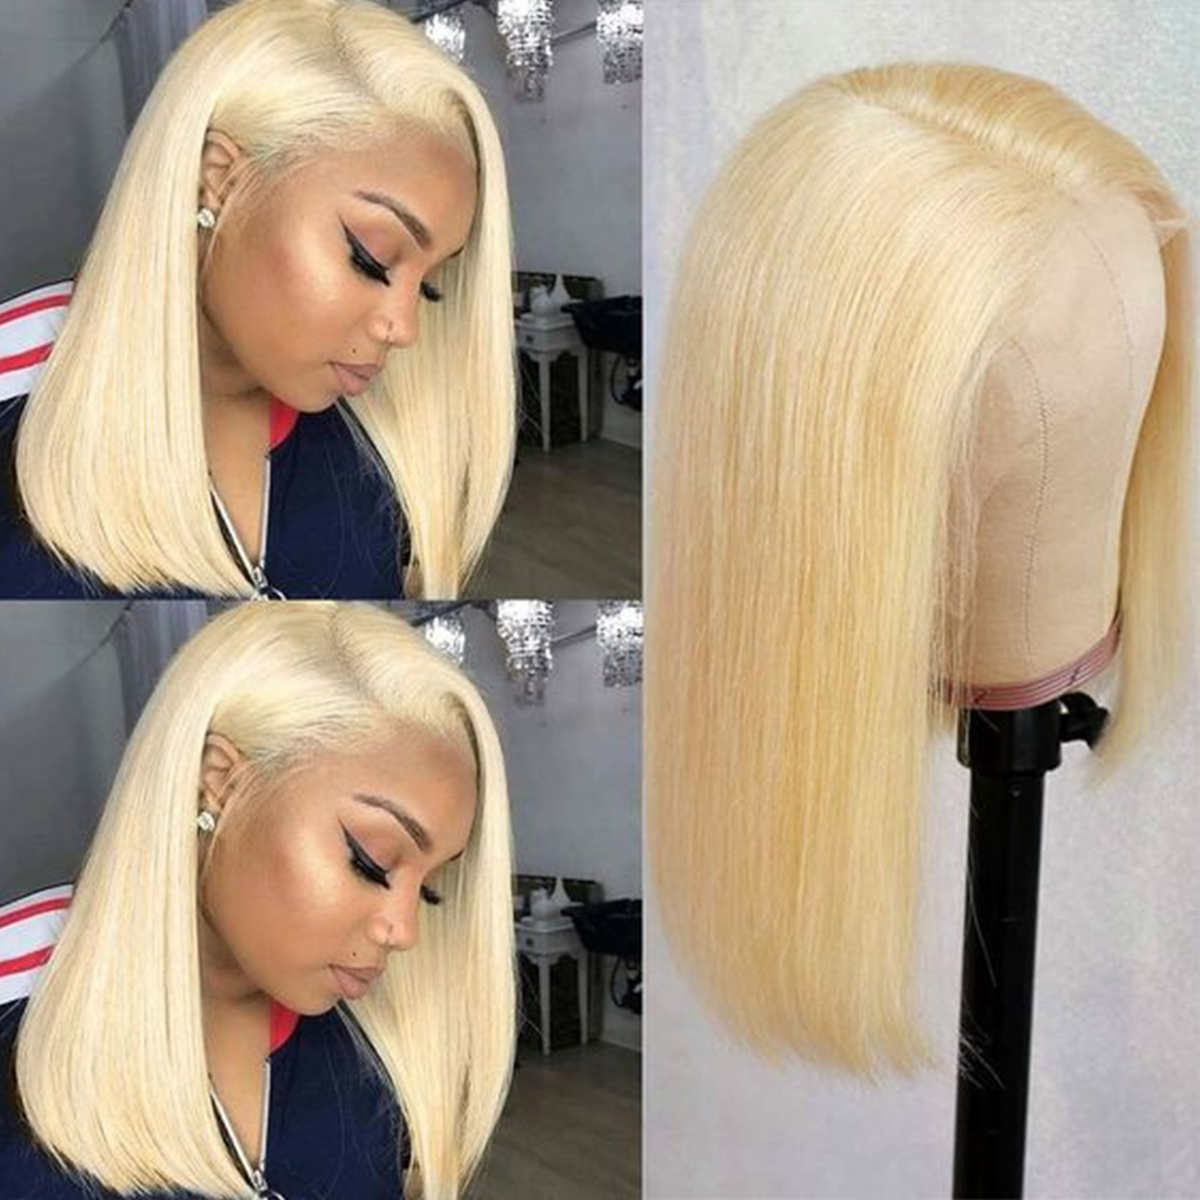
- HD Lace Wig
- By Anonymous
Shop Now➤https://bit.ly/3vCDx0Z
Hair Info: 24inch body wave 13*4 HD lace frontal wig 180% density
❤#AlipearlHair Official Store:➤https://bit.ly/39buZql
1.Join FB Group, Win FREE HAIR➤https://bit.ly/3LgfnQ8
2.Lace Front Wigs for Sale!➤https://bit.ly/37s3JU1
3.Invisible HD Swiss Lace Wigs:➤https://bit.ly/3K9SVao
#alipearlhairwig #alipearlbodywavehair #alipearlhdlacewig
Instagram @alipearl_hair: https://bit.ly/34I3Oyd
Youtube @Ali Pearl Hair: http://bit.ly/2H0Gmmc
Facebook @Ali Pearl Hair: https://bit.ly/3aKwxX3
WhatsApp: +86 15890076489 E-mail: [email protected]
50k subscribers thank you sooo much LIKE, SUBSCRIBE and leave me COMMENTS!
100k SUBSCRIBERS SOON‼️ p
Follow my Instagram @jassnoellee
https://instagram.com/jassnoellee?utm_...
TikTok @jassnoellee
https://vm.tiktok.com/ZMd7N5KPo/
Email: [email protected]
It takes me all right, hey guys, thank you again for watching so right now, hair by mandy, by the way here by mandy. That is who is doing my hair, that to styling me her instagram is hair by mandy. I will also put it in the description box below if you want a book for her she's located in atlanta georgia, so she already melted down my cap and right now, she's just cutting off the excess lace. So we did the melting, the cap, basically off camera. She put her product on it, i believe, glue around the edge of my hairline and then i sat under the dryer for about 20 to 30 minutes and, as you can see, right now, she's just taking her foundation that matches my skin complexion. I believe she's using shade 10 ruby, kiss cream foundation. You can find it at your local beauty, supply, store and she's just taking that with a foundation brush and just rubbing it all across the sides of my hair. Well, the hairline and right now she's just trying to adjust the wig to make sure that it fits my head perfectly and after she finishes matching up the wig with my natural hairline she's, going to be cutting the sides, and you guys will see that in the Next clip okay, so i zoomed in for you guys so that you guys can see a little bit of what she's doing she's just taking out the excess hair. That'S covering my ear and then she's going to cut the lace to where it's going to fit right. Over my ears, so that when she lays the wig down - it's not too big for my head, so this is basically just making sure that your wig fits your head. So just make sure that you cut the excess lace on the side. Don'T cut all the lace off the front, just cut the excess lace that is over your ear and you might have to cut some hair off and that's okay, all right guys so now she's using her lace, glue and she's. Just taking that using small dots across my wig cap, where the wig cap in my hairline meets with my with my skin, so just take your glue and use tiny, tiny, dots on one side and then you're going to take your comb. The end of your comb and go press down and go forward motion so take your comb and bring it forward so that you don't lift your wig cap up. If you lift your wig cap up to the back, it'll start lifting before you even get to put the wig down so just make sure that you're taking the comb and taking the glue and pushing forward so just keep pushing forward until you fully spread all your Glue out and you don't have any more dots and then you're going to take your glue and then do the other side and basically repeat the first steps. Just take your comb and spread out all your tiny dots and go forward, motion and press down so that your wig cap will be secured so now, she's gon na go in with the second layer. Repeat the same process use your tiny dots across the hairline of your wig cap and just spread it out with the comb and then you're going to repeat the process for the other half of your wig cap. So just take your comb press down, put them push forward, press down push forward and just make sure that you're spreading out your glue evenly with no clumps and no more dots. Yes, together is all right. So now she's done with both layers of glue and it's taking a little bit of time to dry, so the first layer dries and the second layer has dried and now it's time to adjust my wig onto the glue so she's just matching up the hairline with The wig, with the hairline of my wig cap, my glue and my natural hairline and just press it press it down. Take a comb, a rack, tail comb, any type of comb that you have and just press this lace into your head, so that the wig will be basically grasping the glue and it'll become tight. So this will just help you have a clean, install and a very melted install. So don't forget this step. Y'All make sure that you're pressing the comb with the lace into your head into the glue so comb with the wig into the glue just make sure that you're repeating this process and your wig will be melted. All the way, all right y'all. So now that she's done using her comb and pressing the lace into the glue to make it look melted, as you guys can see this hd wig is bomb like the lace is melting into my skin right now, and it really doesn't even need that much more. Like she just used a little bit of makeup - and it already looks, melted and she didn't even put the melting ban on so definitely buy this wig y'all, because this is the best hd lace i have seen as you guys can see. It'S really good lace. So right now she's just putting the melting band on so that it gets even more melted and it's going to dry like this and when she takes the band off, you guys are gon na see how melted and bomb this lace looks on me all right guys. So now it's time to part the hair and basically separate it into the top half versus the bottom half - and this is gon na help her when it comes to crimping my hair she's, just gon na take her hot comb and lay the wig flat just the Roots of all the hair, in the back and on at the top, this is going to help you with keeping your wig super super flat, and then you could go in and crimp it afterwards, all right guys. So now it's time to crimp the hair, as you guys can see, she has already started combing it through and then she sprayed product like a hold spray onto the hair so that while she's crimping it, the crimps will hold for at least a couple of days. These crimps lasted me two to three days until i had to re-crimp it, so it's much better than flat ironing or curling your hair every day. I think crimps save time, and i think that they're definitely bomb and cute is okay. So now that she's crimped, all the back of my hair, she went back to the front to go ahead and cut off the excess lace. So, as you guys can see, we took the wig band off and it looks like scalp. This wig is definitely a great hd wig, with her cutting the lace off. As you guys can see, you still can't even see the lace like where it starts. It just looks like a natural hairline with her cutting the lace off and now it's time to go ahead and do the edges. So all the excess lace that was in the front of the wig is now cut off. She just used the eyebrow razor and got really really close and just started cutting until she got everything cut off from each side and now it's time to take your hot comb and we're going to get into the edges. So when she does my edges, she just takes a section not directly in the middle but a little bit to the side of each middle part. She'S going to evenly take some hair and pull it forward with her comb. Then she's going to hot comb it to make it stand alone and basically not go blend back into the rest of the hair that she has to go crimp. So the edges just take your hot comb to separate the two so now she's doing the other side of my edges and just repeating the same steps from the other side. Just gon na pull some hair out. That is off to the side, not directly from the middle. Take the hot comb and pull it away from the rest of the hair that she has to crimp and she's. Just gon na do two so that i have two sideburns on each side and then two edges that are basically on my forehead and then she's gon na pluck them make sure that you guys don't forget to pluck them. Pluck your edges as well going downward motion, and it's just going to help give that look that natural clean look. Basically, you know it won't be too thick or too thin. So just pluck it a little bit so that when you do the edges, it's not too thick, as you can see, now we're laying the band back down so that the edges will be melted and basically stand alone from the rest of the hair that she's gon Na crimp and now you guys could just watch her crimp the rest of the hair until we get back into the edges, uh all right, so she's fully done crimping the hair in the back and the front she took the hot comb and just went over the Top again to make sure that it was as flat as she could get it and she did my edges off camera, but they turned out beautiful voila. There goes the big reveal of my edges. She really did wonderful on this install. This is a bust down. 28 inch hd lace, wig from ali pearl official. This is the final product. She really did her thing like i said here by mandy, i'm trying to change right here, but look at this install get into it brand that sent me this wig right here. The screenshot of them and all the descriptions will be all the links and descriptions and products will be in my description box below like comment and subscribe and tell me some more videos. Uh


Comments
Ali Pearl Hair: Thank you so much for trying Alipearl Hair.
Cee-Cei Thomas: Glad to see you doing well....Miss you make videos
michanel perez: Bendiciones hermosa Celina que Dios te cuidef donde quiera que QUINZAA.Monster encantan tus videos.
Miami: you look Beautiful
Swayandjayfam: Post notification gang love your videos
Chris WalshTV: Hey what’s up jass how are you
Money Goat: Do u and ken still talk❓❓