*Detailed *Glueless Side Part Frontal Install |Ft. Tinashe Hair
- Posted on 19 January, 2021
- HD Lace Wig
- By Anonymous
Hello my beautiful subscribers (and non subs) ☺️
Want more help? I offer virtual 1 on 1 help just send me an email or dm for more information!
• I sell wigs after I review them! (Follow me on IG) I post the wigs in my story if for sale!
Want a wig made? Want me to pluck and bleach the knots for you wig? Contact me!
IG:holaa_caro
Email:[email protected]
Hair in the video: Tinashe Straight HD Lace Front Wig 22 inches 180%.
Direct Link: https://www.tinashehair.com/product/13...
More HD Lace Wigs ➤ https://www.tinashehair.com/product-ca...
※ Tinashe Website ➤ https://www.tinashehair.com/
※ Coupon Code"LWIG02" to Save extra 10% Off
Hot Sale Lace Front Wig ➤ https://www.tinashehair.com/product-ca...
Colored Wigs ➤ https://www.tinashehair.com/product-ta...
No Glue No Lace Wear & Go Headband Wigs ➤ https://www.tinashehair.com/product-ca...
Get To Know Our Latest Promotion And Win Free Hair?
Follow @tinashehair On Instagram: http://bit.ly/2Isud9X
Follow @Tinashe Hair On Facebook: http://bit.ly/34FxUAm
Contact Us: Whatsapp/Tel: +86 17537405381
Email: [email protected]
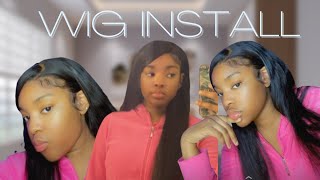
I just want to know - probably not i mean to be honest with you. That'S my baby. Hey guys! Welcome back to my channel. It'S your girl! Caroline! That'S me! What'S good, what's popping, how are y'all doing today in today's video i'm going to be walking you guys, i'm going to be walking you guys through the process on how to get the perfect side part with a frontal. In my opinion, side parts are so freaking hard to do, especially with front tools. I feel, like middle parts are much easier than more beginner friendly side parts. A good side part takes a little more skill, a bit more finesse. I feel like it's more intermediate to advanced. Definitely you could do a side part with a beginner, because my first front tool was a side part but sweetie it would it shouldn't have been a side part. I should have just did a middle part, but yes, i'm going to walk you guys up through that step by step. The way i'm going to be working with is shoddy over here was kindly sent to me by tinashe hair company. It is their 22 inch straight wig pins out. It is their 22 inch straight wig and it's a frontal standard 13x4 frontal and they sent me their 180 density. So it's going to be much fuller than your regular 150, but yeah. Let'S get right into the tutorial. So, first thing: first before you know, we actually put the wig on our head, got ta attempt the laces. So what i do, i'm doing a little part side, part half up half down whatever we got, ta tip the lace so that it matches the skin. On our head, i'm using my maybelline fit me foundation in the shade 340 and a nice little dense brush. This is a real technique. Brush never use a big old fat brush. It'S going to be too messy a nice, but dense brush, get a little bit of the foundation, don't use too much because you don't want to drench your lace just enough to get it to be the same color. So i like to make sure i focus mainly on the you know the perimeter part. The lace is going to be actually seen, but i will also work a little bit down into the wig as well as you can see. I don't know if y'all can see that the lace has been tinted. The parts that's going on my forehead and since i am using a foundation, i want to make sure i'm drying all that up. So maybe my blow dryer in a warm setting so just dry. All that up all right so now your wig is on onto the part, that's actually most relevant to an actual side. Part install one thing that you really need to know if you're going to get like a really good side, part where you know like you can see the sides and everything just looks correctly. You need to make sure you get a wig. That is your size in a way that's actually going to come down onto wherever your sideburns are. If you're someone who has like a lower hairline being like you know, you kind of have sideburns that come down lower than the rest of your hairline. There'S i've been watching a lot of youtubers or like hairstyles, they use the um nair method, i'll, probably link that below you can just youtube nair method for low hair lines. The hair diagram, i think, she's the person who makes um bold, not bold, hold. I think she's, the one who makes boldhole that's the owner of that company, but she uses v she's a snare right to kind of just just just. Look it up. Okay, that's what you do. You have a little hairline, but for those of you don't have a blur hairline or just in general, you want to make sure first side part install that your wig is coming down. The lace is coming down low enough to cover your hairline. This is probably not the best way to use for this tutorial because it's not perfect on my hairline, but it will do with that said. Okay, the next very important part of a good side. Part installation - is how you cut off the area around your ear. You don't cut too much, so you have enough hair and like lace to cover over your ear right. What i do when i'm cutting off the piece around my ear, i like to get a rat tail comb and i like to kind of draw, i would say, like an upside down: u around my ear and make sure i'm really like touching my ear. Sometimes i'll leave a little bit extra hair because it's better to cut too little than too much because you can't go back all right and i'll. Just part like that, and then just use my scissors and i'll just go ahead and draw that upside down. U going around my ear so now we've got a perfect fit on both ears. It'S time to do the actual you know, installation laying of the hair and i'm using my trusty got to be spray and what i do, especially, i don't know about you, but for me the sides are the hardest part to get to stick so sometimes i'll. Respray again, but it's okay, your first braid you just want to go in and try your best. When you cut the lace, you can go back in again and kind of like touch up. What'S not sticking so you know just go in spritz spray as close to the hairline and the lace. That'S actually going to be staying on your head as you can and then get your blow dryer on a warm, not cold, on a warm and not hot hot too much warm setting and just go ahead and use that to help everything stick so okay. So i went around and sprayed down all of the lace, it's time to cut, do scissors for cutting, but you want to use a brow razor. I'M sorry! So you want to use scissors for sectioning. You know cutting off your sections, but you use your brow razor to cut off the lace. Don'T use this kitchen lace off? No okay! If you start to get lifting or get like this white residue, that's normal because, like i said you're most likely gon na have to probably go back over parts that are lifting. So it's okay, don't stress and just carefully start cutting off the lace watch out for your eyebrows and your skin. So right as you can see, we got a few things going on right. We got this white residue going on and we got lots of lifting, as you can see like i said the side did not lift, which i already anticipated. That'S going to happen. So what i do about these problems right. First, i'm going to deal with this side. Part i like to just pull out the sideburn area already so go in pull that out, and i like to use this as kind of like an anchor to kind of force this to lay down right so plot. My little sideburns not too much just a little bit and i'll spray under sometimes spraying under sticks better on the side. For me so try both you can stick under over and then i'll go in with the blow dryer like before, and just keep pushing this side down until it sticks basically, and then you there, you go she's stuck and now for the rest of this. All like the white residue and the lace lifting super easy fix just go back over with your spray. The spray will help take care of all that white residue and that will help with the lifting as well so yeah. My we can finally get to the side. Part, let me find my rat tail comb and then we can get. We can get to the side part. So the way that i pick where i want to part my hair when i'm doing a side part, i pick the side that i feel like has more baby hairs or the side that i step down looks better. I really don't care, which one just depends on which one just looks like it's going to be better because when you're doing a side part the side, that's showing your ear, and all of that you want that to be the best side. That looks the best like meaning because the other part is going to be flipped over. So no one can really tell what's going under that part because it's hidden, but i think i'm going to go with this side because this side didn't stick like. I don't know the lace didn't cover all of my hairline, so i'm going to do this side and the way that i'm choosing my side part i kind of just go to where my eyebrow arches and i just part from there major key alert. You need a hot comb if you're doing any wig installed middle part side, part whatever the frick, but especially a side part you need a hot gum, get one. So what i do go in and just you know, press all of that down once i like the part that i just made uh i'm just using this wax, stick to kind of help, just press and make it look more. You know professional more neat also takes away all my flyaways. You definitely don't need a wax stick if you're starting off you're, trying to figure out what tools that you need to buy for wig installs, but i feel like it's one of those extra things. That kind of help just clean up the look better if you're going for a very you know, if you want a very professional, i got a good air arrogant day or someone to do my hair type of look all right now that we got my side part Situated pull out my baby hairs, i do have a tutorial on how i do my baby hairs. Y'All should definitely check that out. Yes, i'm just gon na go ahead and do my baby hairs, and since i do have a tutorial on how i do my baby going to cut this camera off right here, because my battery needs to die. My battery needs to charge anyways and come back to y'all, okay guys, so i'm back. I'Ve done my baby hairs another! So now we're going to do next before we go in and straighten this hair, i'm going to go ahead with my hot comb. I'M going to go in section by section on the side to really make sure it's as flat as possible. Do do all right. I haven't straightened it but see how flat she is now. Basically, that is our side part. I'M gon na come back later to fix up these baby hairs a bit more, but i'm gon na go in and just straighten out this hair and show y'all what we're working with i'm going to be using my garnier fructis sleek and shine serum. I love this serum, it's great for, like straightening out my hair and honestly help also helps keep my hair, nice and sleek, and, let's get it finishing touches you can do to really make the side. Part pop is to put some concealer in the part, get a little concealer. That'S one to two shades lighter than you, and just put that in the part like so use my fingers to spread it out a bit more. Oh yeah y'all see that that part is what pop it and there you go. That'S silic, she's cute, all right i'll, see her. I feel like my baby. Hairs could have been a bit better, but thank god, it's not a baby hair tutorial right right, okay, but overall we did that. I did what that. Thank you guys so much for watching this video. I hope you learned a little bit something. I hope that helped you guys out in this process that is wig installation. You know it's a tough world out there now, since i helped you how about you help me, you can help me by liking this video, giving it a nice little thumbs up and you can also help by subscribing if you're not subscribed. Follow me on my socials commenting, hey girl. This was great. I liked it just interacting with this. Video will help me a lot but yeah, that's all i have for you guys. I hope to see you in another. One make sure you like comment and subscribe and peace out girl scouts, good, bye,


Comments
rainealyssa: Absolutely beautiful ❤️ Looks like it's coming straight from the scalp! Cannot wait to order my first ever frontal. I hope I can achieve this look cause you did that
AffluentASH: ThankYOU! This was much needed!
melanin baddie: love how flat it came out. you did that!!!
TKeyah E: This tutorial was so helpful tysm babes
J'Zhane Teosha: Loved the video Can’t wait to try a side part next!
Tinashe Ruze: Detailed !!!!!!!!!!!! 22 minutes !!!!!! I’m enjoying
lisa snider: Awesome job!
Debrashawn Henderson: I just purchased some lace fronts. Never wore them before. I've seen other videos on how to install it and they seemed a bit confusing. Thanks for posting this video it was very informative.
Nadia Simon: I literally just got my wig from them yesterday. The same exact one as yours. They must be sending youtubers better hair cause the hd lace they send me was not truly hd it was close to medium brown and thick and not stretchy! Then they say I gotta pay $100 to return it. I was disappointed with this company.
Tozzy: Very informative I hAte when people hear glueless they think no spray glue at all
Dalene Williams: Did you pluck this unit?
sharon: It looks like ur natural hair...what company sells those?
Ciarra Adlam: You have really nice eyebrows
Lateefah Quadri: Did you purchase this hair with your own money or did they send this unit to you
Ashan Loki: how can i do it without a hot comb
Junior Chaves o Picasso de Yahushua: Hey boo hey! ☺️
LadyK: It's a no for me
ubekewl454 vernon: Y'all will learn to leave that fake hair alone. See Ayanna Pressley. I took a poll off 1 million men and 999,999 of them said they hate fake hair. The one that didn't is serving life in prison.
Nora Woods: Ladies lets try and stop doing these home hairstyles and get back to the hair salon please