Hd Lace 5X5 Closure Wig Install Ft. Geeta Hair
- Posted on 13 May, 2022
- HD Lace Wig
- By Anonymous
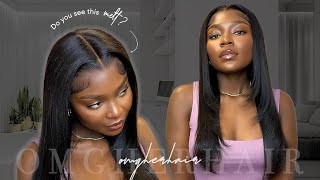
Happy Thursday, Golden Gang!! In today’s video, we are going to be install this straight 5 x 5 closure wig from Greeta Hair. If you liked this video then don’t forget to; subscribe, like and comment. Stay golden! Xoxo
HAIR DETAILS:
♡ G E E T A H A I R ♡
Hair Information: 24inch straight 5x5 closure wig 250%density
Link To Hair » https://geetahair.com/products/straigh...
Video to Achieve Color and Cut: https://www.youtube.com/watch?v=XEqxXF...
5X5 Bob Install: https://www.youtube.com/watch?v=bzIdqd...
#Geetahair #HDlacewig
~~~~~~~~~~~~~~~~~~~~~~~~
♡ H A I R P R O D U C T S ♡
WIG INSTALL:
* ALCOHOL WIPES: https://www.amazon.com/Caresour-Advanc...
* BOLD HOLD ACTIVE GLUE: https://thehairdiagram.com/products/bo...
* REESIE WIG LACE MELTING SPRAY: https://www.lovereesieofficial.com/ree...
* LOTTABODY WRAP ME FOAMING MOUSSE: https://www.walmart.com/ip/Lottabody-W...
* REESIE WIG HAIR WAX STICK: https://www.lovereesieofficial.com/ree...
* KISS COLORS AND CARE EDGE FIXER MAXIMUM HOLD: https://www.walmart.com/ip/Kiss-Colors...
* FANTASIA LIQUID MOUSE SPRITZ: https://www.amazon.com/Fantasia-Liquid...
_________________________________________
STAY CONNECTED & FOLLOW ME:
Instagram: https://www.instagram.com/saphinetv/
Business Inquires: [email protected]
Stay golden, babes. Xoxo
#Geetahair #HDlacewig #Affordable #geetahairwig #HDlace
#wig #Blonde #wigtransformation #perfectblondeforblackwomen
Can'T believe, i'm sitting thinking do it. Let me do it. Let me know i believe the spice tastes like candy sweet, like all right guys, so i'm just gon na hop right into it. I'M taking an alcohol wipe to wipe off any excess makeup oils. Anything like that that will make my lace lift quicker, so i'm taking my bold hold active and i'm using three layers. I use the same technique i use in all my videos, but since this is a closure, i just kept it into that. Um spacing right there. So after i put in my first layer, i go ahead and use the popsicle stick to ver to make sure that it dries down clear as clear as possible. Um. Sometimes it gets really clear and then sometimes i would have to just move on forward. I did do three layers of the glue because i plan to wear it for a couple of days. Like i said in my previous videos, you don't have to do as many layers if you are more into wearing the wig for a couple of days. Um one or two layers are fine. I feel like the bolt hold active, really helps with um harsh weathers, because i live in texas and it does get pretty hot and we are moving towards the summer time here. So it gets pretty hot and every time i've used the boat hold active. I don't really see any lifting. It stays to the amount of time that it normally stays um. I wear my weak wigs every week, so i switch it out every week, but so i can't stand if it lasts a full two weeks since i don't use it for for the full two weeks. But it does give me a good amount of coverage and i don't feel like it. It instantly lifts. So this is my. I believe this is my second layer that i just used. I did use a total of three. I don't remember if i've already said that, but i did use a total of three layers into this install um yeah. That was the second layer, so this is the last layer that i'm going to be using i'm going to again use a popsicle stick after i feel content with how much uh how tacky it gets. I use a popsicle stick to go ahead and make sure that everything is fully laid down. Before i put my lace up, i'm gon na put my lace onto the glue, so you want the glue to be tacky, not too sticky, but not too dry um. I feel, like that's the perfect amount of product to allow your lace to stay as long as possible. Like i said, i turn my wigs every week, but i have worn i have the current wig that i'm wearing right now. I wore it for two weeks already and i can say that the glowhole active does what it claims to do. I don't have the bottle with me right now, so i can't really dive in deep on what it says that it does, but it is a good purchase. I like this, i've never used a light bulb hold before so after i tried this out. I you know. I really was into it so, as you can see, this is again like a 5x5 closure, so i'm just shifting the uh lace forward and pressing it into where the glue is it's not a full lace. So i don't have to really worry about that and once i feel like it is pushed upward. I take the end of my rat tail comb and press the lace into my skin so that it can lay properly now in this video. The angling of how i set up my camera was really bad and i do apologize um. I think throughout the video you are going to see me go out of frame um, but i apologize as i'm trying to do a voiceover for this one so that you guys can understand exactly what i was doing at that time. So i'm just still using the rat tail comb to make sure that the lace looks like it's seeping it from within, and you know it's giving very much scalp. Now, after i feel content, i take the comb portion of it and i comb it back and then i use the rat tail comb. I go back and forth between the rat tail portion of it and the actual teeth of the comb. So that's what you're going to see me doing for quite some time: um! Nothing! Crazy! I'Ve installed a 5x5 closure before on my channel. So if you want more of a detail, you can look into the other video um, but i believe that a 5 closure is the easiest wig to lay on your head, because it's not a lot of space and it's it's a quick process. Even if you decide to just use spray and go so once i was content with how that was looking, i took my blow dryer on cool and just going ahead and blow-dried the lace for a couple of minutes, and i believe, after that i did go ahead And use a little bit more of the rat tail comb just to make sure again that it's very much giving scalp after that, i took my elastic band wrapped that down, for i think 10 minutes 10 to 20 minutes. I don't recall this. Video is pretty old. Then after i took my wrap to my my band off, i noticed there's a few areas where it was lifting, so i'm just cleaning up those areas by adding that bow hold active, i'm in certain spots that feel like weren't, fully adhered to to my scalp. So that's what i'm doing right here. I think i do it one more time. Um before i move on to the next step, like i said, as you can see, i'm going off the frame i do apologize. I brought the camera way too close to me and i should have pushed it back out to give. So you guys can see exactly what i was doing, but it's pretty the same thing i did in the previous video, especially the one i did of the 5x5 closure. So if you have any questions, you can leave down the description box below and i'll answer them and right here, i'm just pulling out my baby hairs. I normally don't really do the baby hairs on camera. I believe in this video i did actually give you guys a full baby hair tutorial on how i uh do my baby hairs on my wigs. So here i am just pulling out some of the baby hairs um in the wig and i'm clipping away any extra hair that comes along with it, um that doesn't need to be a part of the baby hairs. Like i stated, i normally don't have very thick baby hairs i like to have it so very minimal, so it looks more natural because when i wear my real hair, i i wear baby hairs, but it's not excessive. It'S not! It'S not grown people here. If you catch my drift so and because this is a closure, you don't really know that me that many baby hairs, i only did two um, and that was pretty much it. Yes, i feel, like some people go od with having baby hairs on their um closures. When it's not really needed, so i'm taking my hot comb to press in the lace again i've i like when i press it with the hot comb. I think it gives it that ultimate melt that i'm looking for before. I even start uh spraying down any lace. Spray so right here again, i'm just making sure that the lace is sitting correctly. I took my love, reesy um, spray melting spray and i sprayed it on i sprayed it on the actual um rat tail portion. I sprayed that and then what i did there is. I just pressed that into my skin um, because i realized that the way that the spritz is sometimes it gets in my eyes and it can be a difficult task. So i do that first and then i use a spritz to spray down because it does help it after the fact. But luckily i didn't get in my eye this time again. It does kind of give my eye because of the way that the top of the spritz is so i recommend using it on your rat tail comb first, if you can and then going ahead and using it to complete the process by smearing it with the rat Tail co. I think that's the best way to do it. If you have more time and you feel you're more skilled, then yeah you can go ahead and just spray spray it directly and just just don't get into your eye because that stuff does burn. So after i was content with how much hold i put on how much spray i put on, i went ahead and took my blow dryer on cool setting again to go ahead and blow dry down those um that lace, so that the uh the spray can actually Adhere to the lace, and after i did that i believe i went ahead and laid it with the elastic band. I don't remember how long kept the last event on again i just when it starts to hurt. I take it off. I'M taking the alcohol wipe just to wipe down that product pull off any extra product that may have lingered onto the baby hairs because i just spray it, and i don't like my baby hairs to have that harsh line. A harsh way - and i like to have them looking more natural, you know i like to sweep the baby hairs, but i don't want it to be crusty if that makes any sense. That'S what i was doing right here, just making sure that there is no lingering product on the baby hairs, so it doesn't give off like a crusty feeling when i do actually lay my baby hairs, i'm taking my pencil on flat iron to basically curl my baby Hair into like a c shape, i curl upward, not downward um. I know sometimes when people say the curl downward. I curl upward. Now i'm taking my a lot of body mousse and i dabbed a little bit of a lot of body mousse from on the on the uh. From the back of my hand, then i took the home version of the uh, the two, the two two two brush wow can't talk to brush to basically lay down that baby hairs. Now i know i'm doing the beers on camera, but i decided to do it. This time - and i sped that up because again i only did two - i took the pins off of my hair um because you know they were pinned back and i forgot what so i took it back off of my hair here. I'M just cutting off those little tacks in the in the corner of the closure, because you need to take that off or it's going to look weird if you decide to do um a flip over because again, this is a five by five. You do have more parking space to do different styles, but i just really like my middle part, um even on my frontals, i, like a middle part more than i like a flip over method or a side part. So that's pretty much. What i'm doing here just cutting off any excess um lace, then, after that, i'm taking my uh wax stick by resi to use that to very like to give it so that there's no flyaways and took my hot comb and used a hot comb to press that Um wax stick into the hair, so that's what i was doing for a little bit of time, because i wanted it to look very seamless and that's exactly what i was doing. I do like this hair. It'S very bouncy, it's very voluptuous um. I have washed it and i can say that it looks very soft after the wash process and i do like the lace - i don't know if the lace is hd but i'll leave all the information about the hair in the description box. I also leave how to achieve this color because i didn't do this color and it did not come this way. So i don't want you guys to think. Oh yeah, i'm gon na get this wig and it's gon na. Look like mine's. That'S that's not the case. It is a regular black five by five closure. Wig. It'S not no highlight there is no ombre. Nothing like that. So um. Just keep that in mind. If you're interested in pressing this hair, i will leave it down in the description box below if you're interested in see how to achieve this color. I also leave the video down below, so you guys can take a look at that. So here i'm just doing my finishing touches uh, making sure that everything is seamless and it looks as good as it can be. Obviously this is not my hair, but we like to pretend that it is going over my scalp. I just took some edge control to put it on the um top of my river here, and then i used that comb portion of the edge brush to go ahead and basically clean up any extra-ness in my baby hairs um. I use this way to because i want your hair to last the whole time now. Wear the wig and, like i said previously, i normally keep the wig on for at least a week. So i, like my baby hairs to last a week as much as possible. Um, so that's what i was doing here now, i'm taking my spritz spray by fantasia, and so i can really get that ultimate melt um. I always do this at the end of my videos. If you've looked at any of my other hair videos, that's exactly what i do um and it does help me. Keep the legs sitting the whole time um. I rarely have lifting. Unless i just forget to wrap my hair down at night or the weather um. You can't control the weather and in texas it does get really hot in the spring it's that summer. So i i know it's gon na get hotter. So that's pretty much all i did here, i'm just finished doing some fashion touches um. I don't really have much more to say, but what i will say is that if you like this, look, if you like how detailed this video is, don't forget to subscribe like and comment and hit that bell, if you're gon na be next notified. Next to my post um and that's all i have to say for now, because the rest of the video is just me - cleaning up a few things that i've done other videos. I don't think that a voiceover is needed for that, but um yeah just keep watching and stay golden babes, so house you


Comments
Sierra April: Love the install I click the link for the hair but it looks like it’s showing a black wig I want the one with the blonde in it lol