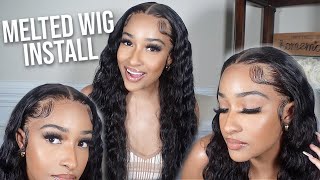
Really Detailed Deep Side Part Frontal Install | Knot Bleaching, Plucking, & Install Alibonnie Hair
- Posted on 06 July, 2022
- HD Lace Wig
- By Anonymous
Hello my beautiful subscribers (and non subs) ☺️
Wig sales page - @CAwigss
Personal instagram- @holaa_caro
EMAIL- [email protected]
PRODUCTS USED:
LACE TINT - PRO TOUCH FULL full coverage concealer - warm coconut
LACE SPRAY- EBIN lace spray in red
STYLING MOOUSE- NAIROBI WRAPP IT AND SHINE FOAM
EGDES- ECOSTYLER GEL AND STLYING MOOSE
Hair bleach: BW 2 BLEACH
40 volume developer
Fanola No Yellow and No Orange Shampoo Package, 350 ml
Revlon Men's Series Slant Tip Tweezer, Stainless
Remington Hair crimped
Edge control: eco styler
hair moose: lotta body coconut hairs moose
hair spray; PINK shine + hold spray
hair wax: She Is Bomb Collection Hair Wax Stick
═════════════════დ Alibonnie Hair დ═════════════════
Usᴇ ᴄᴏᴅᴇ “caro20” ɢᴇᴛ $20 OFF
Hair info: 30 Inch 200% Density Loose Wave HD Lace Human Hair Lace Front Wigs 13x4
Direct Link ➤https://bit.ly/3tcR92B
,
Highly Recommend Hair:
360 Lace Wig ➤https://bit.ly/3IUn4dN
HD Lace Wig ➤https://bit.ly/3AF6YAz
Colored Wigs ➤https://bit.ly/3qrWTUJ
Contact us:
✅Alibonnie store: https://www.alibonnie.com/
✅Facebook @Alibonnie Mall:https://www.facebook.com/AlibonnieMall...
✅Instagram @alibonniehair:https://www.instagram.
There'S pain black girls in my area, cold, dark skin, like skin medium tones permitting braids, got many afros thick lips, big nose, contour, some of us won't. When you see this face, and this banner you know what's going on sorry guys, it's like 2 a.m. I'M trying to find some energy give y'all some pump make these videos a little more interesting for those of y'all they're like dang. All you do is make videos. Well. All you do is watch my web videos because you're still here now, okay, what's up y'all guys, it's popping, i'm studying! What'S good with talking it's your girl, caroline back again with another wig video and today's wig, i don't know what today's wig is hold on. Let me grab today's wig, i don't mind the performance. Okay got the wig today we're working on this wig from ali bonnie hair. So we got okay, okay! I never show like the products in it because at this point i'm convinced these products like they include, are just like pr. It could be included, it couldn't be, but yeah. I don't care about that. If you do comment down below i'll show it if you care, i feel like i never care. I just wan na see the hair, so this is a 30 inch wig. I believe it's some type of curly texture loose deep, deep wave. One of those - let's see. Let'S see, i think it's a loose deep wave, the way it has these little springy curls on it, and this is a fronter. Oh, i love that look at all that parting space. Damn good! I see you so she got a lot of parting. It'S a 13x4 13x6. This is a 13x4 me press, i'm honestly, it's very seldom where i see 13x4 wigs. I have the full four inch parting on the side, like oh i'm, doing a side part with her here's how we're looking 30 inches loose deep wave. I always get so sad when the curls come like this, like you know, pre-processed like this, because i know once i wash it that's how the curls don't look but they're fun, they're cute, but i got ta wash it. So you know do all the plucking and bleaching but anyways, let's get into our install. So here's a little before action without any customization. How the wig would look, i feel like they dyed it, jet black, because it's very dark: oh she's, dark, okay, um, here's, how it looks it's slightly pre-plucked on the hairline, the hairline's, not too thick, but i'm still gon na! Pluck it because that's what i do! Um definitely will be having to bleach these knots. On the bright side, though, the knots are like small and not super tiny, so they shouldn't be too hard to bleach. We hope, let's get into our. Let me be serious, so um yeah, let's get into our, not bleaching portion all right. We'Ve got the bleaching squad here with this got the creamy crack jk, that's relaxer, but might as well be bw powder classic leather standard, and i'm mixing this with a 40 volume developer, see i've been using 20 for, like a couple of my last videos, if you Notice, but i feel like 20 volume develop so sorry, i've tried using 20 pound developer. If all you guys are asking if you can use 20 and my answer to y'all nah, i mean yes, but for me not 20 developer, it does work. It will lift my knots, but does it give me that, like invisible knot, look that i'm going for so i feel like use 40 she's, your bestie. She loves you, but if you're a little bit scared, i want to go for a little more gentler use. 30. 20, it works. That'S all you have, but i don't think it's gon na be as effective and it just doesn't bleach the knots to the light shade that i'm going for 40 she's, my girl. Once you go 40, you never go back. Okay. Now i'm just going to use one scoop, maybe a little bit more, because this frontal got some space. That and like i always say you want to pour this developer in slowly, because the mixture gets burning real fast. I feel, like i've, been doing this for a minute, so i can kind of like pour more, but let me not get too confident make myself pretty mixture until it turns to a nice little creamy icing, i'm just gon na make some brush it's more youtube. Mixing brush okay, see now i can add a little bit more. I don't want to get too cocky and start spilling a lot in there, because it's not a one-to-one ratio. Okay, i don't know what ratio it is, but it's not one to one makes it makes me makes you messy. Let'S make sure i mix it all in i like making my mixture now a bit more thicker than before, because i hate when it bleeds through. It'S such an annoying thing to fix, but this is a pretty good good for me. It'S nice and creamy like some thick, not like thick but, like you know some refrigerated icing. I guess if you ever do your icing either it's still spreadable and creamy, but at the same time it's not dripping off. Y'All see that yeah. That'S what i like and i do like recently, i started using a popsicle stick. I wouldn't stick with some. Like my waxing sticks, i like to use these to help spread the solution, i'm just going to spray a little bit of some hairspray on the front. This will just help me push the hair back. Okay. The last thing i want is to get bleach on the front of the hair. Push that thick make sure everything looks nice and back yeah. Okay, so got her face down. Here'S it see, told y'all. I get weird tonight: okay, i'm gon na go in and then we'll just you know start to apply our bleach, see that nice and creamy, but also not drippy. Okay. Now we are back got me. Oh my god. For some reason i don't know how this happened. It was hair dye on this piece of foil, but anyways. You can gently fold this up and place this foil gently, i do mean gently. Sometimes even this part can cause you to over push the bleach. So i'm going to come back every 10 minutes to check how the knots are. I never give you all the time on how long to lay your knots process, because every wig is different. Just keep coming back every 10 minutes. Don'T you walk away and forget about it, because i have done that literally i tell alexa alexa set a 10-minute timer 10 minutes yeah, so i'm gon na go ahead and let that just sit and chill and we'll keep checking back usually about 30 minutes is good, But sometimes these last times i need more okay, real close, though y'all can see the knots in the bottom, real nice and black we're going for a yellowish kind of color the knots in the back already processing a little bit. You can't see that but yeah okay, i don't know if you guys can see, but it's been literally only 10 minutes and the hair is now about a like it's more of a brown color. So i feel like this wig in another 10 to 15 minutes. It'Ll be ready, so all right and that's why i say: keep a timer, because it's already lifting it's only been 10 minutes any more than 20 to 25. This would be a goner, so yeah i'll be back. Another 10. alexa send me another time at a time. Okay, it hasn't even been a full 20 minutes here. I think it's like 18 ish minutes and y'all see a little like yellowish, yellow orange kind of color. I'M gon na go ahead and cut this and wash this out now, because one time i left my i don't know what kind of hair it was because one time i learned my lesson after letting bleach sit on my frontal for too long it wasn't even an Hour y'all, it was like 45 minutes and the front started to shed as i was watching washing it so be careful with this bleach once you start to see it lift just go ahead and stop it. This is how the lace was looking after i washed out the bleach with a neutralizing shampoo, and you can see she's getting very much donald trump, very much orange and i felt like i could have low-key. Let the bleach sit a bit longer, but i'm telling y'all. I'M traumatized after i let my bleach sit for too long and the hair started shedding in front of me. To be honest, i did let the front process a little bit too long, because the front knots were very, very delicate after this process, and i was getting a little bit of shedding in the front. So do keep in mind. Shedding from your frontal could be a result of bleaching for too long anyways, so to help me fix the over orangey tone of the wig. I now do a two-step wig. I mean lace toning process, instead of just using the standard, shimmer lights that we all know. I now go in with a blue and a purple shampoo. The reason why i use the blue is because the blue helps cancel out that orange color and then i used a purple shampoo after and purple helped cancel out, yellow tones. I got these shampoos both from amazon um. They came together in a set and they worked really well and they helped give me a very neutral lace like you'll see after i do these two steps. First, i'm going in with that blue pigmented shampoo and i'm using a very generous amount and i'm letting this just lather and make sure it's sitting on the bottom of the lace, because it's mainly for the knots of course. So i'm really making sure i'm pushing that blue pigment through the bottom of the lace to get onto the knots and then after i've done that i go ahead and just scrub it through to get a nice lather going on. And let that sit for about 10 minutes, then i come back wash that out and i do the same thing with the purple shampoo to help get away, get rid of any yellow tones that are left after getting rid of the orange tones. Some of us here is a before and after shot of the toned knots you see before very orange and right here on the right. It is more toned and neutral, giving very much scalp. So after i've done that, i just went ahead and washed the rest of the actual hair with just a moisturizing shampoo, and i let it condition for a few minutes as well. And then i just let the hair, oh dry, hair, i'm sorry, i'm getting all tongue tied. I let the hair air dry overnight, so i can go ahead and pluck it here. We are the next day the hair has fully air dried. I prefer to pluck my hair while it is dry, because this way i can see the full density of the hair, because whenever i'm plucking, when it's wet, i can never tell if the hair is over plucked or if it's just right. I always end up having to pluck more because whenever it's wet, that's why i prefer to pluck dry, because i can tell exactly if it's over plucked or you know, if it's just right so now, what i'm doing real quick is i'm going in with my very Very hot hot comb and i'm just trying to push back that hairline. So i can see exactly what i'm working with the wig was slightly pre-plugged in the front, as you guys can see, you could honestly go ahead and install the wig just like this. Without doing the plucking, because it was very well pre-plugged in my opinion, but you know me i like to strive for protect for perfection, so i still went ahead and did the plucking anyways. Once i made sure the hair was all the way pushed back and the hairline was very much visible. I pulled out the pre-pluck section in the front, regardless of the hair is pre-plugged or not. I always like to start plucking behind the hairline. This just helps prevent me from you know, over plucking in the front or just over plucking. What'S going on with my baby hairs later in the future, here's a tweezer i'm going to be using. I use a very specific tweezer and this tweezer only it is the revlon slant tip diamond series tweezer. I will link it down below. I love it. It gets all the hair without also ripping a massive hole in my lace. Sometimes i'm getting holes in my lace. It'S really just because my tweezer is too sharp and or i'm applying too much pressure. Now when it comes to my plucking, i find a hard time to explain it, but literally what i'm doing is i'm going in a dragging back motion with my tweezer? I'M not pulling the hair upwards, i'm dragging it back and i literally go pluck a line skip a line. Pluck a line skip a line. I am trying to create little gaps in between each line of hair. If that makes sense, i do not plug in the same spot as well. That'S how you create a big bald spot. Now, if you look closely, my tweezer is no longer plucking in the front line like it was earlier. I'Ve now taken my tweezer to the back of the hairline and i start thinning out the hair towards the back. It'S important to make sure you are thinning out the hair in the back as well. That'S how you get a very natural installed plugged! Look because when you pluck just the front, it looks too thick in the back, and you know you understand this goes if you guys also look closely you'll, see little tiny, um blonde roots coming up as i'm plucking, because i am making sure i am plucking. The hair from the root you're, not just plucking the hair on top make sure you're pulling out that actual knot. That'S why having small knots in your frontal is important, because sometimes the knots are too big. You might end up pulling out a hole, but i always try to make sure i'm pulling the hair from the root and that's what gives me a very clean freshly, plucked type of look, i'm going to go ahead and just continue plucking this side of the wig And i'm not going to fast forward these clips, so you guys can visually at a real-time speed, see exactly what i'm doing, and hopefully this kind of helps you on your plucking journey cause. I think i'm bad you'll be okay, okay, sometimes when it wasn't even in style to me. Okay, once i was done completely plucking this side behind the hairline, i went ahead and just you know, combed the hair in the front back to the front, use my hot comb to help clean up everything and push everything back again. It'S really important to make sure you're using this hot comb mousse, whatever anything to help you pull back that hairline, so you can see exactly what's going on and plus having the hairline pulled back by plucking gives you a much more neater clean, finish anywho once i've Done that i'm just going to go ahead and do like a very minimal pluck in the front like i'm not going to plug too much in the front, because it's already been pre-plucked out for me. If you see any plucking, mainly, it's me just kind of going back into the hairline, because sometimes when i pull the hair all the way to the front, i can see where exactly needs more thinning out or needs a gap there. Okay, hi guys now got ta install this wig. It'S the next day pluck the wig this morning, like i'm sure i'll start earlier, and here she is this wig, i'm so excited to install it. I feel like i'm about to eat. Plucking came out good bleaching actually from much better than i thought it was um. Hair is really long. You see what i mean about the curls dropping once you wash it like. Literally now that's exactly what it's supposed to be more of a loose wave, but i think i want to put crimps in it and i feel like i have to do a side part, since this is definitely giving all the space you need on the frontal. But um yeah, let's get into install now i'm hoping this install takes me up three hours but, let's be honest, always takes me longer, but let's be optimistic. Okay got my snack got us some fruits in the lime, because i'm honestly eating limes gives me energy just drink my tea to give me that energy i'm preparing for the long haul. Okay, i think first thing i'm going to do. Is i'm going to go ahead and tint this lace so that way it can be a good match. I'M not sure this is supposed to be transparent or hd. It kind of looks like hd lace in my opinion, but we'll see. Okay, i literally got back from the store just getting this. I'M going to tip my lace with this elf concealer. Would she focus? Does she want to focus there? You go with this elf concealer. I had to run to the store real, quick, hence the bucket hat. To grab a darker shade, because the girl's got a tan this summer and i have the shade rich chocolate. I hope this is a good just match my skin tone. Let'S see um, i feel like this might be a little bit too dark. Let'S blend it up on my forehead, actually, actually, no, it's a pretty spot-on match. Okay, cool! I think it's a good match. That'S what i'm gon na wait for it to dry down. You know what yolo i'm just going to try it. Hopefully it doesn't end up being too dark on my head. If i'm going to get a good little scoop of that, no, i feel like it's going to be too dark. Is it i'm scared? I'M scared. Okay. I also picked up this maybelline fit me foundation and i got i wasn't sure what shade me better match for me, because this is my summer shade, and i got this one in the shade, warm cappuccino. So, let's see which one's gon na look better um. I think maybe warm cappuccino yeah, i think that's a better match for me. Yeah, okay, so i'm gon na actually use i'm gon na use warm cappuccino, because this one seems a little bit too red warm cappuccino is like more neutral. Do that? Let me put on a wig cap and if you know you know, i literally only wear my wig caps just to protect my braids from getting caught in the comb. So i like to make sure i push it nice and far back. So it's not out here. Peeking under my wigs all right, the wig is on. We are ready to install so i'm just gon na probably start doing voiceovers from this part on, because, honestly, i need to focus these big installs. Take 100 percent of my mental ability go away my voice over caroline she's cute she's friendly. She got y'all. Let'S get into this install. I am going to be listening to a podcast and this i'm a podcast. I love a good podcast and i'm going to be listening to this podcast called horrible decisions super funny. It'S one of those like sex talk podcasts. So if you're, not a team, i didn't send you, but if you are a little bit of tea, it's really good students. I have to hype myself up because howdy. So the first thing i am doing before laying down my lace, i'm just going in with my scissors to help me part around the space on my ear and i literally just use the comb and just try to feel for where my ear starts and stops. And i just part that out and to help me make sure i don't cut too much. I always cut a little bit less hair than when i actually part it out and yeah. So i just go ahead and cut monica upside down. U or n right a lowercase n around my ear and i go ahead. Do the same thing on the other side, less is more so that way, if you end up cutting, you know a little bit too less. You can go back and cut more and adjust until you make sure you get a perfect fit around your ear when it wasn't even in style, we pay the prices to help me lay down my lace, i'm using the evan wonder lace spray. This is a glueless braid, meaning that it it will come off with water. It'S a temporary hold and i like using this because it's safe on my edges and personally i don't sleep in my wigs, so this works just perfectly for me, i'm going in with this and i'm just using my fingers to lightly help spread the product around and To help everything just dry, i'm using my blow dryer on a cool heat setting. I use a cool heat setting because this lets the lace dry fast, but at the same time, not too fast. I'Ve noticed using a high heat starts. It makes the spray start to get too sticky too fast, i'm just going in and using that comb to really make sure i'm pressing down the lace and the hair and getting everything, nice and melted into my scalp. This is not sped up so i'll. Just let you guys see how long i do use the blow dryer on the hair before i proceed to cut the lace once this section of hair has been dried. Well, i thought it was dry. I'M using these, like cuticle scissors, to help cut off my side. Tap region - i do this side, i always have it. Has i'm getting my side? Tab tighten down ended up cutting this section of down there, i'm just pulling out it to work by burning here and i'm gon na pull what i'm doing to help get into the stick better. Is i'm gon na go back and have that episode baby and i'm just trying to really get all those out and help it i'm going to pull down on those hairs gently and go in with that evan, lace, spray again and spray in between the lace and The hair and just use a blow dryer again and the hop i mean at the hot comb and the um rat tail comb, and just repeat this step until i can feel the lace literally start to stick. I find that the reason why it's having a hard time sticking, especially for me on my side burns, is because i do have my actual hair, sometimes poking through, which makes it a bit harder for the lace to stick, but once it gets all nice and stuck I'M just going to go ahead and repeat the same process throughout the rest of the lace and pro tip working in sections really does help you make sure you're getting everything to lay nice and flat. Oh, we cry once i've completed, laying my lace down all around. I'M just putting this elastic band over my lace to help hold it down and just help make sure everything is nice and dry before i proceed to do my baby hairs, because i don't want any lifting, especially with this glue with install child. Now, what i'm doing, while my lace is laying i'm just going in and starting to carve out the part i knew i wanted to do a deep side. Part y'all see how much space i have like wow, i'm always so impressed whenever i get a frontal with deep space. Partying like on the side. You know it doesn't happen quite often very much anyways getting the side. Part was really going to be the death of me the way it took me about an hour to finally like be satisfied with the way the side part was looking. I am literally looking at a pinterest inspo photo that i have. I always like to look at photos whenever i'm doing my hair to give this inspiration and to kind of give me a guide of exactly what i'm doing, because trust me i'll. I don't know what i'm doing as well. Okay, we're all just clueless, but once i've got the part parted out, i'm using my hot comb to help press out everything. This is like my pre-press, because i'm definitely going to go back in later and do more pressing, but i like to just press out the hairline one time at first to kind of help, push everything. So i know you know how to shape my baby hairs pro tip for all my naturally clumsy people to help you not burn your head. The way i always do i now i like to push my elastic band exactly over the lace where the hot comb sometimes touches my forehead. That way that kind of acts as a barrier to help me just you know, reduce the chances of burning up. My forehead now i'm just parting out the places that i'm going to use for my baby hairs and i sprayed a little bit of that ebb and lace spray on top of the baby hair section to help get it to lay down nice and flat. You can also use your hot comb for this part, but honestly, i always burn myself doing that so using evan spray works just as well. Here, i'm also just kind of like doing like a pre swoop to see if the hairs are going to lay the way that i want this into once. I got the hair to lay the way i wanted to. I put the elastic band back on and here i'm using my mini curling iron, i'm sorry flat iron. This is a one inch or half an inch. I believe i got this from amazon. Don'T worry i'll link it down below and i'm just using that to curl the baby hairs, and this kind of just helps the hair. The baby hairs lay a bit better when you curl them. It'S not a. Must you get this. I definitely don't always use this, but whenever i use it, i find that it makes the baby hair sweep a little bit easier. I'M also using my um razor comb that i got from the beautiful store to help me cut off the hairs. I cut it exactly where the curl ends, that makes sense, and i like to use this razor comb, because it helps give me a jagged cut which makes the baby hairs. You know just laying a more feathery look. One thing you don't want to do is when you're chopping when you're cutting your baby hairs, you don't want to cut them straight across, just like how you don't cut your lace straight across same concept, because it's just not going to lay as like natural i'm going In with this eco styling gel, i like using this product because it helps give the hair some hold, but at the same time it's not like too much of a hold where i'm still able to brush it out once it all sets and get a nice. You know fluffy natural, look with it when it comes to laying your baby hairs. The only advice advice i can really give is just be patient. Use your finger to like hold what needs to be hold and like. If you've ever done finger waves, you get the just the same way. You do. Your baby hairs is really the same thing, so i'm just trying to look at the install picture and just swoop the hairs. The way i wanted to swoop, and also as well i'm using these cuticle scissors to help taper the cut, because you don't want the well for me. I don't like when the hair is all the same length, so i like to make sure the hair at the front is shorter and it gets longer as it joins back into the hairline. There'S, keep it real from the jungle. Now i'm going to go ahead and just apply that same elastic band to my baby hairs over the lace to help you know, get the baby hairs to dry down and to hold down the lace. While i do my styling, so you really want your wigs to come out flat flat. You know what you got to do, instead of doing the normal hot combing, where we just you know, hot comb over the part. You got to go in section by section and use that hot comb and press it down like really take your time to press i've realized taking my time and going in section by section, really makes a big difference like the wig ends up super duper flat. I also will be using a bit of my cara care wax stick to help me with any flyaways and to help press the hair. But one thing i've learned is when you use like hair wax, don't use it on every section, use it sparingly, because whenever i use too much of this hair wax the hair starts to get very greasy, so be light-handed. I honestly literally just use it towards the top sections and just try to make sure i'm focusing on pressing down the other section. Oh finally, i can get into the styling styling is my favorite part, because it's literally so easy. It'S really just straightforward for me here. I'M showing you guys exactly how long this hair was and boy she was long, i'm 5'2 and this hair came down to past my butt, like honestly, mid butt crack. I would say here i'm just cutting some layers and chopping. The dead ends to help the hair. Look more full towards the end and add very light layers to the hair we paid lucifer and his forces are attacking me at this very moment and into cosmic yeah. It'S given. Yes, it's like a giant. Okay, quick check-in. Y'All, i'm tired! You know what's so crazy. Let me tell what time this is: it's almost 3 a.m. So, in theory, i've been doing this for 10 hours and it really shouldn't take me that long. I just get so anxious when it comes to doing hair. These days, like i feel like i just got ta you know one tic-toc sound. You know i just put my best i'ma, find it and place it. I just don't like to put no scrubs out there. So now i put so much pressure on myself to really make sure i slay these wigs for y'all. You know, i don't know literally took me like loki two hours just getting this part the way i want it, you know, but anyways, i'm glad i'm finally getting to the styling portion. This part is pretty straightforward. I don't do cramps often i'ma start doing them like i really like them, especially if they help give like a little body wave, and i got this crimper from amazon literally like 25. I think it's even like on sale at walmart for like 20 or something, but this is good stuff quality and i don't like really stiff crimps. So i feel like it's the perfect surface anyways i'm now watching is the hair burning. I think i'm too hot yeah. I'M now watching that was the ugly crap. So now i started, i just started the show. While i'm doing my hair, it's called god's favorite idiot it's on netflix guys this show is actually hilarious. Starting this show has been helping. Give me a little bit energy because, like i'm over here, just laughing, it's really funny. It'S a limited series, i'm so bad at giving all synopsises synopsis. But if you're someone who has like you know a dark sense of humor or you just like to laugh, love a good little feel-good show, this is definitely it for y'all. I love it and if you watched it comment down below anyways back to this cramping. Oh, these curls, these this little, this is giving. I think i forgot to spray heat protectant on the section trying to get sloppy, but i'm tired. What exactly is the message that i'm supposed to get out there? Samuel was a little light on the details. I need you to let people know that god is real and god is good and everybody. Maybe all religions are actually quite right about god - also nobody's really wrong: i'm okay with all favors, unless you'll fall crazy, train or use my name to hurt people. So you let everyone know that, and then i want to know what people say great. I could try to do that. Good. The world is at a tipping point, clark, there's far too much bad mojo out there and my battery is running low. Either we get the message out there and people love one another and respect one another more right, lucifer's ass or we don't do that and he'll walk mine. What uh? No can we do it the first way. People don't really want my help anymore. Maybe i'll stop giving it it's not much use putting out a fire if the homeowner keeps lighting a match. Is there hey guys it's the next day? Okay, so i've already had already put the wig back on and the finishing touches i want to do. Is i'm going to use this um cover your gray? It'S like a a little it's a product. That'S meant to cover, like your gray, like gray, hair, if you have gray hair, but i like using it to just help cover up parts that i over bleach. It'S basically like mascara, you can use mascara, i got a smoothie slice store, but i'm just gon na go ahead and fix some over bleach spots with this to clean it up. Okay, another finishing touch, i'm going to add, is i'm going to use some concealer in the part to make really pop. This is the la pro girl, og concealer in the shade warm honey? I use warm honey or fawn. It'S like you know, see it's a much lighter tone than me. It'S my highlight shade, i'm just gon na pop that apart now, here we are with the finished product, went ahead in my makeup a little bit cuz going out to get a little cute. I have to use my phone a lot of the time to show you guys the final products. You can see the full length of the hair, because the way my setup is right now i can never get the full hair in camera, especially not 30 inches. You can see this hair is super long, but this look was really cute. I even did my part in a different. I always do my part on the other side, but i was trying to change it up in jk. I'M sticking to my side. I have my side and i'm sticking to outside only anyway how i ramble too much guys. Thank you so much for watching this video. I hope you enjoyed it and let me know guys know how you guys are feeling about these a longer start to finish installs. I know this video is super long, but to be honest, this install took me about two and a half three days, so i'm just trying to be realistic and show you guys just how much work and effort it goes into sling. A lot of these wigs that we see all over the internet, but no seriously, if you're liking these longer videos. Let me know if i'll make more of them. If you're like no caroline, i need something short and quick and snappy. Let me know if i'll make more of those too i'm here for you guys, but again, thank you so much for watching. You know the joe like comment and subscribe, see you in other ones, peace out, girl, scouts and goodbye a bit different.

Comments
Mari Lashawn: I love that you go in depth about your process in every video!! The hair looks amazing as always
Nascia08: I love that you showed all the product, made the video longer and also showed yourself relaxed. I throughly enjoyed it. I think sometimes do longer videos aswell as shorter vids to add that balance. It was very detailed which I’m happy about. Keep slaying these wig…You look beautiful babe
As Told By Chy: I’m glad you added the products.
Tinashe Ruze: i need to try this
niita.baeè: Literally always slayin
tr3n.n🫶🏾: love this
Briana Samone: Kill it every time
Brittney Blue: You already the reason I’m buying this curly wig from wiggins hair you tryna make me go broke what I need two wigs for ?
Джемс Минсон: que Savilaa.Uno encantan tus videos. Bendiciones hermosa Celina que Dios te cuide donde quiera los mortalesp abian apreciado tan hermosa mujer
Planet NINK: My favorite
As Told By Chy: Hey fav