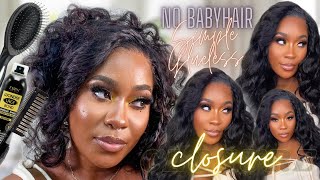
Honey Highlight Wig Install (Extreme Meltdown) + Bald Cap Method Ft. Wiggins Hair | Tay Ming
- Posted on 28 September, 2021
- HD Lace Wig
- By Anonymous
Thanks for watching!!! I hope this video helped y'all tremendously! this wig giving scalp? I'm in love with this colored wig
Products Used:
- "Ghost Bond XL" lace glue
- "Got2b Glued" Freeze Spray
- "Silk Elements" Heat Protectant
- "Lotta Body" Foaming Mousse
- "She Is Bomb" Collection Wax Stick
- Elastic Band
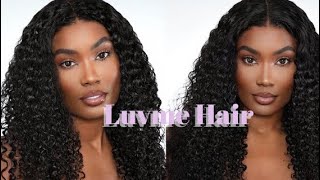
════════დ #WigginsHair დ═══════
❤Direct Link➤https://bit.ly/3sSzOt7
Hair details: Pre-Highlight straight lace frontal wig 180% density 20 inches
More precolored wigs➤https://bit.ly/3pzt6qx
You may also like:
1.Hot selling#lacefrontalwig➤https://bit.ly/36rvOXD
2.Invisible skin melt #hdlacewig ➤https://bit.ly/3j1H6XJ
3.Lazy girl approved #headbandwig➤https://bit.ly/2YvB5Ja
Follow @wigginshair on instagram:https://bit.ly/2NDr8Y3
Tiktok@wigginshairbest
Facebook @wigginshair:https://bit.ly/3cmxMMP
Email: [email protected]
-------------------------------------------------------------------------------------
Don't forget to subscribe to my channel for more videos:
https://www.youtube.com/channel/UCJblU...
Instagram: https://www.instagram.com/tay.ming/
Twitter: https://twitter.com/_TayMing_
For business enquiries email: [email protected]
Hey you guys, what's up it's your girl, tammy and welcome back to my channel. You already know today, i'm gon na be doing a wig install. You guys have been asking me how to install a frontal wig, so we're gon na get into it today. So the wig that i'm installing today is from wiggins y'all know. This is one of my favorite all-time hair companies that i've ever freaking worked with. I love them so much. This is a 150 density wig, it's their highlighted wig, and it also is a 13x4 lace. Frontal the lace is transparent, so i will be having a tint a little bit, but we're going to get into it and it's going to be cute so now that i'm done tensing the lace we're just gon na whip this baby - oh no, okay, just put that Thing on girl yeah, like that you know, get cute, so once you get it on your head, you just want to brush all the loose hair to straight hairs back. You don't want it in your way and you also want to position the wig. You know start kind of placing it where you would want your wig to lay. As you all see, i did that for mine and what you're going to do now is just pin your hair up, because we're about to cut these ear tabs love. So the way that i cut my ear tabs is, i literally just start where my ear is and then i just cut around my ear. I know it sounds really easy and simple, but you can easily mess this part up. So what i recommend is you guys going and taking your time, because you want your wig to lay as flat as possible? Okay, so take your time now that we got the ear tabs on it's time to lay this baby. Okay, so you're gon na get some alcohol and you're just going to rub it across your forehead, just to get rid of any type of buildup or oil or foundation makeup, whatever might be there just so you have a clean surface and we're going to use my Ghost bond excel glue, it's my favorite glue and it holds really well and we're just going to do some thin layers start off with some dots in the front of your frontal um, that's usually where you're supposed to start. I don't know anybody that starts on the side, but start in the front make sure your layers are really really thin. You don't want to have it too thick to where it's not able to dry, and it just looks all white and clunky. So yeah just take your time on this as well. The worst thing about having a wig is having the glue show through the lace, and you don't want that. Okay, you want it to be nice and pretty and seamless you just don't want to see all that. So if it helps use your blow dryer and once you're done letting that layer dry just place your wig baby, i also cut tabs that kind of helps me lay my frontal, because i do it by section. So if that helps you or you think, will help you, i highly recommend it. It always helps so that's like a little tip for y'all, but basically you're, just going to repeat the same process that you did on the front throughout the whole entire week, like i said, take your time make sure that you're doing really thin layers. Also, you guys don't have to wait till that first layer dries completely. That'S a myth. You don't have to wait, just keep applying it but make sure it's not too thick, like. I said your friends so now that everything is glued down you're, going to take an elastic band and you're going to tie it up. I don't told y'all about this elastic band. If y'all don't have one go to hobby lobby michaels whatever and get you an elastic band baby, this is what helps make your wig, seamless and natural okay. And while i have my hair melting, i'm just going to blow dry the rest of my hair out. It'S about 90 dry, so i'm just going in the roots and making sure everything is you know nice and dry before i put this line on it. So after i'm done drying my roots, i'm just going to take the elastic band off and, as you can see, it's melted love. Do you see that yeah? So now we're going to go in with a razor and we're just going to cut the excess lace off? Be very careful: you don't want to cut too much lace off to where you don't have enough to cover your forehead or whatever you just want to be really careful um. This is kind of why i glue down before i cut, because you can see where you're supposed to make your cuts and everything so try not to cut the lace before you actually place it on your head. I think that's common sense, but i don't know some people do it differently. So yeah, that's another tip. Just try to do everything while it's on your head, so you can measure it exactly to your hairline also. So all my melanin dark skin queens. Don'T worry about this little white line that you see around the hairline um, it's going to be a little bit of discoloration just because this is a transparent lace and it's not a hd or it's not a medium brown. But it's okay. We'Re going to make everything melt by the end of this video, especially when you put that gossipy on there. You see that yeah that helps tack it down, so that got to be it's going to go to work. So don't worry about this! Okay, just keep doing you and trust the process also use a little blow dryer to kind of help the doctor be tacking and help everything blend and flatter on that baby bag or hot comb. It i mean and you're gon na see them out so yeah trust. The process so before putting the elastic band back on there for one last time we're gon na go ahead and pick out the baby hairs. So recently i haven't done front baby hairs for real i've done like two big ones on the side and then the little um sideburns. So that's kind of been my little skis and style lately. So i'm just going to stick to that, but also when you're parting, the baby hairs, make sure to flat iron, or i mean hot comb, damn y'all hot comb, the hair forward. So that way, you can separate it from the rest of your hair, and it really gives you that baby hair effect also, i just kind of twist it and put it to the side, so it doesn't get in the way too, and once you get the elastic Band back on there, you can cut it. It doesn't have to be that long that way, it's not in your face, while you're flat, ironing and y'all know what i'm about to do, i'm at the flat iron. This thing too: okay, we're gon na wear it straight today, just keep it nice and simple um, so yeah, i'm gon na come back after i finish flat. Ironing this and y'all can see it. Okay, so we're back hun and you see the hair. You see the material girl okay, so now we're gon na go ahead and comb through these baby hairs um and go ahead and lay them so i'm gon na use my mini flat iron and i'm just gon na curl them up uh for this style today. I'M just gon na leave the sideburns kind of curled, but i am going to go ahead and lay like the front two that i was talking about there right by my widow's peak some of those but massage brows, they're, just gon na be curled up just something Cute and different i've never done this before so we're gon na see um. You can go ahead and start cutting your baby hairs. Mine needed to be trimmed down, because i did not need them that long and yeah so to lay my baby hairs. I'Ve always used mousse or foam just because it makes it easier for you to really manipulate your baby hair and fix it without it getting stiff on you. So if you have some mousse foam hair wrap whatever use that i highly recommend you use that before you use like real edge control, because again you want this to look really nice, you don't want it to look too cakey and stuck to your forehead. We love the fluffy baby, hair look and the mousse is gon na. Do it also, you can use a blow dryer to kind of help set it in place. That always helps as well, and i also go in with my black um hairspray, to put it around. Like my part and the sides just to make everything a little bit more cut and defined that's optional, but as you guys see, it looks amazing and that part looks great. So yeah do your thing get cute and we're going to come back for the finished. Look. So this is the end of my video. Thank you guys so much for watching. Thank you guys for supporting this video. I hope this helped. You guys lay your wigs down shout out this wig look so good, okay, so yeah! Thank you guys for watching. Thank you. So much so much, i can't tell you guys enough, and i love you guys, and i will see you guys on the next video also make sure to comment like and subscribe and turn on that bell button for notifications. Every time i drop a new video yeah. So let y'all stay blessed, stay lit, love! You bye! You

Comments
Becca D.: You do it so effortlessly
Monique Gayle: Love itttt
BriAna Ke: This video
Landii Williams: Love the hair what is the name of the mini flat iron
cee: love the hair. can you please send the link of the wig
Kennedi Webb: Did you color it more yourself? Because I seen other ppls vids and yours looks more colored which I love.