40Inch &Hd Lace Closure Beyani Hair Collection Review/Same Hair Arrogant Tae Uses/ Is It Worth It?
- Posted on 27 April, 2021
- HD Lace Wig
- By Anonymous
Hi everyone, welcome back! I'm excited to do this review. This is the same hair Arrogant Tae uses. Watch me custom make and color this wig using Beyani Hair Collection 3 40inch bundles and a 20 inch HD lace closure. Don't forget to LIKE, COMMENT, AND SUBSCRIBE!
https://www.instagram.com/victoriasiob...
#BeyaniHair #40inchwig HDLaceWig #HighLightWig
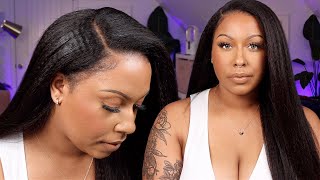
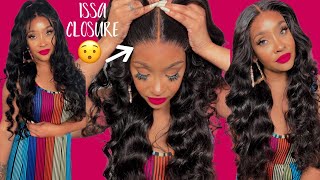
Hey guys welcome back to my channel, so today i'm going to be making a wig starting off i'm using a dome cap. You can get these from the local beauty supply store and then i'm going to be using the bianni hair um, i'm going to be using three bundles of 40 inches and a 20 inch hd lace, closure, and this is the hd lace um. This is like the thinnest lace. There is, as you can see it blends right into the palm of my hand. You can't even see the lace so starting off, i'm going to start t pinning down my lace closure. I like to do this so that way everything is in place. Then i'm going to tape in the back of the closure. So that way, when i start sewing, everything lays nice and flat. So starting off, i'm going to start sewing down the lace closure, i'm just going to start off by making like a little knot with the needle and thread at the corner of the lace. So that way it's extra secure and then i'm going to make my way. All the way around, so this is one of the bundles. As you can see, it is super long. So same thing, i'm going to start t pinning it so that way, nothing slips. While i'm sewing it because you don't want that because then you'll sew it crooked. So i just make sure that it's nice and tight, as i sew my way around same thing, i'm starting off taking a um knot at the end of the weft. So that way it doesn't like fall as i am sewing it. So if you can really see i'm just like going over that knot that i made and then once i do, that i take the t pen out and then start sewing all the way around. So now that i got to the end of the bundle i am going to overlap it, i don't like to do double wefts, so i forgot to say that, but when i hit the corner of the lace closure, i'm going to overlap it not double with it, Because that makes it bulky and you don't want that and it will sit out, so i always overlap it. So that way it lays extra flat. So so now that i'm closing up the top of the wig, i'm just going straight across with the bundle and cutting the ends off. That does not fit, and i'm just going to sew straight across. And it's super important to do this step, because this is what's going to make your wig be really flat at the top. So, okay, so now the wig is finished. As you can see it's in its natural state um. Now i'm going to move on to coloring. It um i'm going to stop talking. Let y'all see how i colored it. It'S pretty self-explanatory, um the bleach. I use the piranha bleach with 30 volume. So that's all i use and yeah you um, so so so this is what it looks like after i rinsed it. I let it process for about an hour um, as you can see, it's really brassy. So i went back in and did another round of bleach. So now i'm moving on to applying my wigs. You already know you guys if you've seen my previous videos, i wrapped my hair underneath my wigs. So this is what the hair looks like after it's dried, it's so pretty, as you can see it's so much brighter after i did that second round of bleach and i did sew in an elastic band and bleach the knots of the lace off camera and i'm Going in with my true match, lace tint in the shade dark and i'm just spraying - that on the lace and then i'm going to use my blow dryer on a low setting just to dry it a little bit. And then i'm going to put it on and start you know adjusting it the way i like it so now that i'm getting my part where i want it to be, i'm just cutting off the end tabs of the lace closure with some scissors and then i'm Going to take my eyebrow razor and cut the lace, i like to use the eyebrow razor to cut the lace because it gives you more of a jacket cut, so it blends better and i'm getting really close to the hairline. As you can see and you'll see that it is taking off some of the um hairline like the hair pieces a little bit and i don't like baby hairs on me - i think they're pretty on other people. So i don't like to do baby hairs on me. Um so now i'm going to comb it out, get it make sure it's the way i like it and then i'm going to go down the part with some tweezers and i really didn't have to do much to the lace closure. It really came already pre-plugged, but i'm just plucking it just a little bit and then i am going to start gluing it down so to glue down my wigs. I don't use lace glue, i'm just going to use this hairspray by bed head and i'm going to spray it about at least three coats and then dry it on a cool setting and then start to put the wig on. So i'm going in with my wax. Stick and hairspray, and i'm going to use this kendra's boutique hot comb. This hot comb gets really hot. It gets up to 500 degrees, it is really cute too. It has pink swarovskis all over it. So i'm going to start doing that and the closure just to make sure that it's super flat. So now i'm taking some mascara and i'm just using that around the lace where the bleach kind of bled. So it's easy to correct. Just take some mascara and blend it in with your finger and then i'm going to tie down the lace with a um band, and this helps lay the lace down even more. I'M going to take this whey, hair oil and i'm going to put that in the hair and then i'm going to start flat, ironing it and the flattering i'm using is by babyliss. So this band is so tight, you guys, but it did its job. So i'm going to take it off and, as you can see, the lace is really melted, so in the next clip is just going to be me talking giving my little review of the hair. All right, you guys. So this is a few days later, maybe about a week now that i've been wearing that hair um. This hair is so pretty for me to have bleached it twice to um. Get it this light. The hair held its integrity is very soft. I can just run my fingers through it. It has minimal shedding. I barely have to brush it for real um. This is three bundles of 40 inches and for it, to only be three bundles is very full from the top to the bottom. Um usually, like my longer lens i'll, do four to five bundles, but i was just trying out the company to see how i liked it first um. The closure is hd lace, so yeah melted down just fine, and today i didn't even glue it down. I just you know just put it on just so you guys can see how it just blends with my skin after i um sprayed it with that um lace, tint and with me being a darker complexion. Sometimes lace is a little harder to blend, but this lace is so good. This hd lace is so pretty didn't have to do much to it. I didn't have to really pluck it or anything. So if you guys want to shop with this company, i will say: do it. I most definitely will continue to shop with the company um and, if you're wondering how tall i am with for 40 inches, where it will stop at i'm about five six five. Seven. I'M not sure - and it comes down to about my knee it's very long but yeah. This is the color of it and everything like that. But yeah you guys. I hope you enjoyed how i made this wig and colored. It don't forget to like comment and subscribe and follow me on instagram and victoria underscore and i'll see you guys in my next tutorial.
Comments
Empress HPriestess Mix: How long did it take you to get the hair? I ordered my hair not too long ago.
Nydefinesbeauty: Hey I love your Channel. I have a question, where did you get your Crystal LED Mirror in your Salon ? Thanks in advance!!
Empress HPriestess Mix: And it’s the nails for me
Ada Jeffrey: Can we get a AMEN on them hair stitches
Juliette Rivera: MISS YOU!! Love watching you
Jaylin Dashh: You bodied & your nails fire
Empress HPriestess Mix:
BeachBully Tv: