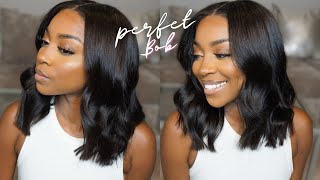
Make All Wigs Look Hd! Knot & Grid Filler + Sun Test! | No More Bleaching Knots! |Perfect Line Swiss
- Posted on 23 December, 2021
- HD Lace Wig
- By Anonymous
**WATCH IN 1080P HD!****
Some great features about this product!:
Sweat and water resistant
No tinting or bleaching your lace
Hide both lace grids and knots
Comes in 5 shades
Cover damage lace
Cover over bleached knots
Cover lace stain
One application can last 1-4 weeks* Can be adjusted with your foundation for a true match!
Made by www.perfectlineswiss.com
#perfectlineswiss #knotconcealer #lacegrideraser
————————————————————————-
Join the QTE CLIQUE and hit the red Subscribe button!
See All Products I currently use on my Amazon Storefront! http://www.amazon.com/shop/qtepiee88
SHOP My WIGS! https://qtescloset.bigcartel.com
*•*•*•*•*•*•*•*•*•*•*•*•*•*•*•*•*•*•*•
Thanks so much for tuning into our channel! Remember to rate, comment and subscribe! Thank you for helping me grow my channel!
••••••••••••••••••••••••••••••••••••••
Camera: Canon Powershot Mark G7 X Mark ii
Iphone 12 Pro Max
Software: Imovie | Videoshop
**************************************
My Channel | https://youtube.com/user/qtepiee88
My FAMILY YOUTUBE Channel | https://youtube.com/channel/UCjg8MQCk3...
Help me get to 17,000 Subscribers! ‼️
Follow my hair page on INSTAGRAM
https://www.instagram.com/qtepiee_hair...
Follow me on TIK TOK
https://vm.tiktok.com/ZMeM8R4bN/
Follow my Family page on social media:
https://www.instagram.com/4love__4life...
Family YouTube channel: https://youtube.com/channel/UCjg8MQCk3...
Business Inquiry? Video request? Email me! ✉️ [email protected]
Let’s get this video to 200Likes!
Hit that notification Bell !
***Hair or products shared in this video express my OWN TRUE, honest, personal views, opinions & experiences. The video may contain sponsored content and/or affiliate links. Items were sent to me for review unless otherwise stated. I may receive a small percentage that I use to invest back into my channel to help me continue to bring you all great content! Thank you for your support!**
What is up my lovely people thanks so much for tuning back into my channel. This is pewdiepie 88. So today we are back with an exciting review. Some of you may have heard of this product. Some of you may not have, but i am here to show you guys how you can get a realistic, looking scalp on your wigs, whether it's hd lace or not without bleaching you're, not so bleaching does seem like it's something of the past. Like do you see a lot of bleaching the knots videos up, you know. Lately i haven't - and i thought that was quite interesting, but today a lot of wigs are like hd have tiny knots things like that, but y'all know them. Wigs can be very, very expensive. Those like hd, invisible knot, clear lace, that's going to run you like 400 or more, depending on what you want. So i'm like. Okay, i'm! I never was an expert on how to bleach knots and whenever i did, it always made the hair super brassy uh. The bleach leaked through the holes and the lace and it made the hair brassy and it actually made the lace orange like i could not stand it. So i literally just gave up on bleaching my knots and was like you know what i don't care. If people see my knots or not, i i don't care if they see some people looking all close sweet, i don't even care if they see my nuts, they know it's a wig, they know it's, not my hair. I don't even care, because i was so tired of bleaching my knots and it coming out so bad looking and it make it it makes it look even worse, so number one. I can't afford those expensive wigs that you can't see the knots and number two outside of bleaching my unit, so i'm like okay, i just give up but y'all this product has been a savior to a lot of women and you guys it's all over youtube. It'S all over instagram, so the company is called perfect line. Swiss perfect line switch so this product that i'm about to show you. It allows you to have a scalp like look to your wigs without bleaching. The knots okay is revenue revolutionary. So it is a lace. Wig grid filler and not eraser, so it fills the grids because, as you know, once you look at a wig, you can see the grids which is the little like holes in the lace. That'S called grids and the knots the knots like those little black balls. You can see that makes a wig look like a wig um i'd. Rather, you see my lace grades than my knots, seeing my knots is like oh, but perfect line swiss wanted me to show you guys two of their many grid, not concealer sticks. Let me see if my camera will focus so two of their concealer sticks, so i asked them to send me the darkest color and also, i believe, the second to the darkest which is mitch. So you got mitch and dan yeah, so you got mitch and dan. So this is the deepest color dan, and this is the second to the deepest. I think this one would work, however, for some reason the skin on my forehead tends to be darker than the rest of my face. So i'm, like you, know what let me try. Dan as well um but yeah, it literally converts all lace, wigs to look like a real scalp. It is so easy and, like i said this is the mini stick. They do have a larger version for um a little bit more money i'll leave the price. The current price is right here and the ingredients are super super clean and it's not crazy chemicals, mineral powder, turmeric, beetroot powder, it includes, rose water, shea butter, lemon and sage oil. Now this is the thing rip keep in mind when buying this product. It is actually low pigmented, so it's going to look darker in the tube but lighter when you apply it so it will apply lighter. So, as you can see, as you can see, dan looks like it's quite deep right. It looks like it's like, oh my god that is gon na, be way too dark for you, girl, it's gon na be way too dark for you, girl, it's gon na apply lighter than what it shows in the tube, so dan and mitch. So here is the product i'm gon na. Take it off, and here is the color dan and of course my um light is going to make it look a lot lighter as well my ring light, but that is dan and, as you can see, that does look lighter than the two, but they just want To show you that's their deepest shade, and here is mitch. This one looks like a better match, but then again my skin plays tricks on me. A lot um. So here is mitch. So, as you guys may know, you just heat this up and apply this directly to your parting space or your closure on your wig. Now i have been told to stay away from the front of your wig and only do it where the part is going to be, but i'll show you guys what i mean. So let's go ahead and hop right into it. I have heard that um, you heat up the product to make it more easier to blend, because it's literally like a clay consistency and it's really hard in the tube. So you need something to soften it up, so you can spread it easier and it also says caution. You may burn yourself so when, when you heat this stuff up with your blow dryer, it will be hot. So don't put it directly on your skin and when you put it on your wig, please wait for it to dry um to make sure it's not going to burn you all right. So enough talking, let's go ahead and show you guys the wig that i'm going to use this product on and i'm going to give you two examples. So i'm going to put dan in one part, parting, space and mitch on the other parting space and we're going to compare the two and i'll give you an example of how the wig unit looks in the sunlight before and after perfect line twist all right. Let'S hop right into it all right, so we are up close and personal with this unit, so i made sure this was all cleaned off with alcohol. This is, please ignore um. My wig has sheet i've been through the storm in the rain, but uh. So i wanted to get as close as possible uh to show you as much detail as possible, so we are going to go ahead and blow dry, so we're going to start off with the product mitch and we're going to do that as the middle part and Go ahead and blow dry this, so this is a mini stick. So what you do you want to twist the product up and it's a little tough to twist. Just let you guys know so, as you can see it is coming up. You don't want to do it too much and you don't want to heat it up too, too hot, because it will melt all over the place but just pump it up just enough to go ahead and melt the product make it soft and then rub it right Directly on where the part will be so, as you can see, the product is like much shiny now and it's like the consistency of like milk chocolate. So it does cool down quick. So what you want to do, while it's still warm, you just want to rub this product and don't be afraid if it's like a little chunky, it's all right and you want to take it all the way back now, as you can see, there's a lot coming Off, that's because it's really soft, but that's okay, y'all, don't be afraid, go ahead and rub that in but don't take it. You never want to take it to the very front of the wig okay, because that will definitely cause some problems. When you try to lay down the wig, the wig will not stick to your skin because literally it's like a clay product in between your skin and the lace. Your lace has to meet your skin in order for it to adhere properly. So you don't want this product to be on the lace, because then it will not adhere to your skin properly. The lace will not stick to your skin properly, so you want to just rub that in avoid this area, the thinning, the thin area and you're good to go. So once again, this is mitch. So while it's still warm what you want to do, you want to take your rat tail comb and you want to kind of push it in. So we're going to do this same step when we turn the wig around, but this is just getting in getting the product deep in the knots and the grids just to make sure they are fully covered. But there is one more step you got to do when you turn the wig around, so just for fun, we're going to test out mitch as well, go ahead and twist, i'm sorry test out dan we're going to test out dan. Like i said, this is the deepest color and just because it doesn't fit me, i still want to show you guys how it looks so go ahead. Let'S heat it up and then let's rub it onto another part of the wig that i'll part, so you guys can see the mitch color against my skin tone and dan okay. One thing i noticed about dan: it melted a lot quicker than mitch. So, let's see what side i'll do this side, so i'm going to put dan here. I keep wanting to say mitch. We'Re going to put dan here rub rub rub! I didn't push it up as much i did with mitch. I didn't want it to be too chunky, so you just want to rub dan in and, as you can see, is much lighter than it showed in the tube. The scalps are naturally lighter than your normal skin tone, so it's good, so that is dan. You guys that is the difference between dan and mitch, so rubbing in dan as well. So now we're going to flip the wig over and show you guys what it's looking like: okay, so literally in person, this is already looking good. So what you want to do you want to take your rat tail and you want to push the product so, like i said it's like the consistency of clay and you're going to know, if you over, did it or not. I probably overdid it because you can see like the product all on the side of the lace, but it's really kind of foolproof. If you need to remove this product, you just flip it on the side that you, you know the other side of the wig, and you want to heat it up, heat that spot up and then um wash it off. You may want to apply a little bit of oil and just rub it as long as it has like heat applied to it. It should rub off easily so as you're as you all can see, i kind of overdid it. So you see the product spilling over to the side, so it's making the part look very wide, but that's okay, like i said i can show you guys how to clean that up. But as you can see, this is the point of the product. Do you see those black holes so see here how you can see those black holes? You can't see that here. So that's the that's the difference. That'S the point of this product. I can take it down just a little bit more, but you just have to be careful, because if this is the area using to lay down on your skin, it's not going to stick very well to your skin, because that clay type product is between your skin And the lace so it may not, it may not lay. So let me get something to see if i can kind of clean up this access. So hopefully this is a good. Before and after for you guys, as you can see, you can really see those knots. Those black spots and then over here look at the difference, so definitely a difference, especially in person. You will see the difference all right y'all, so this is dan dan gave me a little fit um. It was a little bit tougher, but it's not because of the products because of the wig, but here is dan, as you can see it's looking like scalp, you guys. I hope you can really see the difference and i hope it's not blurry, but it is a huge difference between the knots and where this product is laying. So this is dan in low light, and this is mitch mitch is giving okay scalp dan is too. I just think the application of mitch was a little bit better, but both of them are given like scalp and they're. Really, really, this product really really is concealing the knot. So once again, here is the knots and how normal knots look as you can see those black dots and that is with the product, so no product perfect line swiss nut grid concealer before after this is mitch before after all right. So this is midge and dan mitch and dan. Hopefully you can see a difference all right guys. So that is my review for perfect line swiss. I hope you guys enjoyed. I definitely believe this product is worth it. It definitely beats bleaching you're, not especially if you're, not an expert and don't know what products to buy to make it look good. This definitely looks better than having those black knots on your head. You may be like okay, i don't think it's worth it. It'S definitely worth it. It makes a huge difference in person. You may not be able to see it on camera, but it is worth it. You guys definitely pick it up if you're a beginner and if you can't afford those expensive wigs, it looks bomb and spare yourself the embarrassment of people looking at them black knots on your head, because i have had it happen to me and oh, it's just so Embarrassing but y'all might not mind y'all might not care. I want my wigs to look as natural and realistic as possible, and i definitely think this product deliver. What it says is gon na do so definitely drop a comment and like drop a comment and subscribe thanks. So much for watching you guys, i hope you enjoyed this video. Thank you perfect line swiss for the products, and i give them two thumbs up thanks for watching you guys bye,

Comments
Qtepiee88: Sorry for the lower quality! For some reason Youtube is not letting me upload in 4K lately!
Ayana Smith: Oh, you DID THAT! Definitely gonna try this for my new wig. Thank you for the detailed tutorial with up close shots!
Latrese Latrese: I purchased this same set micj looks so good I love it I actually stopped wearing frontals for two years because of the knots but now I’ll be back at it
Perfect Line Swiss: Beautiful review!!!
mina C: Excellent review
Lori Wilson: Great review!!!!
alwayscece: Which color is best for light skin tones ?
Doris Williams: thanks a lot very helpful!
Alicia Robinson: Did the wig come with the elastic band or did you sew it on yourself?
Jazzyfbaby: Can you put it on top instead of under the wig
Khaleesi: What brand lashes do you have on if you don’t mind me asking
Monebyrd: Thanks soo much for sharing
Naomi: Beautiful!! You favor one of the Braxton sisters!!!!
AntiHeroine: Looks way better!
MRSHEARTLESS24: What shade is she using to match her skin tone?I was confused with her showing 2. Also Mitch and Dan are not even showed on line that’s why I’m confused. She keeps saying ‘Dan’ , do you mean Tan?
Kawanna Green: I wanted to like this product, but I really didn’t, I wasted $50